Rapid Development of Smart Home system–
Rapid Development of Smart Home system _ DIY Intelligent Remote Controlling Power Distribution Box By Xu Wei
After reading the article of the 3rd issue, we have studied the application and implementation of KC868-H8 intelligent control box in intelligent lighting control. Believing that, the remote controls for lightings through PC software and APP of mobile phone have been achieved.
Lighting is only the most common of the many electrical loads, the power is not large, and they can be driven directly through the relay inside the KC868-H8 intelligent control box, then if we encounter higher power or non-regular type of load, And how to achieve the intelligent remote control?
Today we will show you how to DIY an intelligent remote control power distribution box, so that we can almost control all kinds of electrical load types. Such as: air-conditioning, bath heaters, the total power supply; large-scale equipment in factory enterprises, workshop lighting, machines; the pumps in field, irrigation systems, a series of high-power equipment and so on.
Compared with the traditional power distribution box, the reformed and upgraded intelligent power distribution box can cut off the strong power supply remotely, which is more safe; and it can controls the electrical equipments in the factory and enterprise automatically through the timing mode, which is more energy-saving; and also, it can connect to the security sensors to grasp the real-time situation on the spot, which is more assured.
Through the trigger of the sensor, the alarm message can be sent to the user through the mobile phone APP, and some automatic control can be carried out at the same time. According to the power of the air switch and AC contactor, the controllable power load can cover the whole house, the whole floor and even the whole building.
Because the intelligent power distribution box can achieve very large load power, it is suitable for many usage scenarios:
- The anti-theft alarm application for office, factory, enterprise, apartment, villa and school.
- Centralized control of decentralized lighting and electricity system
- Frequent operation of electrical equipment distributed in different areas
- Application of remote automatic pumping irrigation
- Application of automatic Feed for fish plant
- Intelligent upgrade for traditional Power Distribution Box
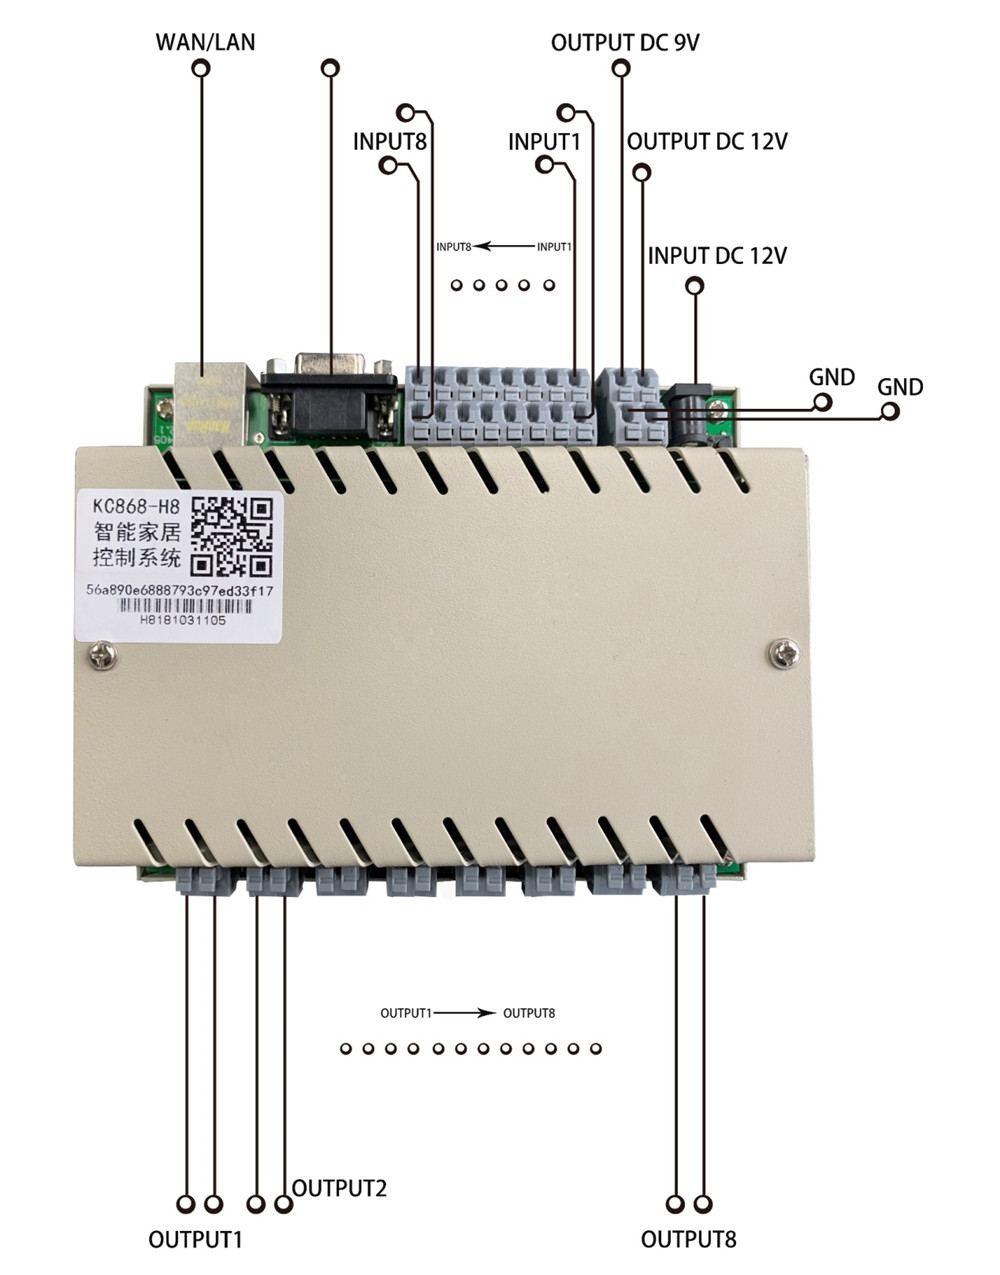
First, let’s take a look at the hardware interface diagram of the KC868-H8 intelligent control box. As lack of space, more details about the hardware section, please read the articles in 《Radio magazine》 issued 1, 2019.
The main interfaces of KC868-H8 intelligent control box are as follows: DC 12V power port, external power supply port, network port, RS232 serial port, 8-way relay output port and 8-way signal input port. For the 8-way output interface, each way can connect to the max load with 250V/10A. For ordinary applications, it’s more than enough. And each output is a dry contact signal.
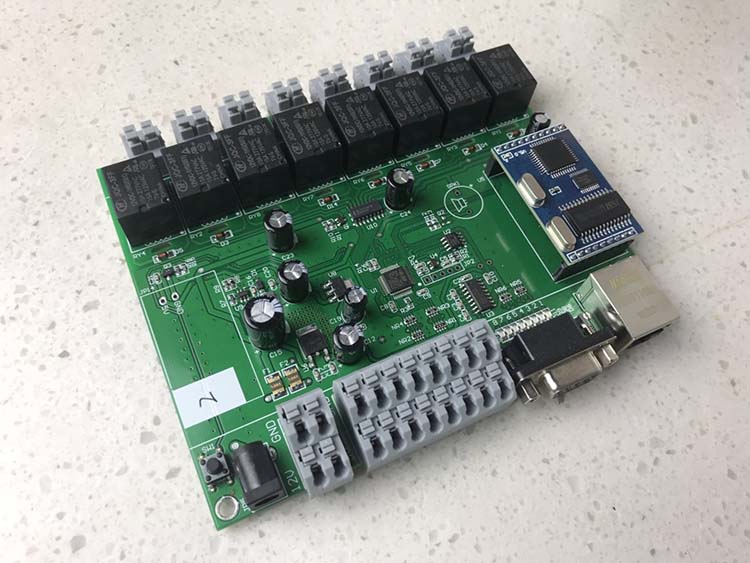
This is the inside picture of the intelligent control box.
The basic frame of the control system is composed of KC868-H8 intelligent control box and AC contactor with manual control function, and also air switch.
The structure diagram of the system is as follows:
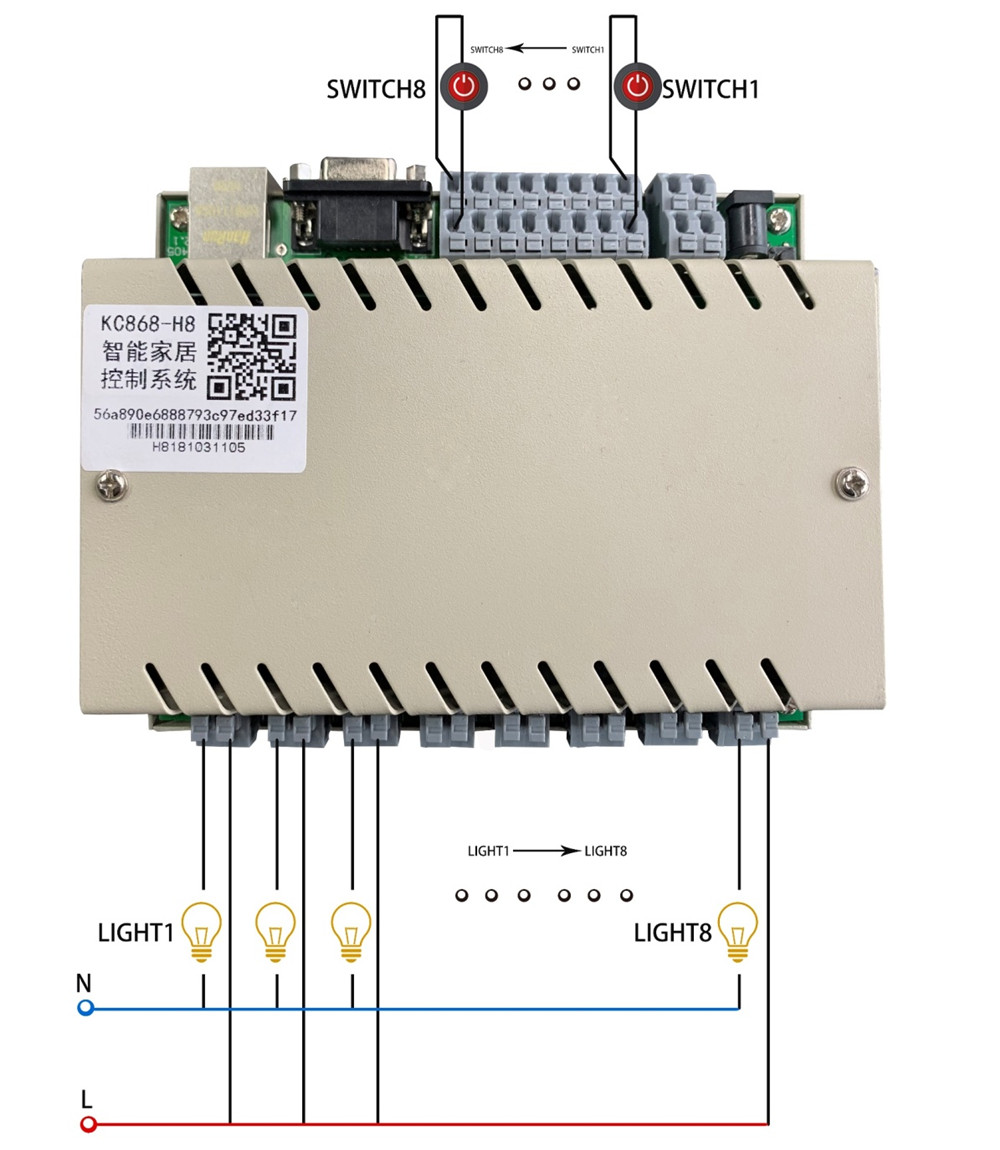
The device of KC868-H8 has two parts: inputs and outputs as showed the frame diagram. At the upper parts, the input terminals are connected with wired switch signal sensors, such as: wind, rain, fencing, smoke, human infrared, door lock, leakage, power loss, light and so on. Sensors need external power supply, which is generally divided into DC 9v and DC 12v, and DC 9V is more common. After supplying power to the sensors, then connect the two detection lines of the sensor into the “input” of the device KC868-H8, regardless of the positive and negative polarity.
At the bottom part, the output terminals first connect to the AC contactor with manual control. The function of manual control is safer to make sure the operation can be opened or closed by hand, in case there is something wrong with the network or other electric problems. It’s the highest priority with hand operation. And then, the AC contactors connect to the air switch, which is same function as the traditional PDB to get the circuit be protected.
Mobile phone APP personality setting:
First, the alarm message can be set to send or not, when each sensor is triggered. If you want to receive the alarm message, you can set up the contents by yourself.
Second, you can set the linkage control for outputs when the inputs are triggered. For example, when the leakage sensor connected to the terminal of “input end 6″ is triggered, it will linkage control the “output terminal 8” to close the connected solenoid valve, meanwhile, the message will be sent to the mobile phone with contents “a leak has been detected in the house” Please go home as soon as possible for inspection so as not to cause unnecessary damage. Similarly, the input terminal one connects to the rainy sensor, and the output terminal connect to the electric window; when the rainy sensor detect raining, the window will be closed automatically by the electric motor, so that avoiding the rain water into the house.
The air switch can connect many different types of electrical equipments, even the total power source for one room or the total power source for several electric equipments, but, make sure the total load should not excess the rated power of the air switch.
The 8 inputs can match to the 8 outputs one by one, and 1 input can matches many outputs together, such as operation of scene mode. All the operation is supporting the users’ defined linkage.
After learning the basic theory knowledge, next we are going to DIY one intelligent power distribution box, we photograph the whole process with the Sony 4k high-definition camera, which can be downloaded to watch, So that intuitively understand the process.
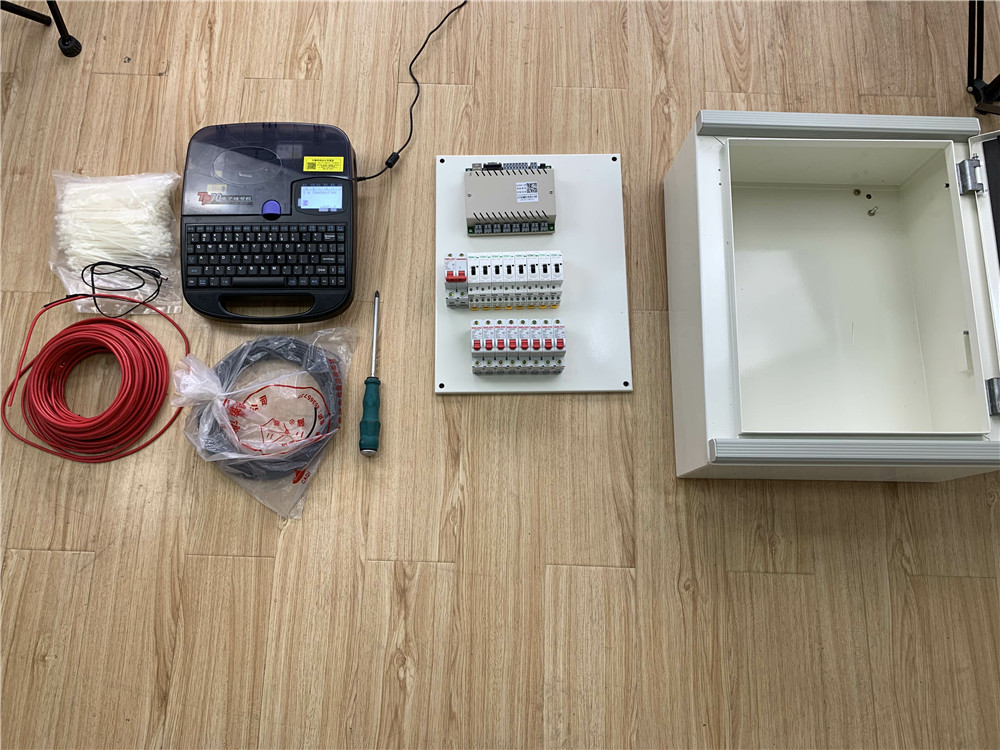
The material accessory needed to prepare before DIY: KC868-H8 intelligent control box, Air Switch (2P), Air Switch (1P), AC contactor, Power Distribution Box body, labeling machine, wire, screwdriver, tape, and other hardware tools.
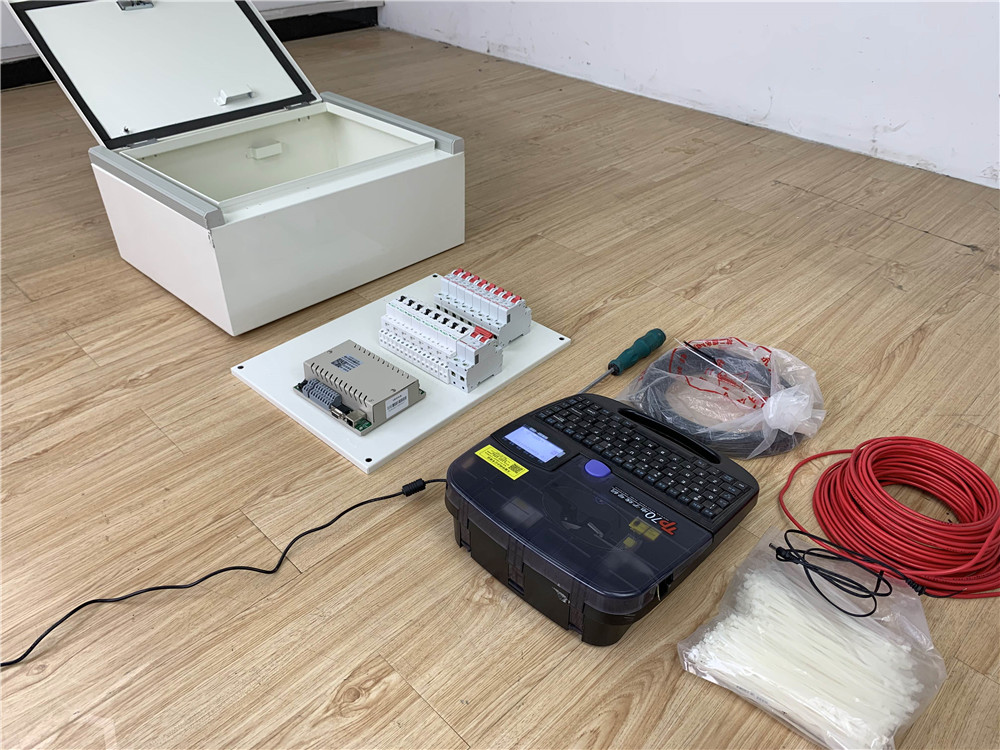
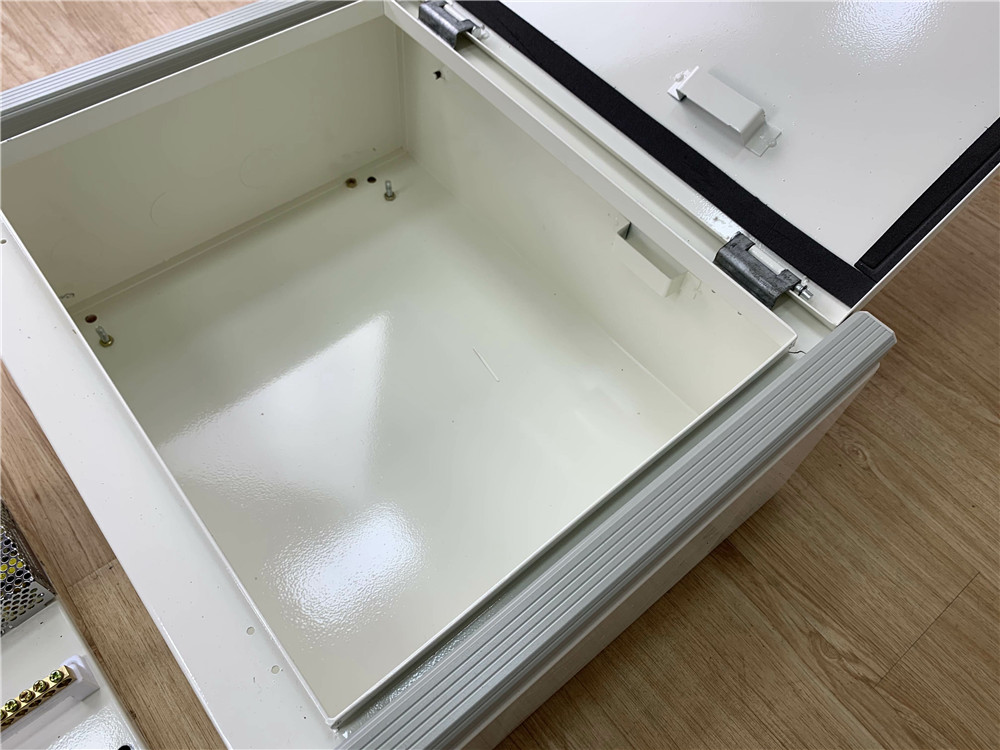
Box selection: The box can be divided into two types of surface mounted and hidden mounted, which should be chose based on the real location and environment of the installation. Meanwhile, it should be also according to the size of the internal equipments to be installed, such as the number of controlling routes and the size of air switches and AC contactors. Normally, larger the general power, larger the volume.
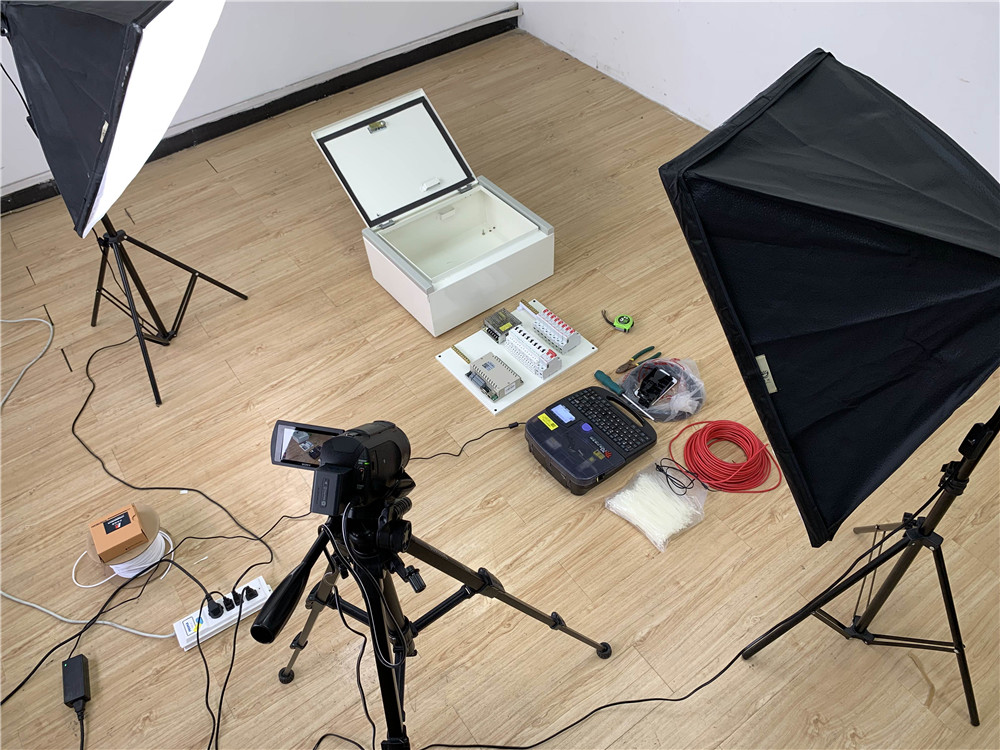
We will record a full hour of production for the smart power distribution box with the studio, then the DIY can be produced as same time as the video watched.

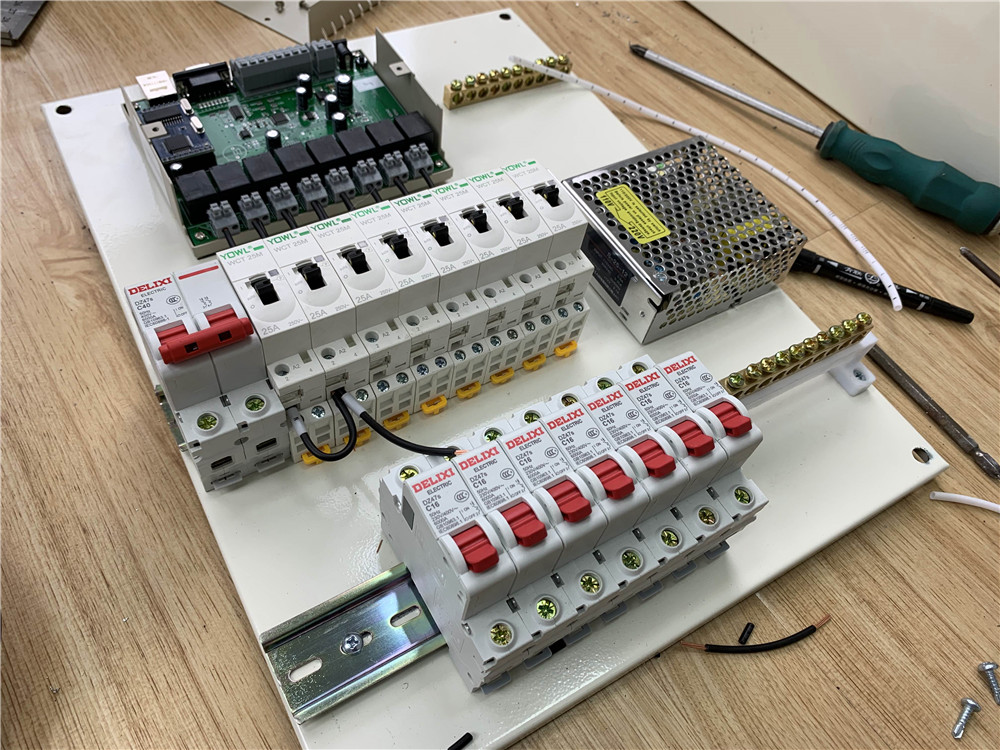
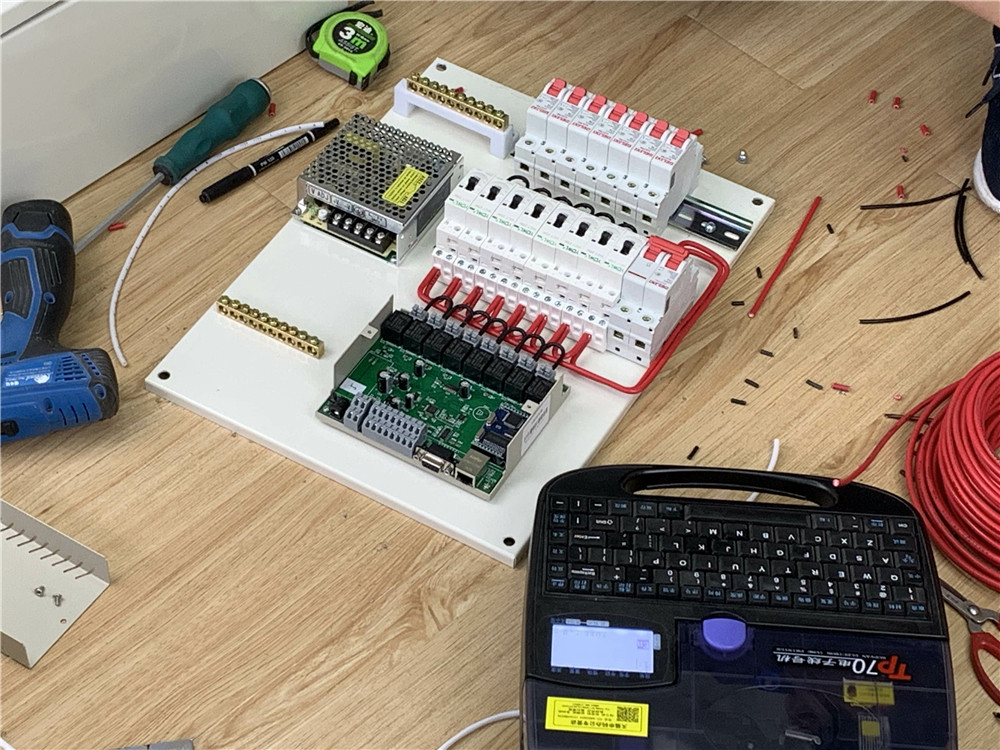
First, we take off the bottom plate of the distribution box, and then fix the KC868-H8 intelligent control box, AC contactor and air switch on the plate.
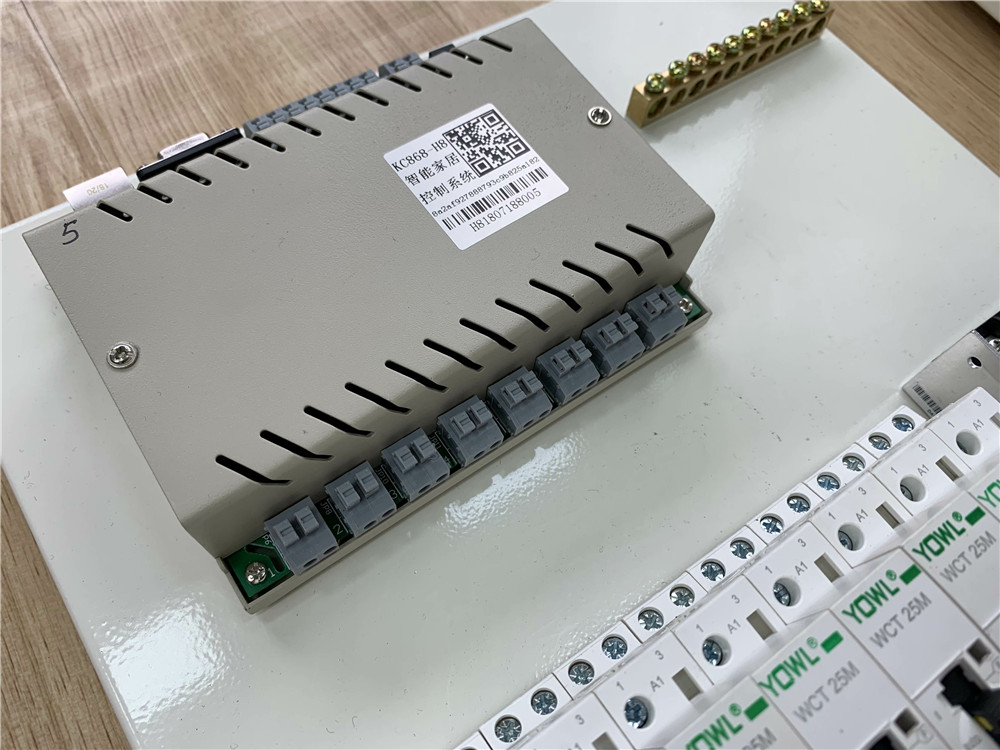
Keep the control box an appropriate distance from the AC contactor.
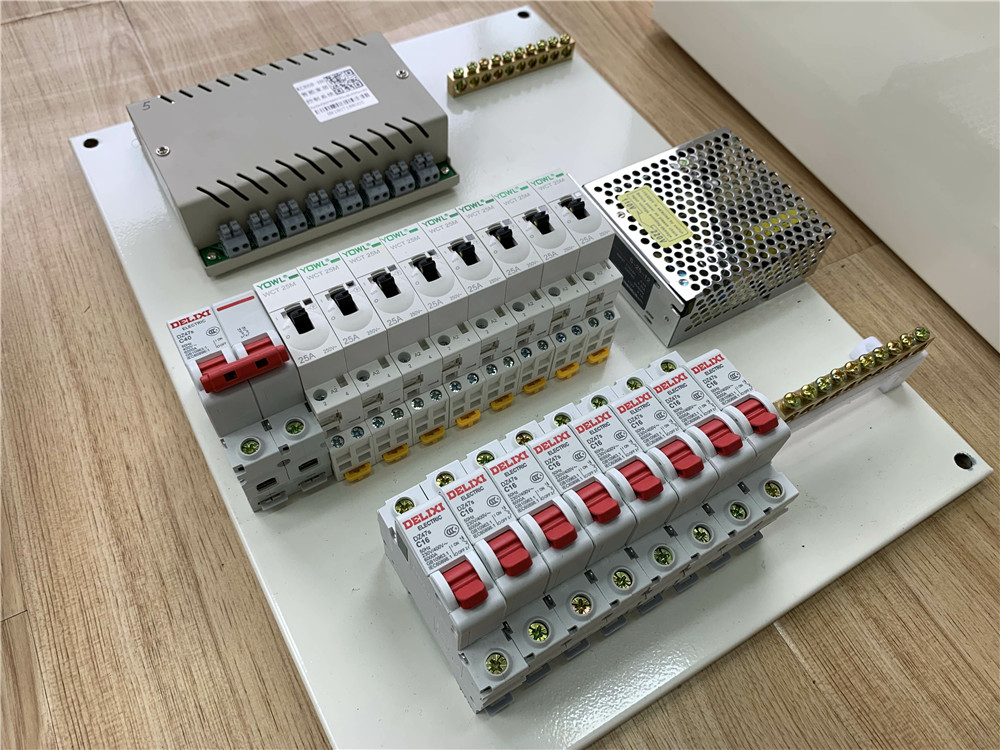
Then to put the switch power supply and the wiring position right on the plate.
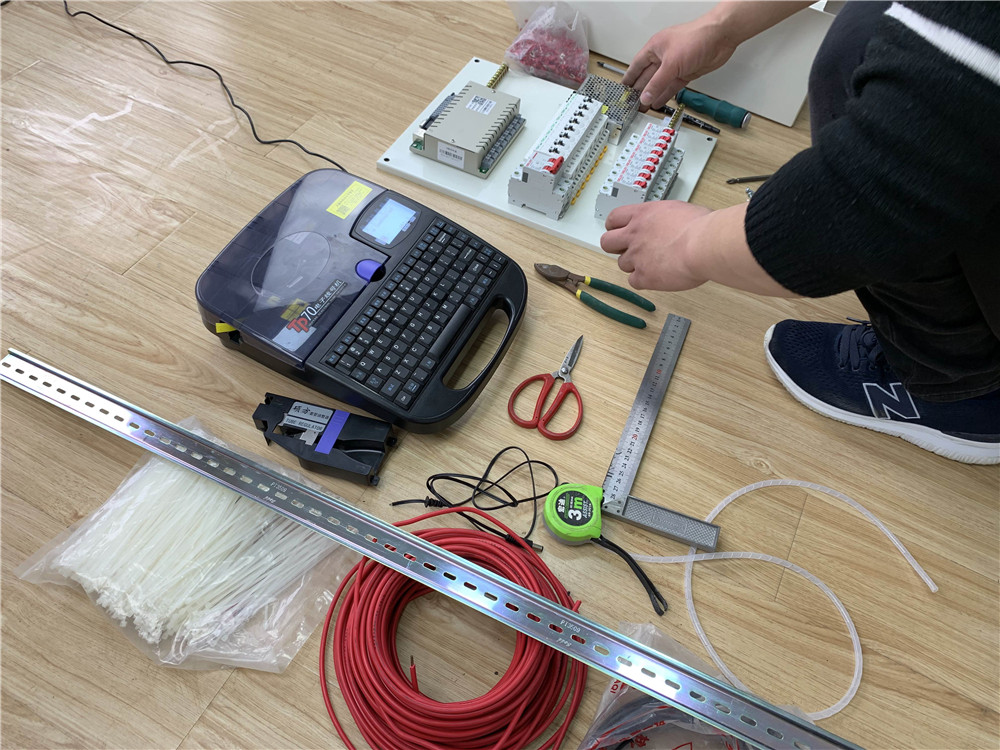
Measure the length of the switches and then cut the right size of tracks for them
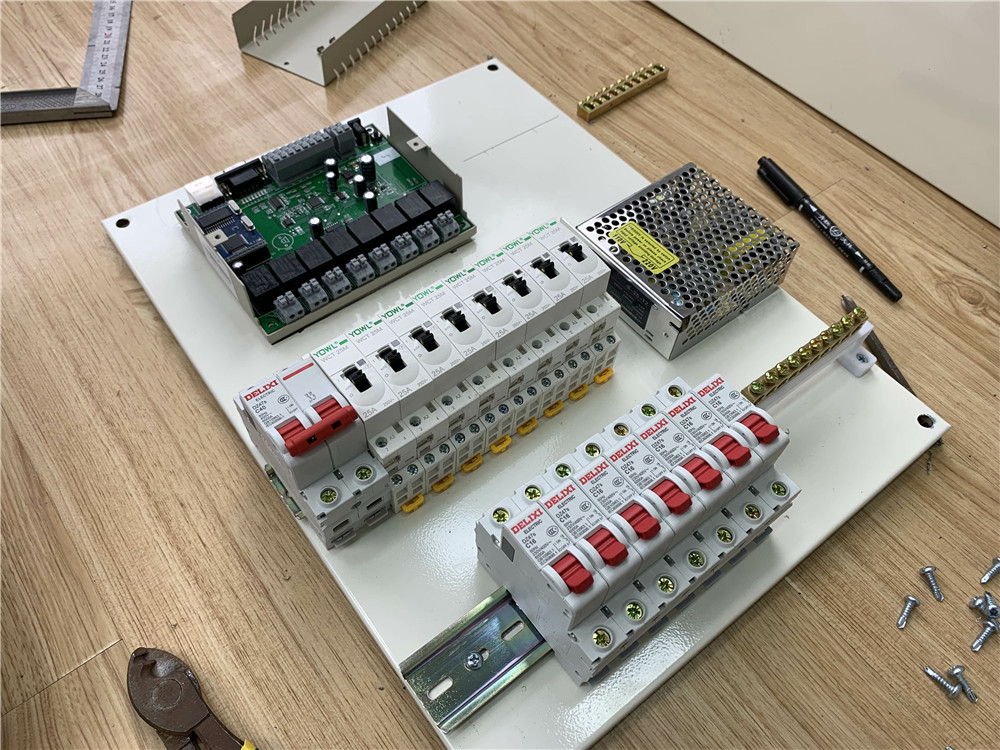
Open the cover of the KC868-H8 intelligent control box and position it on the bottom plate through the positioning screw hole around the PCB circuit board. Secondly, fasten the track with self-tapping screws, and then clip it to the track according to the relevant accessories.
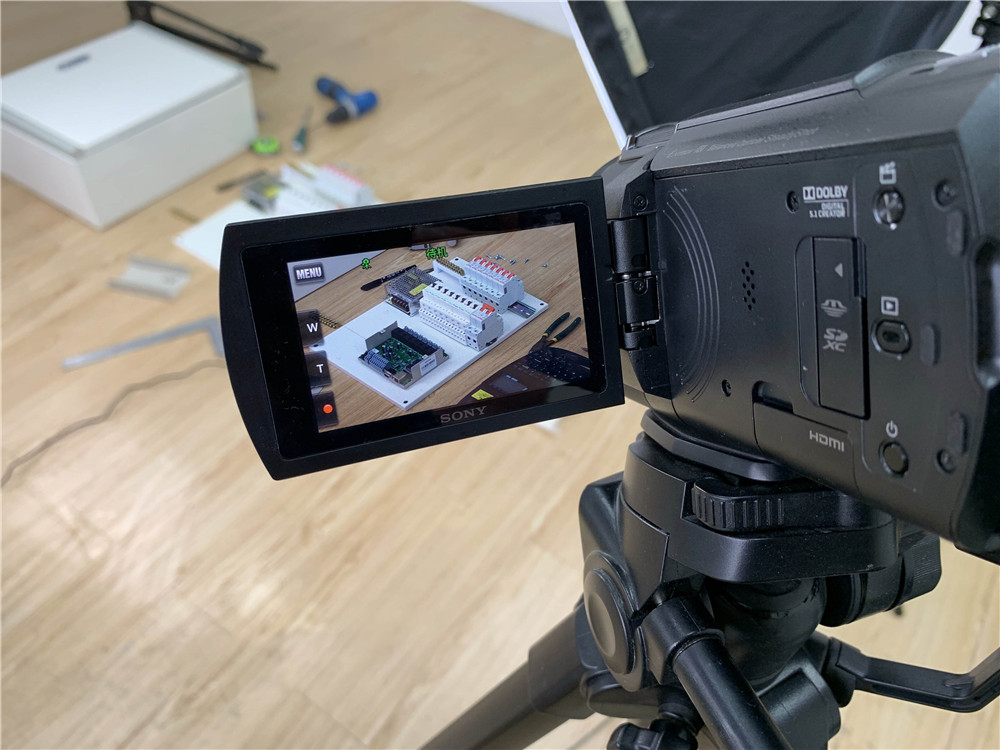
If you don’t understand the process clear, please don’t worry, our camera is recording :), you can download and watch the video later.
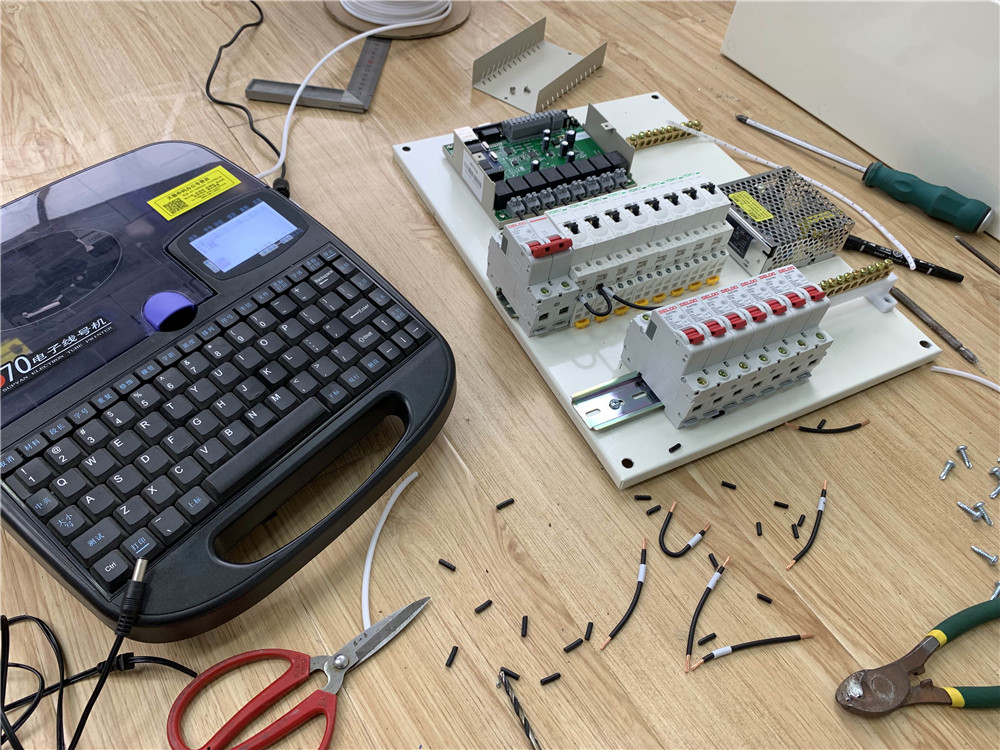
Now we use the labeling machine to mark the white casing of the wire head, such as: the number 1 – 8, the fire line is “L”, the zero line is “N”.
Cut the wire into a short line for connecting the AC contactor and the air switch
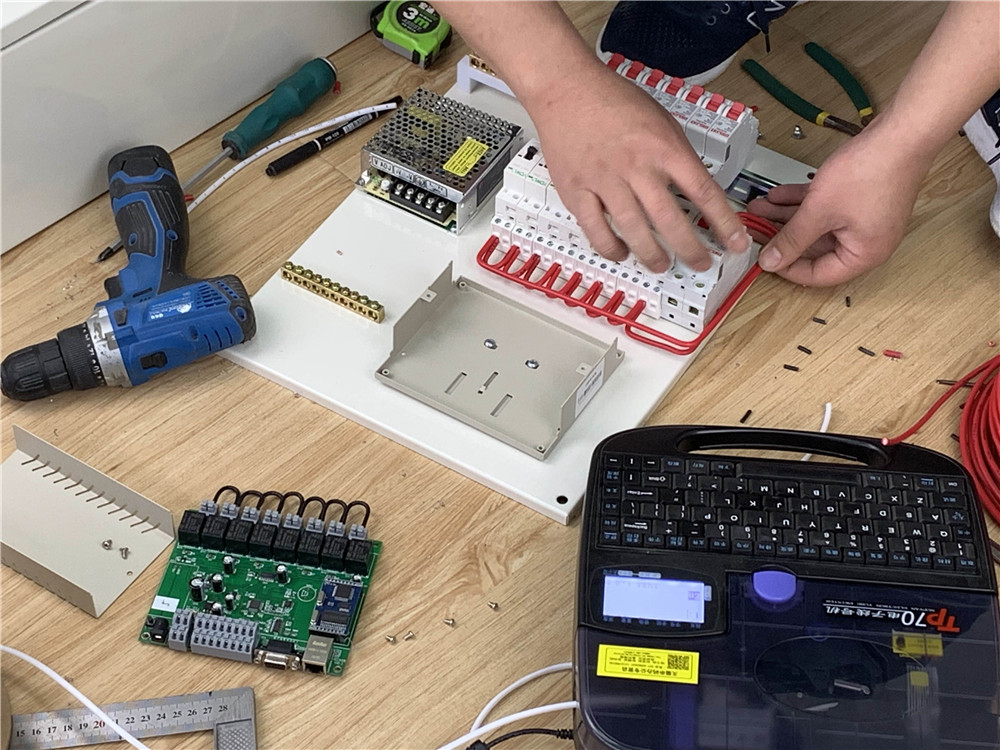
Connect one end of all the AC contactors as one public terminal to the fire wire.
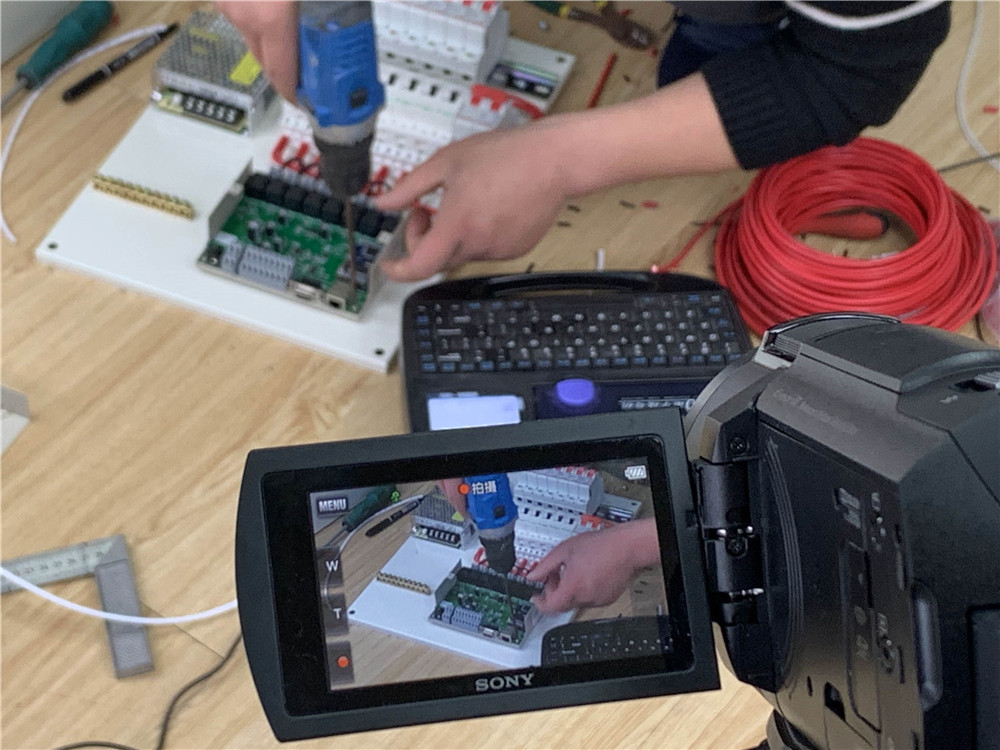
Fix theKC868-H8 on to the plate.
Connect one terminal of all the 8 outputs together, to be a common terminal.(see the black wire connecting)
Before connecting, put the casing onto the wire head, and then twist the installation.
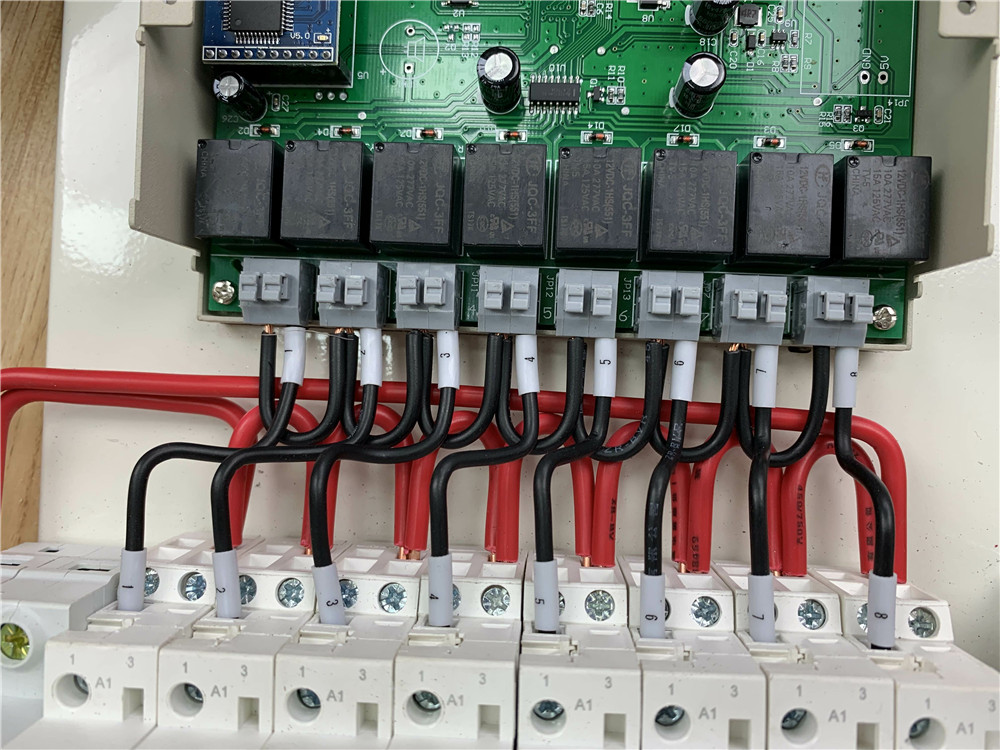
After the output of the KC868-H8 intelligent control box has finished wiring, the cable will be arranged neatly.
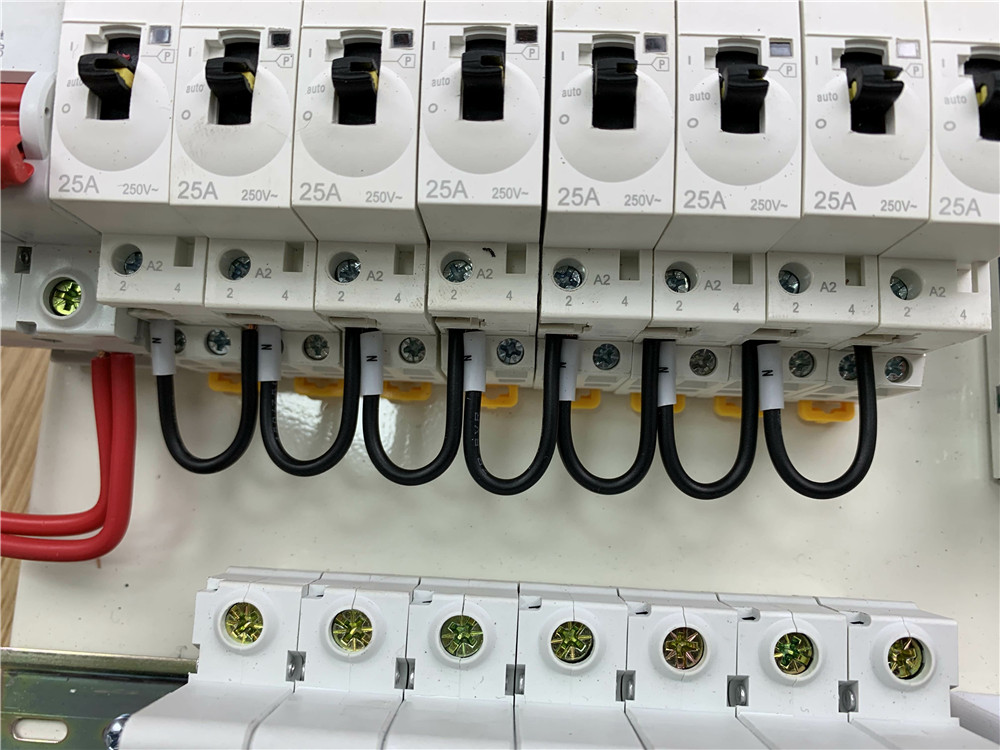
The current rating of the AC contactor, we are using, is 25A, meaning the largest electrical equipment controlled can reach the power of 220v*25A=5500W. Of course, in general, we reserve a margin of safe power, and the actual use should not be too close to the rated power.
If the power of 5500W is not large enough, the capacity can be expanded by replacing an AC contactor with a higher rated current. We can choose 220v AC contactor products.
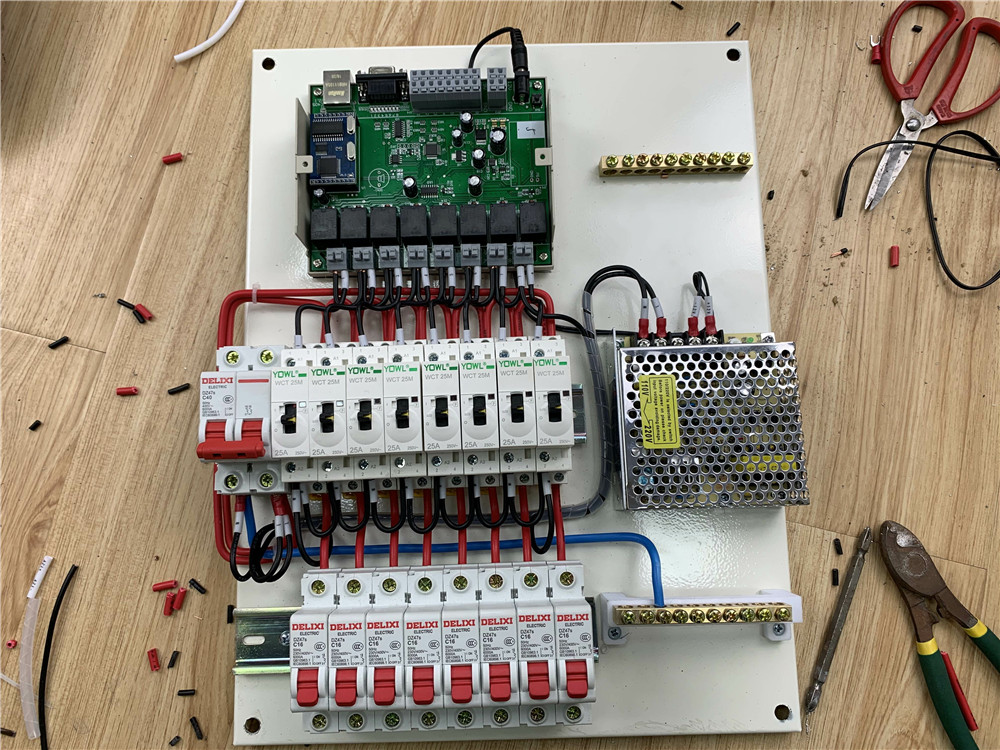
The toggle switch in the middle is a manual and automatic toggle switch. There are a total of three gears, the switch to the “middle”, is for the mobile phone APP remote control mode. The switch to the top is for the manual local control mode with “ON”; the switch to the bottom is for the manual local control mode with “OFF”. When both manual control and APP control operate at the same time, manual control has the higher priority.
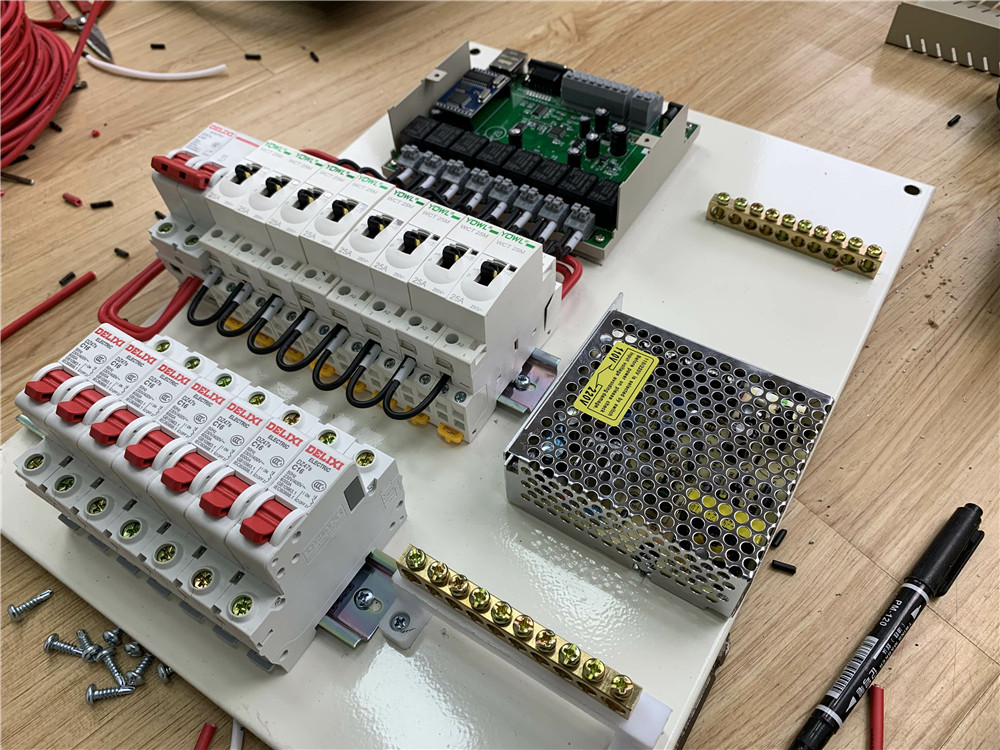
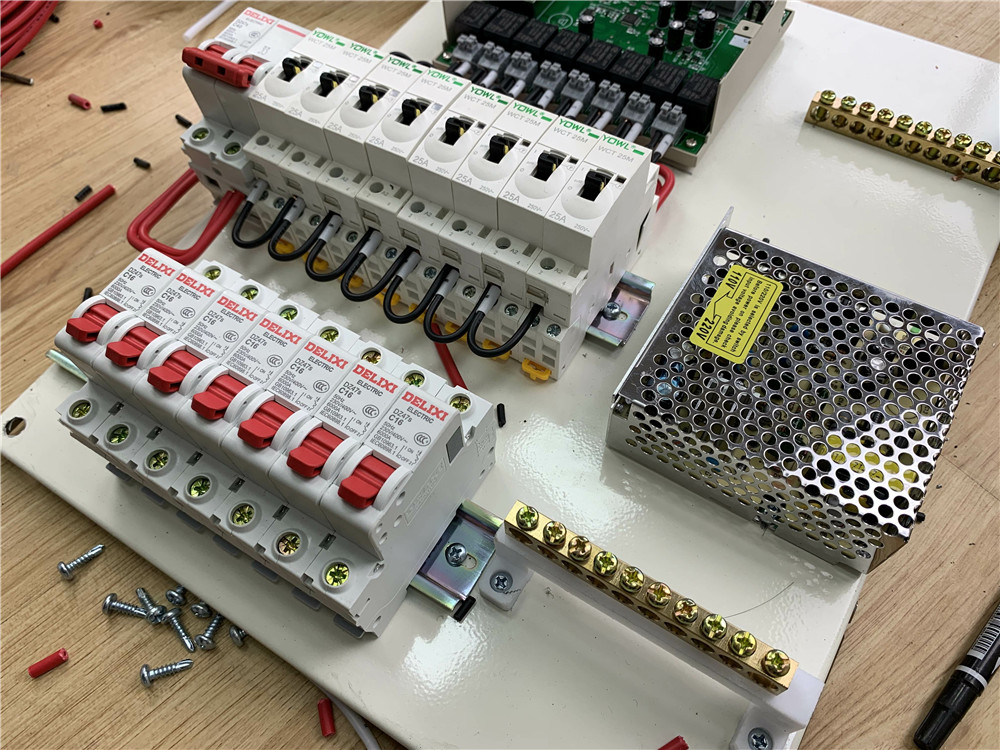
Let’s see the connecting details from another view.
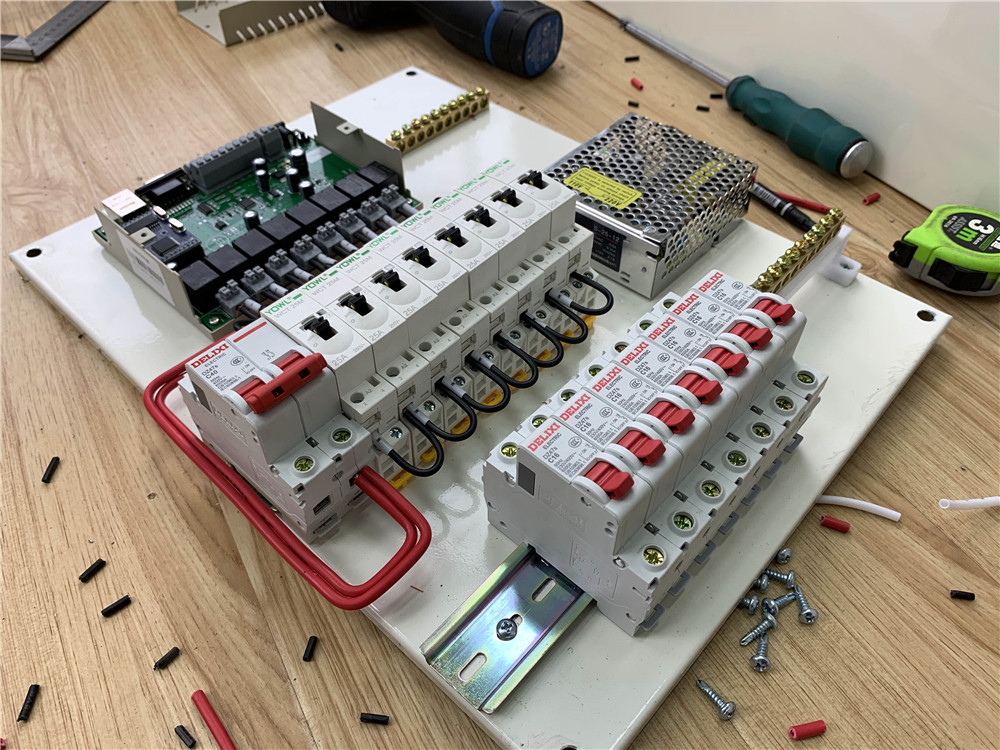
Another view more.
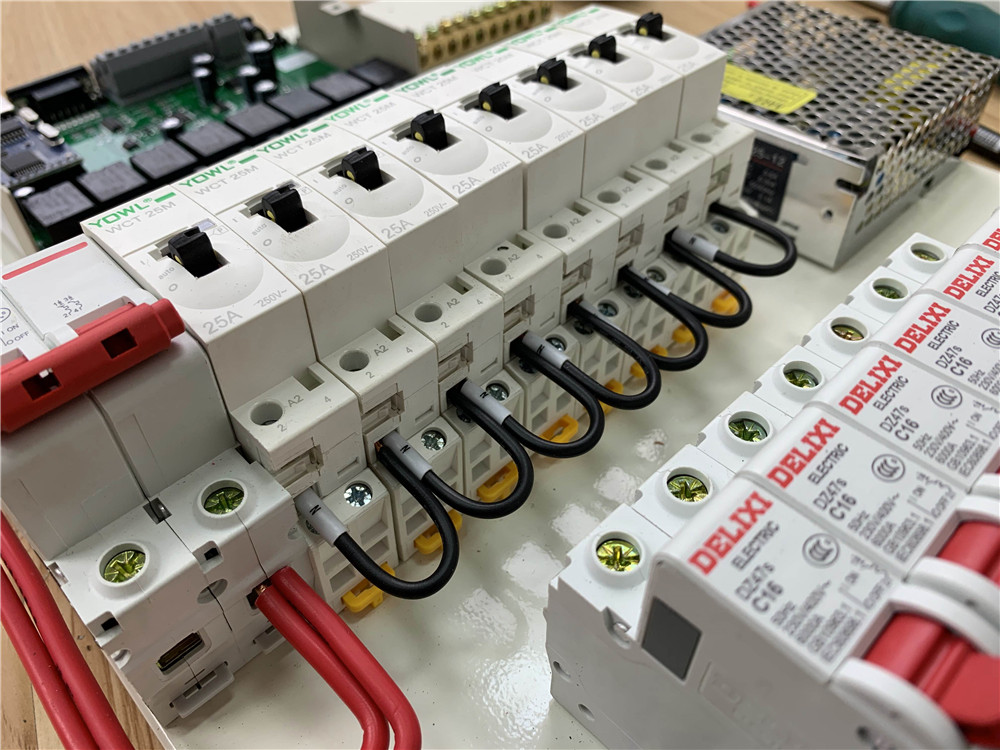
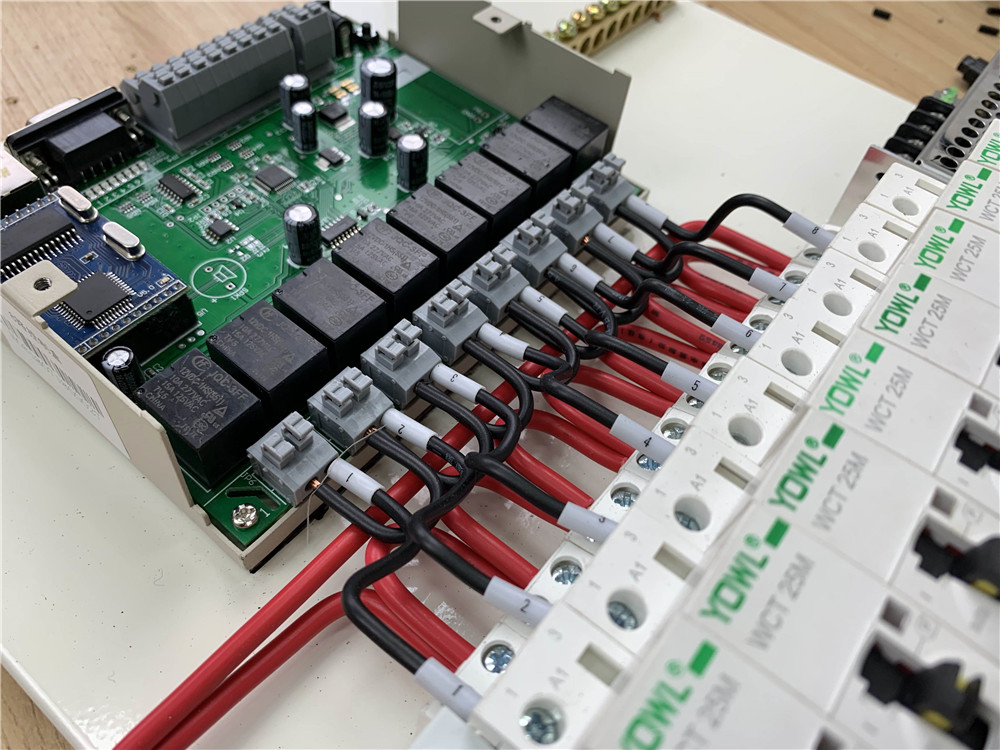
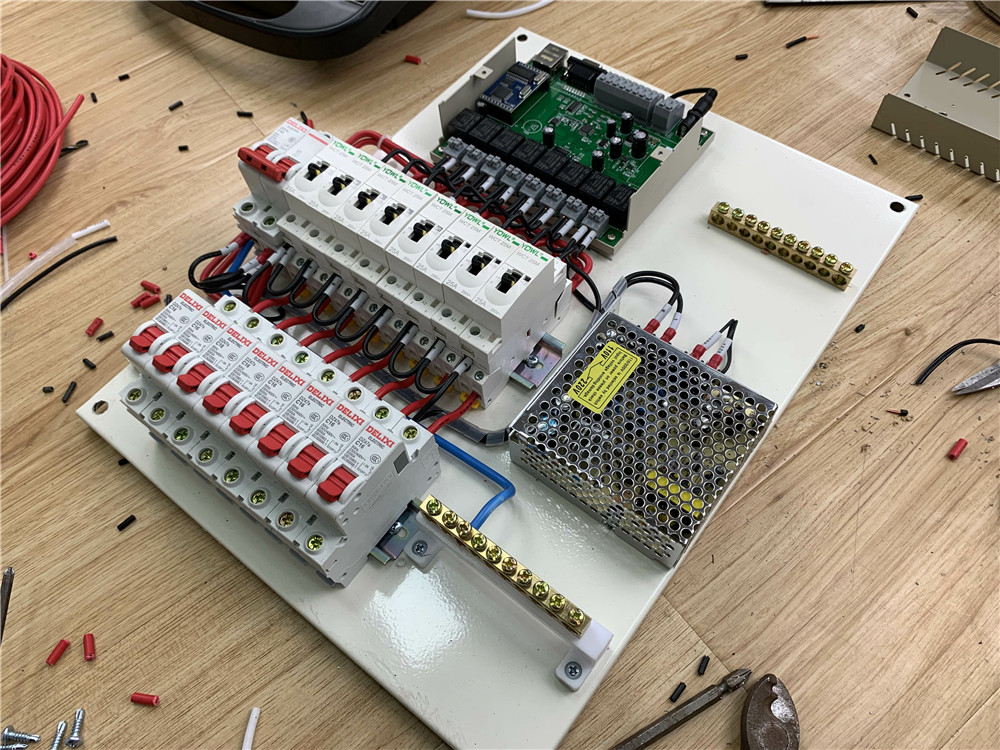
Connect the 220V power wire for the switching power supply and connect the 12C/DC power wire to the KC868-H8 intelligent control box.
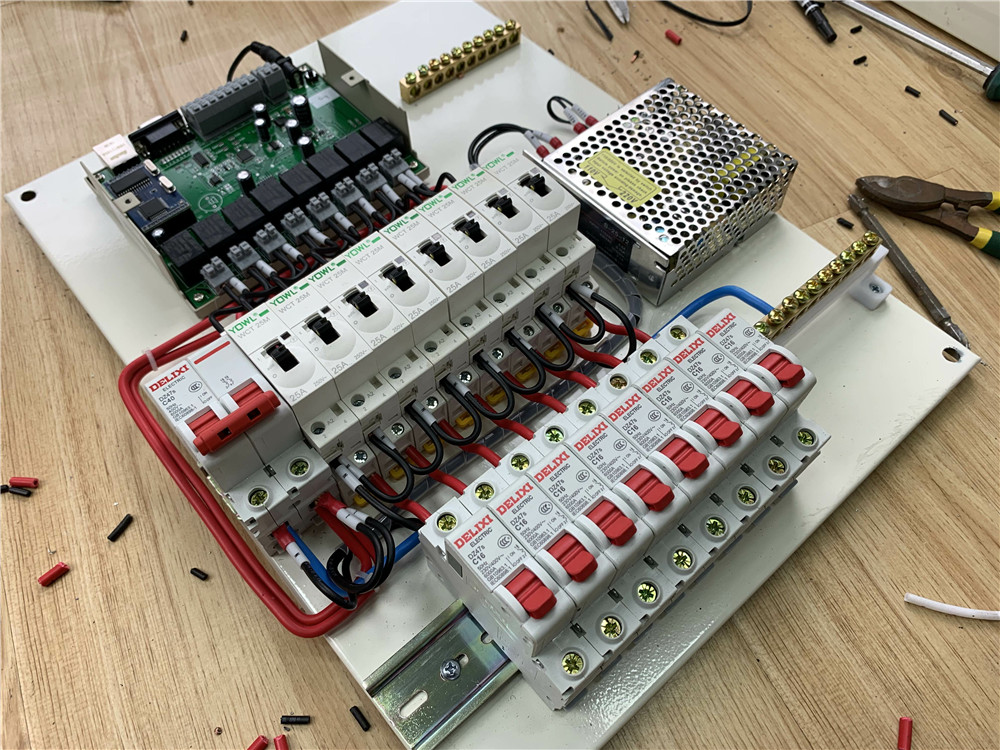
Now, the entire bottom plate has been installed completely.
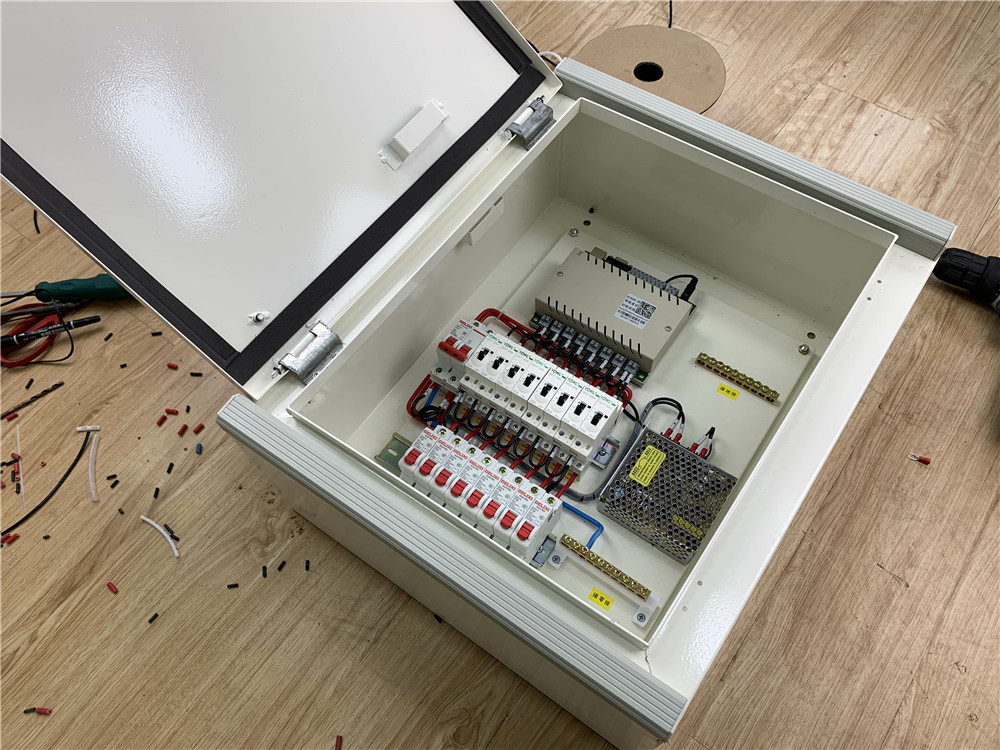
Put the whole bottom plate directly into the distribution box, and fixing screws. So the power intelligent distribution box is finished completely.
How can we achieve remote control of a specific load device?
- Connect the air switches to the application equipments, operating as same as traditional PDB.
- When the security sensors are required, connect them into the inputs of KC868-H8, meanwhile get the sensors power on.
- Connect the KC868-H8 device to the network (network cable of WAN or LAN) and get power on; if there is no cable network, you can add 4G wireless router to convert it to cable network or use the KC868-H8W Wi-Fi version device.
- Configure the IP parameters of the KC868-H8 device (generally, it is DHCP mode as default, just plug the cable to the device)
- Install the app into your mobile (Scan the QR code from the official website) or install the software to your computer (downloaded from the official website)
- Set up the executive actions in the APP, which will be executed after the sensors are triggered. If a message is required to be sent, then set up the relevant settings. If there are already some accountants who are authorized to use it, the alarm messages will be sent to all the accountants at the same time. For example, one of the three members of the family is an administrator and the other two are users; when the sensor triggers, all three can receive the alarm message.
The intelligent power distribution box has four control modes: computer remote control, computer local control, mobile phone app remote control, manual switch direct control.
As shown in the following figure:

For these 4 controlling models, the PC application software is based on the previous controlling communication protocol, which is including the functions of controlling through local network mode and remote mode, as well as the function of reading the switch state of the relay output.
At the end of the article, we will provide the links to download the source code for you to learn and redevelop. You can develop different forms and styles of applications suitable for different industries.
- PC remote controlling
First, download the PC application software of the KC868-H8 device from the link:
https://www.kincony.com/document
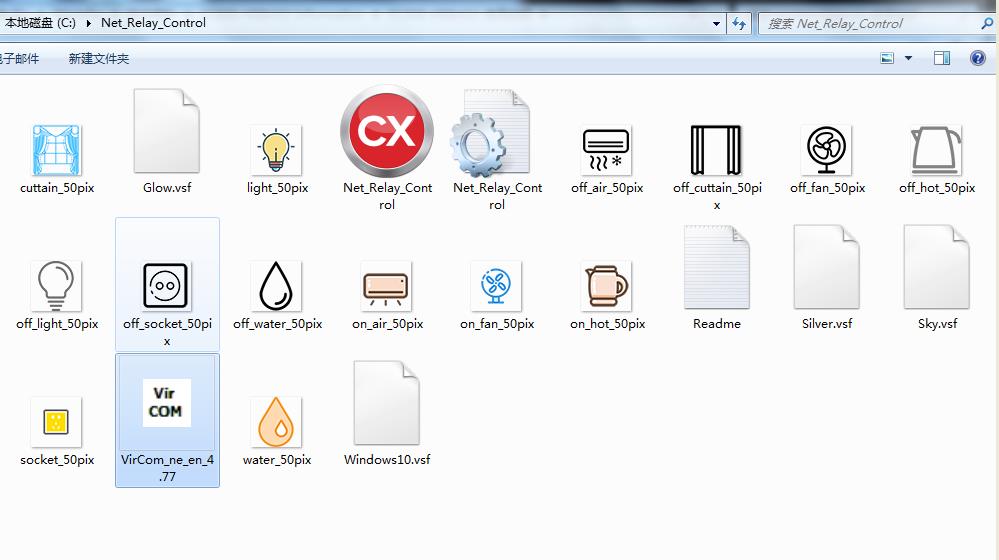
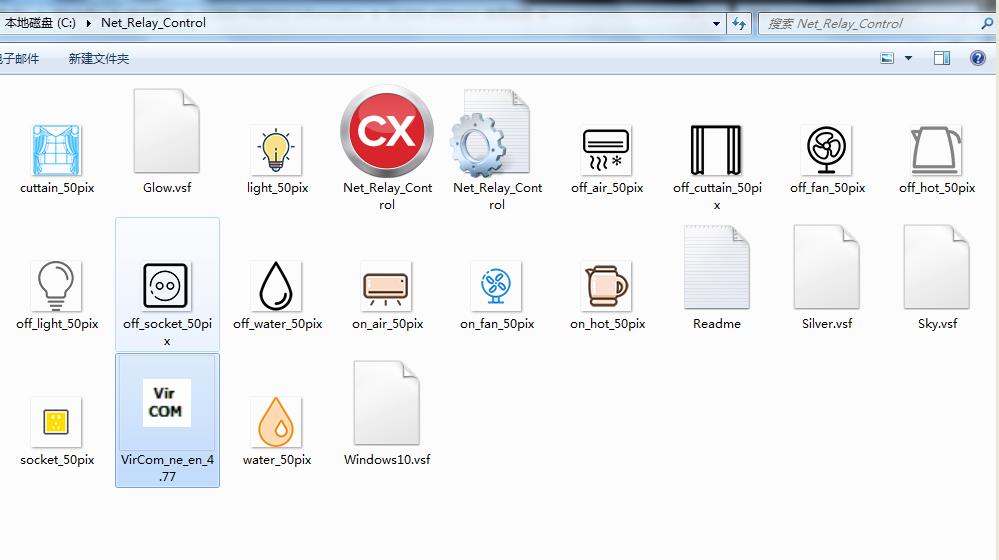
Please store the unzipped file in the root directory of the C disk when the first download. As shown in the below picture
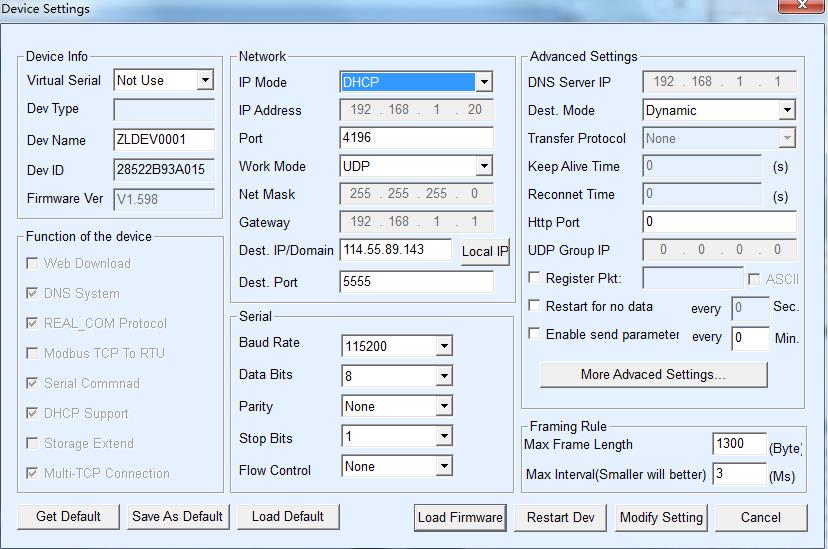
Second, open the network configuration tool of “vircom_ne-en4.77” program, modify the “work mode” into “UDP mode”, and set the “destination IP and domain name” into our cloud server address”sdk.hificat.com”, the “destination port” into “5555”. Then”IP mode” recommendation to be set to “DHCP”, which means the router DHCP dynamically allocates the IP address. Normally, the router opens the service of “DHCP dynamic assignment IP”, otherwise, we need to set the router to open it.
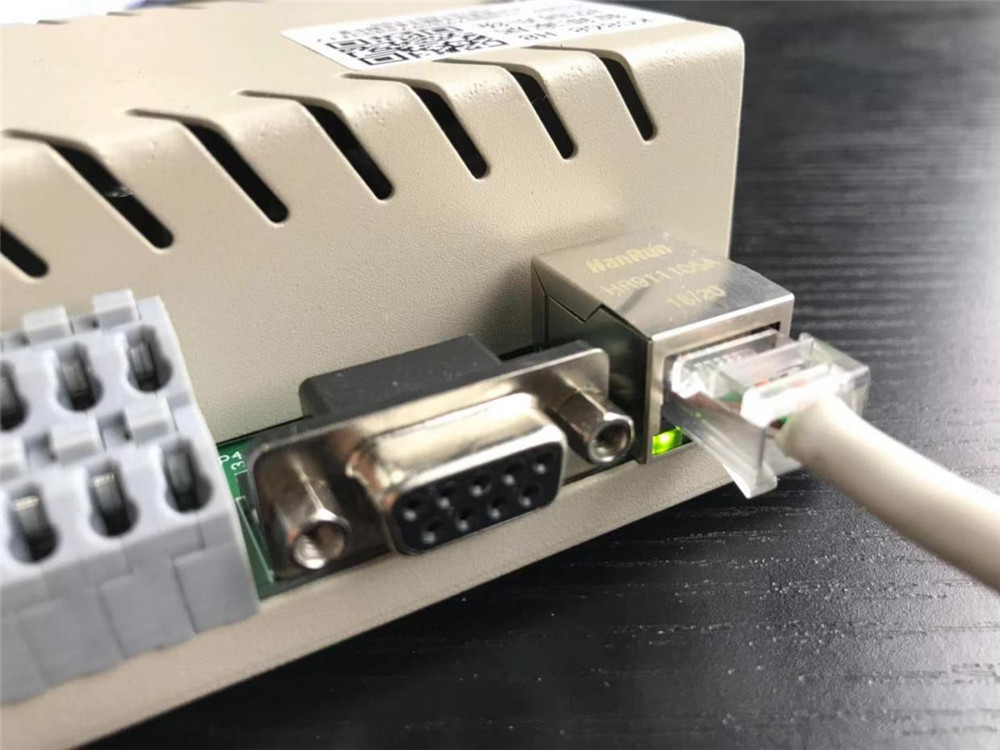
After finishing the network configuration, get the device power on, the device will be automatically connected to the internet. And the network light will become green when the connecting is successful.
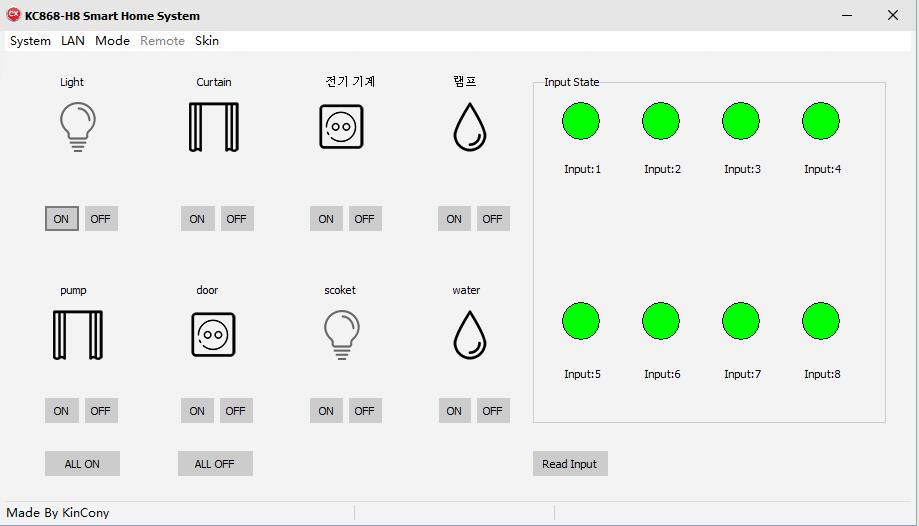
Then, we open the program of “net_relay_control.exe” to set configures the device’s parameters.
Click the “system” to open the “config” window as below:
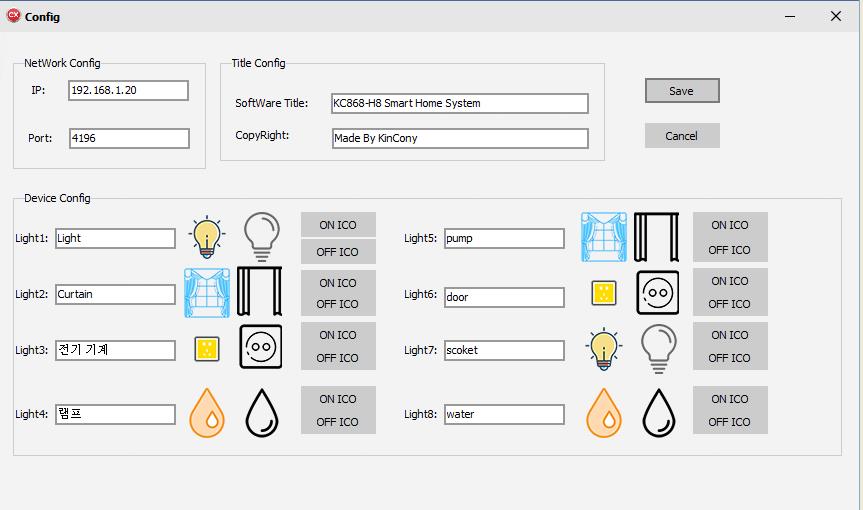
According to the device IP address parameters in the network configuration tool previously, we fill in the corresponding column. When the configuration information input is complete, we click the “save” button and close the software to reopen it, which make our configuration setting to take effect.
Then dropdown the “mode” menu, select “WAN” as below picture (it is LAN mode as default)
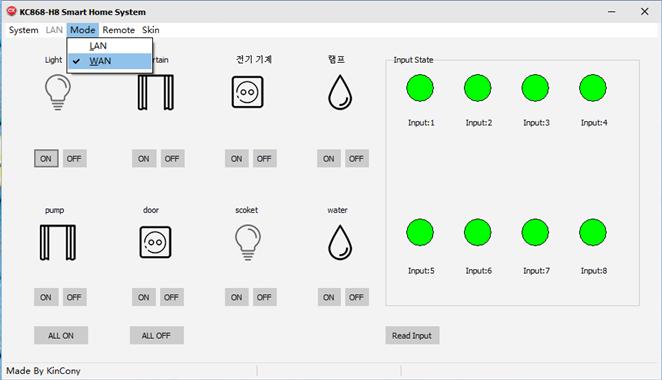
Next, we drop down the “Remote” menu to open the “config” window.
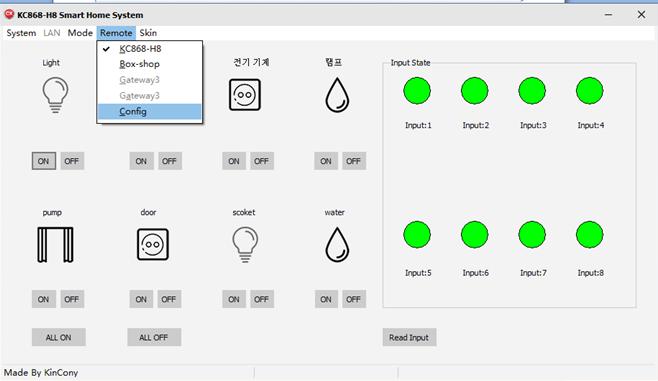
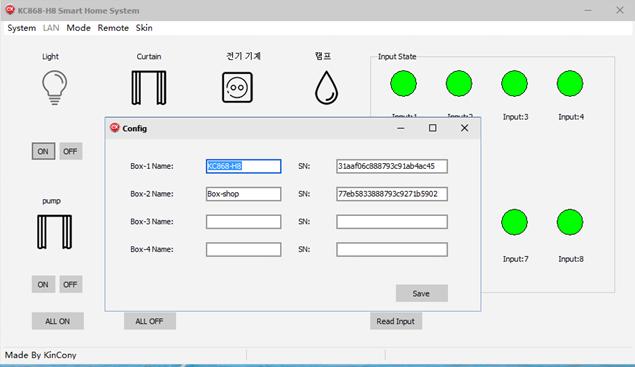
Click the “config”, as the below picture; we see that there are the text columns for 4 devices, which can be named and set. Because the main program interface shows a control icon for an 8-way device in a control box, then when we connect multiple control boxes at the same time, we need to make the switch choice of the control box. This is why we need to set the name of the control box. Note: the four control boxes configured here can be anywhere, not limited to the same LAN, as long as the control box can be connected to any place where the internet network can be connected, and can be used at home or abroad. If you have a control box, set up a message for one, two for two, and a few for information. When setup is complete, clicking the Save configuration button and shutting down the software before reopening will take effect.
We just make two set devices for displaying, and you can see the below picture that two devices can be controlled now.
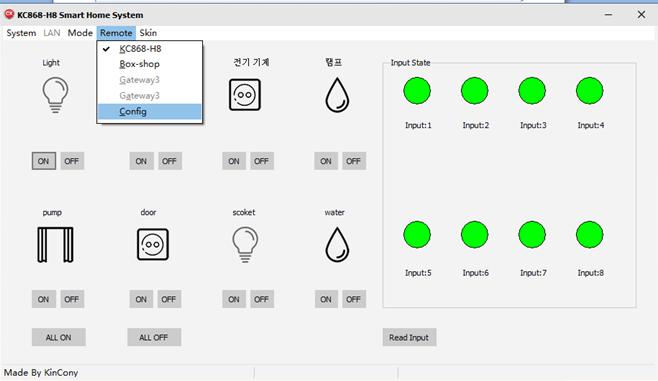
After setting up the basic information, we can control each device by clicking on the “on” and “off” button of each device, and the status of the device will be displayed by using a different color icon. Software interface below the “full open”, “full off” button, can open all the switches, and once off all the switches. Now that we can remotely control the lights from the computer, isn’t it very simple, in remote mode, to remember the most important “serial number” parameter, which is the only sign that distinguishes the device.
- PC local controlling
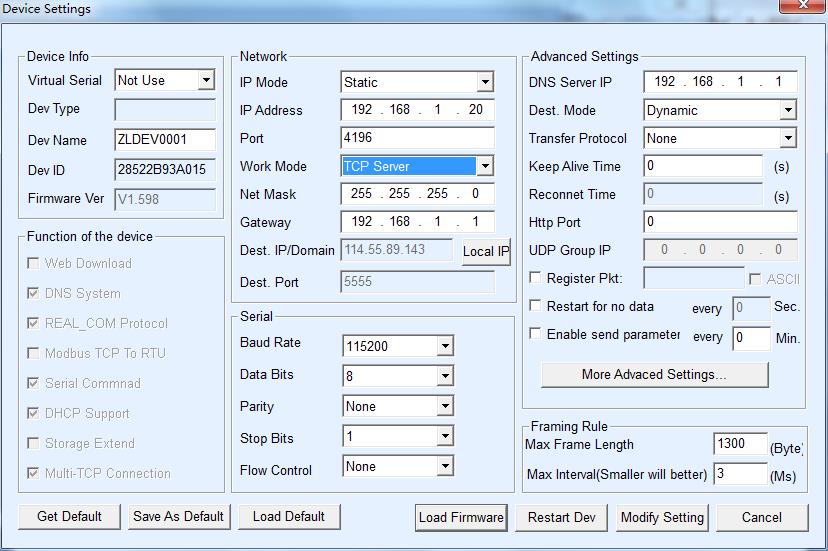
First, we need to use the Network configuration tool ”vircom” to set the device’s work Mode to TCP Server mode. Now, the device KC868-H8 is used as a smart home server role, and the computer as a client role. The control mode of the local network, that is, the device and the computer software realize the point-to-point communication control, and do not transit through the data of the cloud server. This way can be used only with the device and in the same LAN.
Then click the program “Net_relay_control” to open the main controlling window.
Open the controlling window as below, click the system button and choose config to open the “config” window
It is the “Config” window as below:
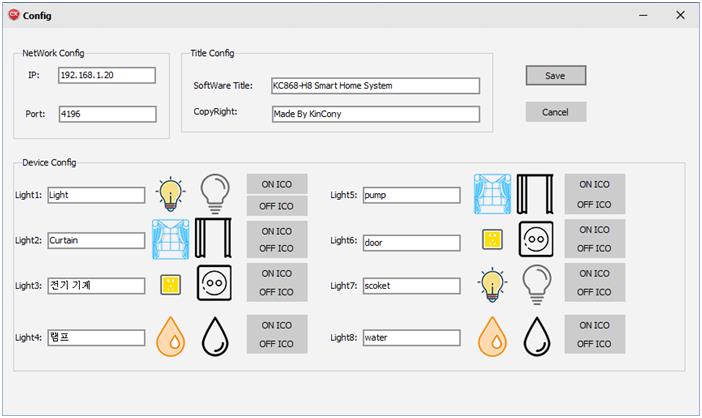
According to the device IP address parameters in the network configuration tool previously, we fill in the corresponding column. When the configuration information input is complete, we click the “save” button and close the software to reopen it, which make our configuration setting to take effect.
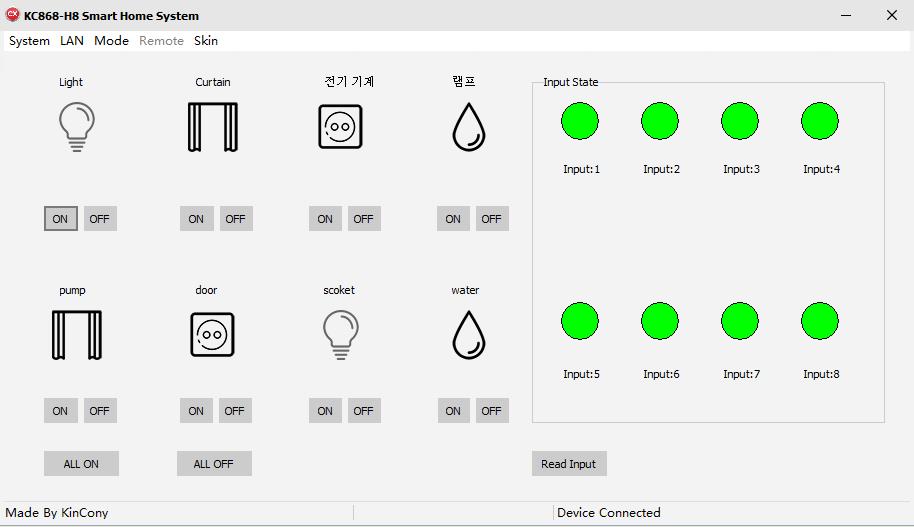
After that, we dropdown “LAN” button to click the “connect”, it will show “Device Connected” and “Connect OK!” at the bottom.
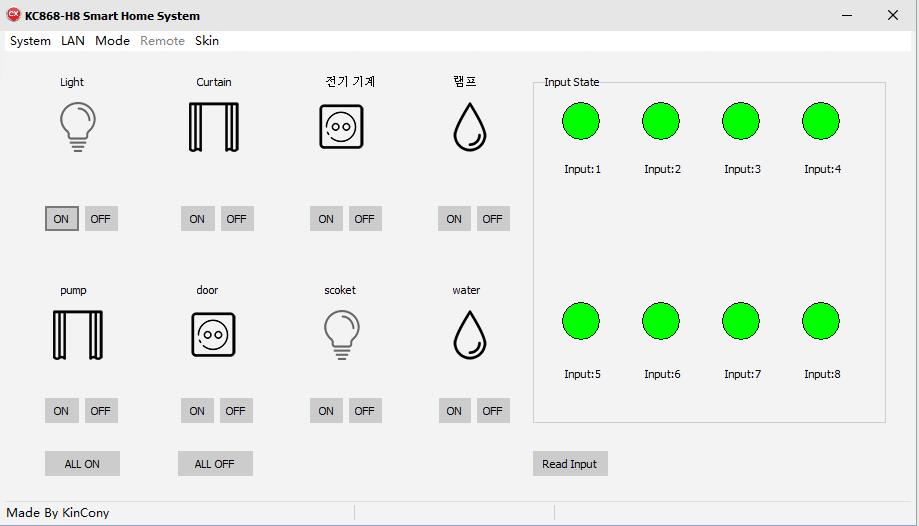
Then, dropdown “LAN” button again to click “Initialization”, it will show “Initialization completion”. This setting is very important; please make sure to do this setting right. Now, we can control the “on” and “off” button to open and close the applications as below.
- Mobile Phone APP Remote Controlling
Download Apple or Android smart control software app, via Crystal’s website to open the app, selection registration page, follow the prompts to register the phone number, and then log in. After registering for the first time, the system Wizard recommends adding “floor”, “Room”, and “add Host”, among other basic configuration actions. After that, you need to add a host operation to the app side of your phone, click “my-host management,” click “add,” click the “scan QR code” icon, scan the QR code of the kc868-h8 control box, and set a nickname for the device. Click add to complete host addition.
In “my”-“my device”-“not classified,” the icon that has just been added to the control box is displayed, the number at the bottom of the icon is the corresponding serial number, and the “room” is selected for the control box by clicking the icon. “device name” according to the actual situation to name, the device icon can choose its own, select the actual control box “room” location, and then click save.
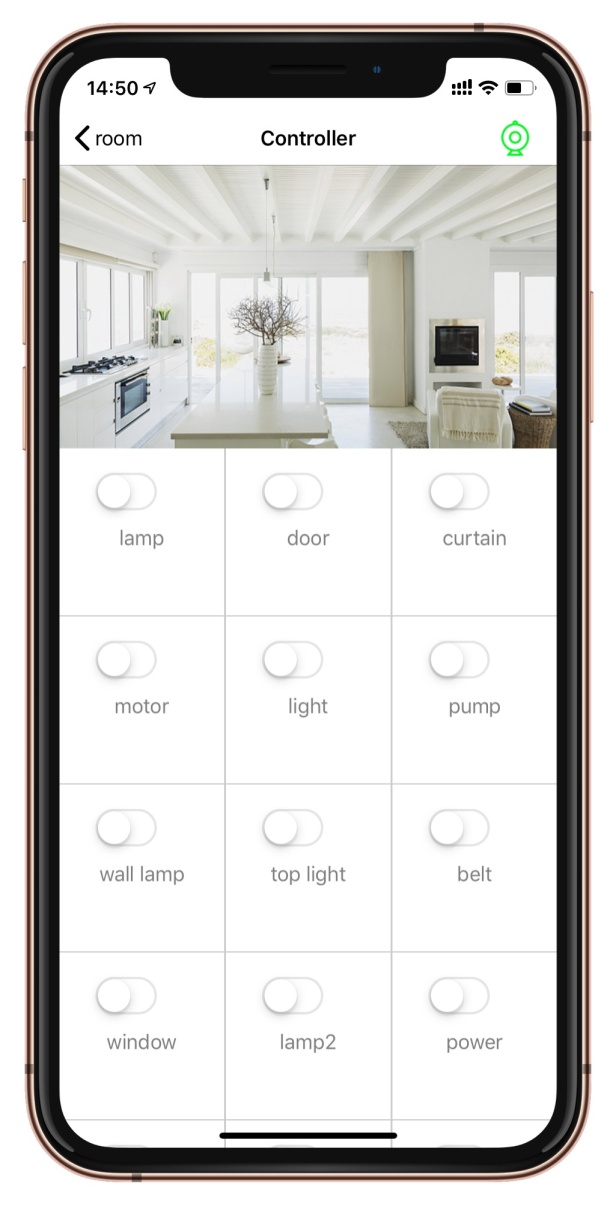
After adding the control box, we can realize the remote control of the light switch of the control box in the mobile phone app. When it comes to intelligence, we can not only use the mobile app to control the lights manually;
You can also customize the situational mode, such as one button to turn on / off all lights, or one button to turn on a specified number of lights, and turn off a specified number of lights at the same time;
In addition, you can customize the timing control operations, such as: Monday to Friday, 7:00 automatically turn on the bedroom lights. These flexibly defined scenario patterns, as well as a variety of trigger execution methods, have fully emerged intelligent portability and practicability.
For more detailed information about mobile phone app operation instructions, you can visit the Kincony official website to obtain.
- Switch Button Local Controlling
Manual switch control mode is the simplest, directly toggle AC contactor switch to “ON”, “OFF” and “APP operation mode” control.
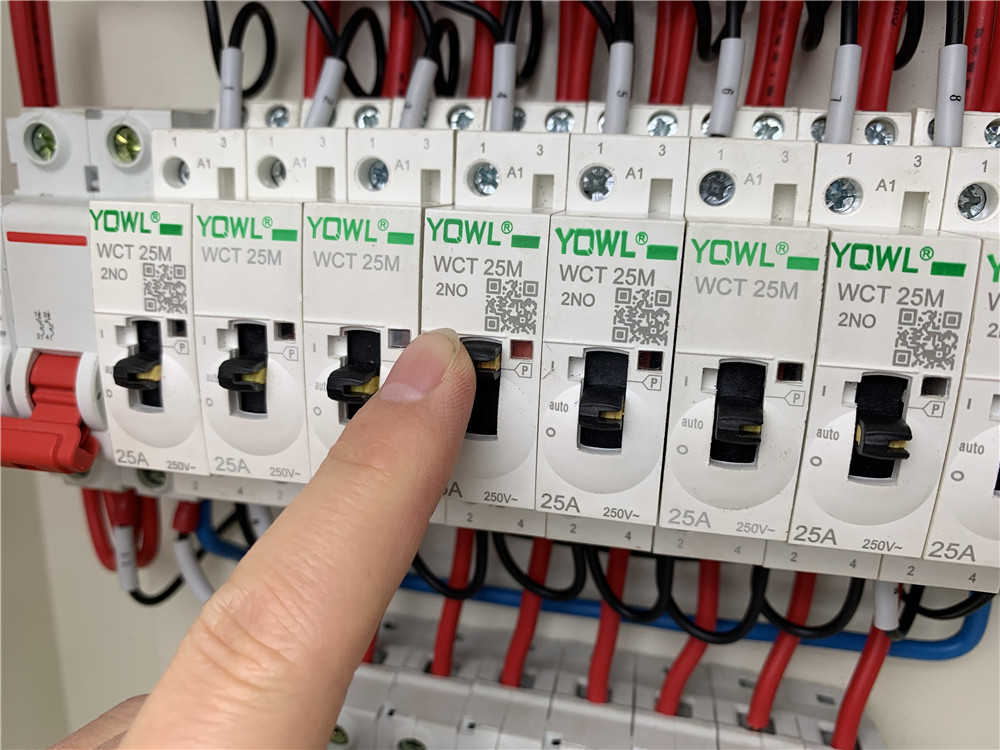
Turn on one way by hand
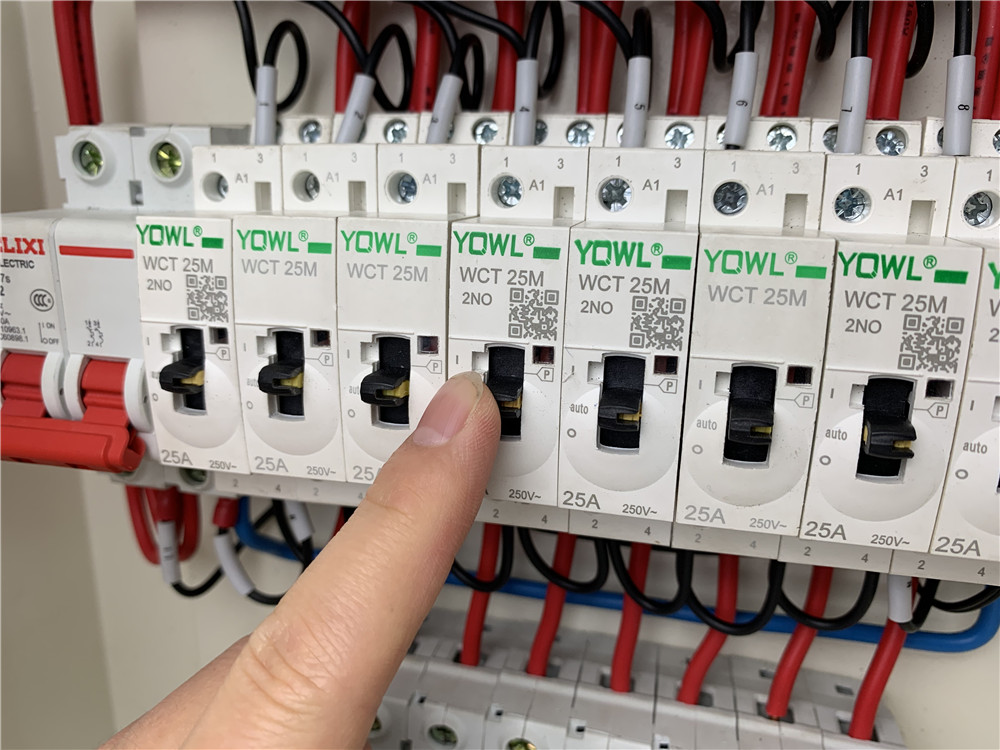
Turn off one way by hand.
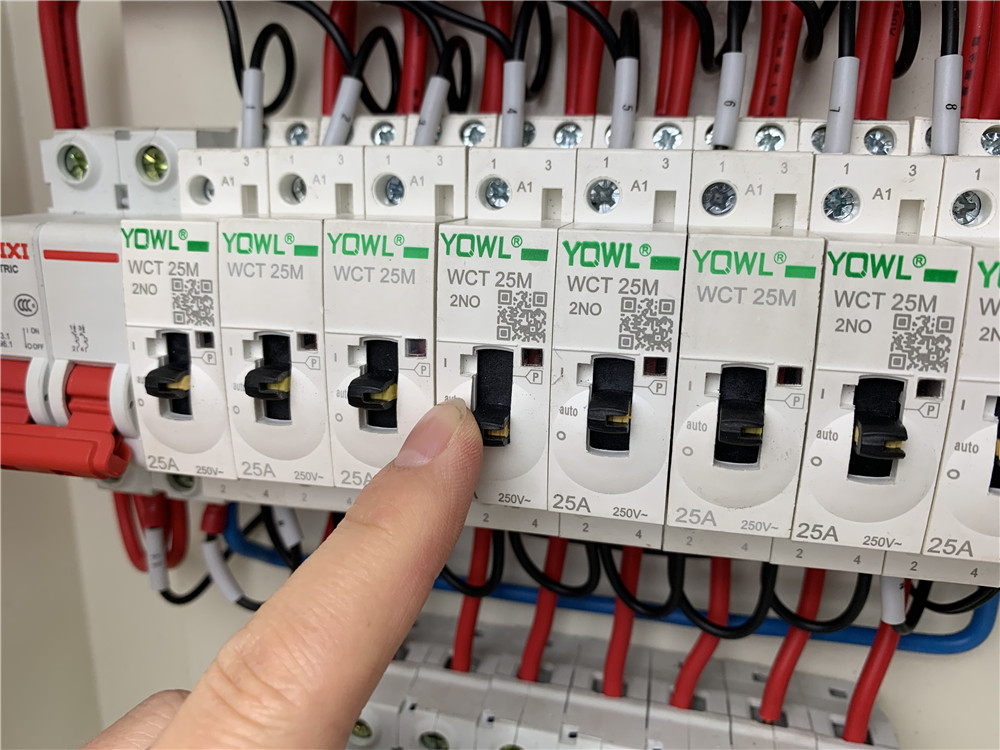
Turn the switch on the position “APP control mode” by hand.
Till now, we have finished to DIY an intelligent power distribution box. Here, we DIY 8-way intelligent power distribution box, and learn its basic principle and wiring method, then what to do if the control outputs are not enough?
There are two solutions.
The first is to use more pieces of KC868-H8, which can be 2, 3 and 4……. just to plug the control box into the power supply and the network cable;
The second way is to use the KC868-H32 with 32-way. And the AC contactor and the air switch to be connected at the output of the control box; the wire connecting method is the same.
In previous issues, we have described the hardware and software details of the device. If there is any confusion, readers can go to the previous issues of 《Radio magazine》 to get some more detailed information. You can also access electronic articles directly from the official website of Kincony. At the same time, we also provide readers with the computer application download address used in the article introduction, as well as the relevant source program code. We wish more friends can develop various new or practical applications to share, we also hope to receive more proposes, we can communicate more with each other.
We will also provide you with more practical and more valuable tutorials and related information.


