1. Hardware interface
2. How to wire
3. Ethernet setting webpage
4. How to use manual control switch panel
5. How to use remote control
6. How to use TUYA phone app
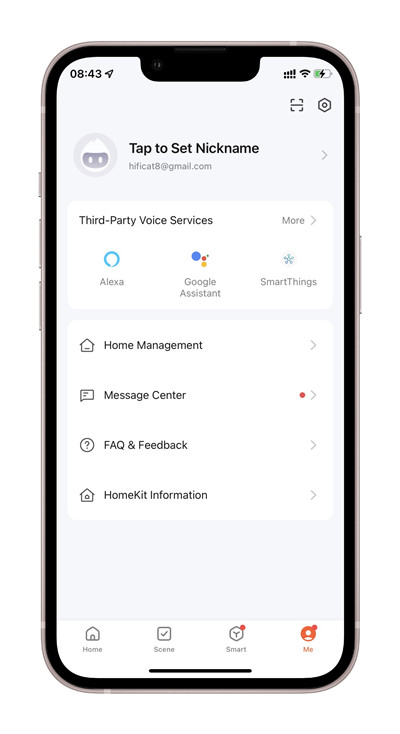
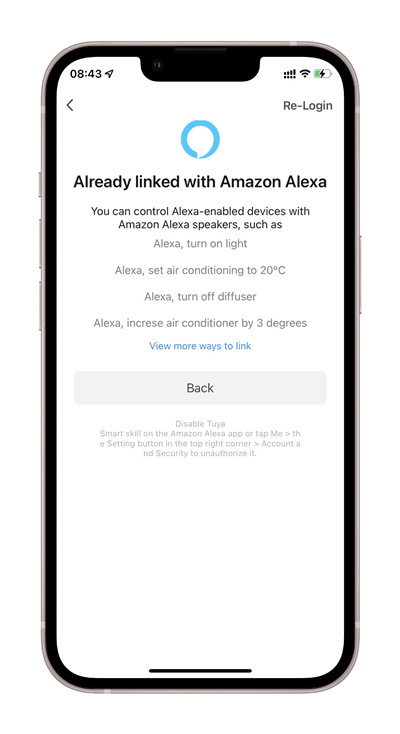
7. How to voice control by Amazon Alexa speaker
8. How to voice control by Google home speaker
9. Protocol document for integration
1. Hardware interface

Power supply: use DC 9-24V
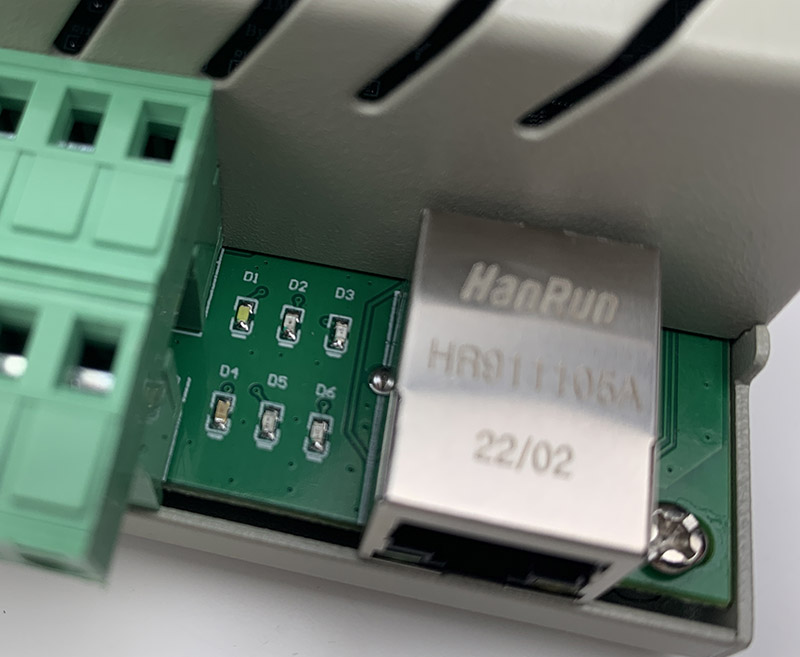
Led status details:
D1: white color when ethernet using “MQTT” mode
D2: yellow color when ethernet using “TCP Server” mode
D3: blue color when ethernet using “TCP Client” mode
D4: green color when system running
D5: red color when mqtt can’t connect with server , red fast blink; when try to connect to server, slow blink
D6: blue color TUYA network: fast blink means ready to pair with phone app. always on means connected to tuya cloud server
Buttons function:
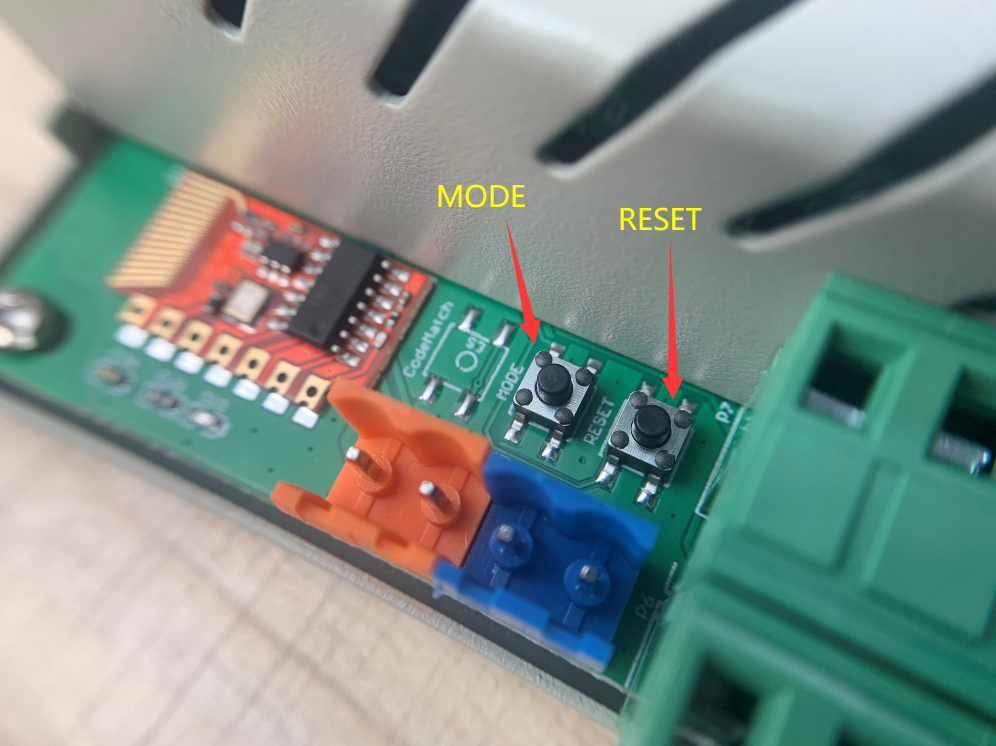
Button — “RESET”: reset TUYA WiFi module.
Button — “Mode” : set ethernet in different work mode.
Hold on the button until LED color changed. There are 4 status:
a.)Hold on button, when the [yellow and white and blue LED] all is ON, release it, then work mode in “TCP Server” and IP (192.168.1.200) by static mode; (factory reset function)
b.) Hold on button, when the [yellow LED] is ON, release it, then work mode in “TCP Server” mode and IP by DHCP mode;
c.) Hold on button, when the [white LED] is ON, release it, then work mode in “MQTT” mode and IP by DHCP mode;
d.) Hold on button, when the [blue LED] is ON, release it, then work mode in “TCP Client” mode and IP by DHCP mode.
Note: after changed mode, the controller will restart automatically.
The controller default work mode is DHCP and TCP Server mode.
2. How to wire

Terminal (1+ 1-) —- (16+ 16-) are 16 channel output DC 0-10V. they can connect to power driver for DC12v/24v LED strip or AC220V/110V dimmable lamp.
3. Ethernet setting webpage
use Ethernet port to config IP and different work mode by “KinCony-SCAN_Device Tool” for KC868-xB/xBS/Dx” series controller.
Let your KinCony smart controller connect to your router by ethernet cable (CAT5) and your computer also connect with your same router, download “KinCony-SCAN_Device Tool” and unzip file, open “KinCony-SCAN_Device.exe”
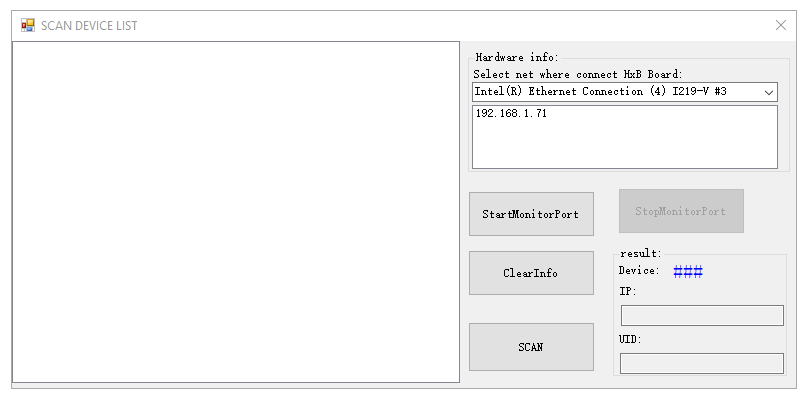
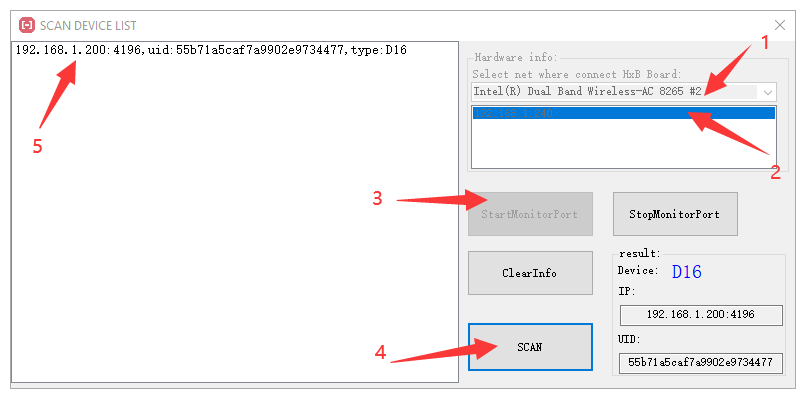
Step1: chose your network device of your computer.
Step2: click your computer IP address.
Step3: click “StartMonitorPort” button.
Step4: click “SCAN” button.
Step5: listed KinCony device’s IP,Port,UID,product type.
Setting details on webpage:
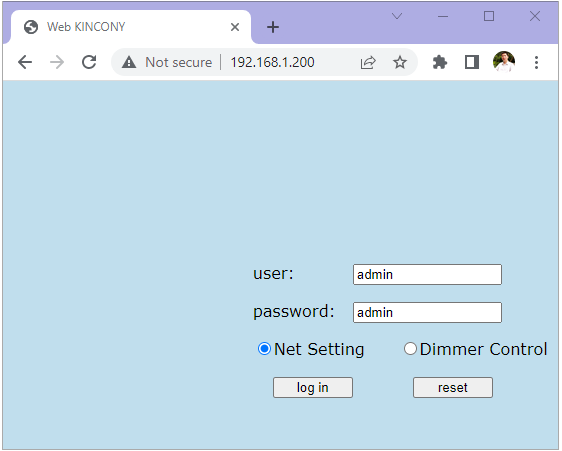
Use your ethernet IP address login by web browser. Default user and password are “admin” “admin”

if chose “dimmer control” option in login webpage. Then you can control 16 channel dimmer by webpage.
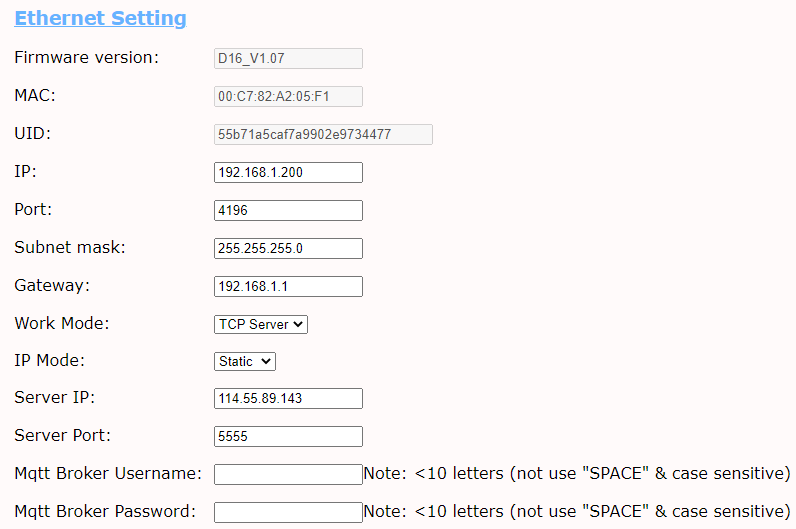
if chose “Net Setting” option in login webpage. Then you can config setting by webpage.
Work Mode:
1- TCP Server: Work in local network without internet.
2- TCP Client: This mode for programmer or developer, controller can connect to your own cloud server by TCP socket connection.
3- MQTT: integrate with third party software by MQTT protocol, such as home assistant or Node-Red or Domoticz.


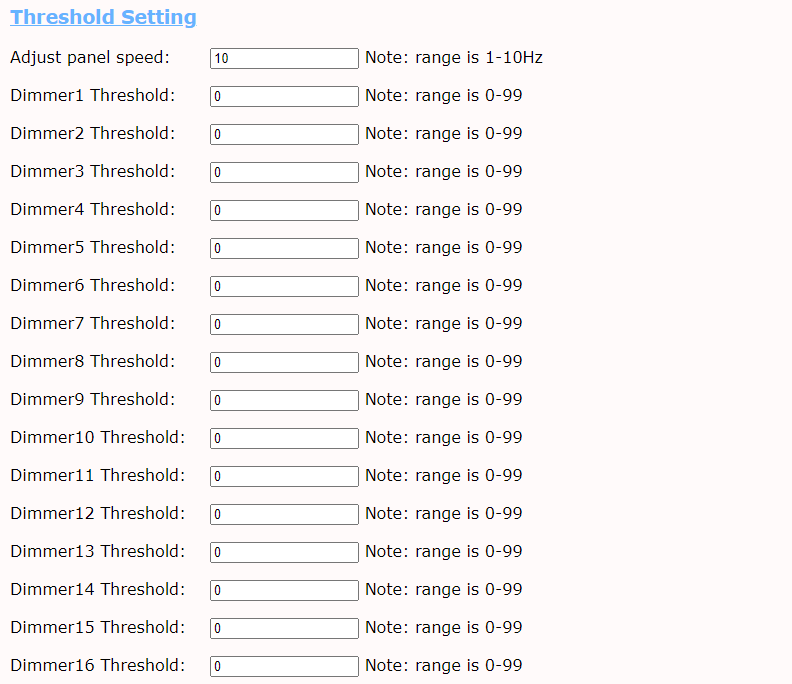
Threshold setting: Adjustment startup percent options for every channel output. sometimes LED SSR driver begin work with 10-20% brightness. Different driver have different threshold.
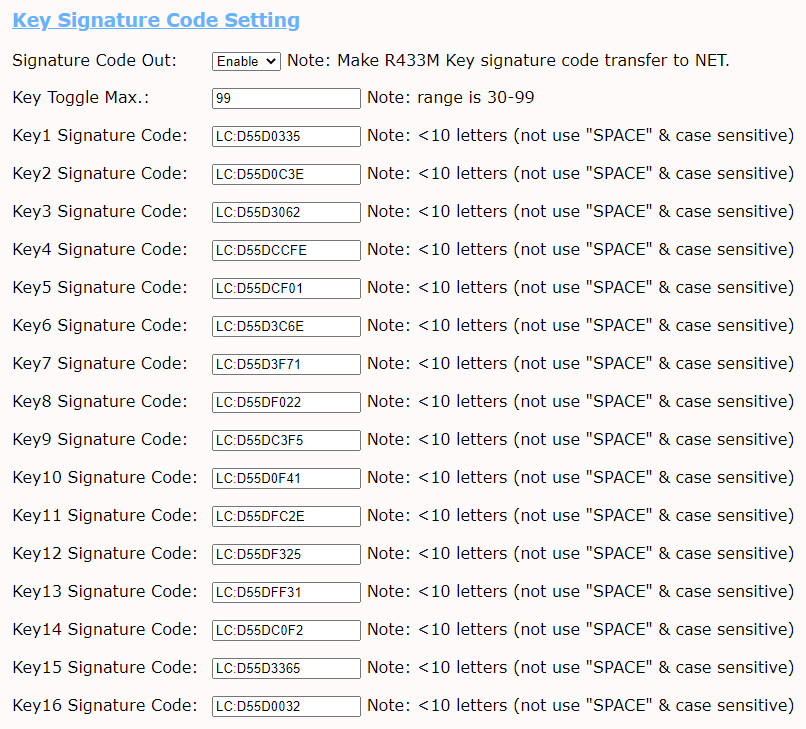
“Signature Code Out” option: enable/disable RF decode key send to tcp network.
“Key Toggle Max.” option: set the switch button or remote’s button when turn ON lamp for the MAX brightness value. If set to “50”, when turn ON lamp, the brightness will at 50%, not 99%.

Login Password is set for “LOGIN” webpage use.
Post Password is set for http command protocol use.
4. How to use manual control switch panel
K1—-K16 are input ports for dry contact switch buttons.
K1 control output1, K2 control output2, K3 control output3, …… K16 control output16
you just use “Kx” and “KCOM” for one button
for example:
if you want to control 6 channel LED, so total will use K1,K2,K3,K4,K5,K6,KCOM = 7 wires.
if you want to control 4 channel LED, so total will use K1,K2,K3,K4,KCOM = 5 wires.
if you want to control 2 channel LED, so total will use K1,K2,KCOM = 3 wires.
wire distance between KC868-D16 smart controller and switch button MAX support 1000 meter.
“HOLD ON” button : the output1 brightness will increase brightness until to 99% –> 0% –>99% –>0% –>99% always loop.
“SHORT CLICK” button : if your lamp is ON (1%–99%), then will be turn OFF. If your lamp is OFF (0%) , then will be turn ON (set to last time brightness have saved on memory).
5. How to use remote control
KC868-D16 support RF433MHz remoter pair function. It can learn RF signal from any remoter (use by 433MHz 1527 or 2262 wireless code) . On the KC868-D16 have a small RED RF receiver module, when it received remote’s signal , blue LED will blink.
There are two pair RF remote ways, you can chose any way to pair your remote:
a. Set remote by PCB buttons
1. Quick click “Mode” button 3 times, Buzzer beep for 2 seconds, begin enter signal learning mode. “learning mode” valid within 15 seconds
2. If you want to learn for “K1”, just short “K1” and “KCOM” (hold on the switch button “K1”), note: not release your finger.
3. Press remote’s any button that you want to pair. If pair successfully, will beep for 2 times. Then you can release your finger.
4. { Begin loop for pair other buttons. Such as if you want to learn for “K2”, just short “K2” and “KCOM” (hold on the switch button “K2”), note: not release your finger.
5. Press remote’s any button that you want to pair. If pair successfully, will beep for 2 times. Then you can release your finger. }
6. Loop step4-5 for pair all 16 buttons.
7. Release your finger, after 15 seconds, beep for 4 times, exit “learning mode”
b. Set remote by PC software
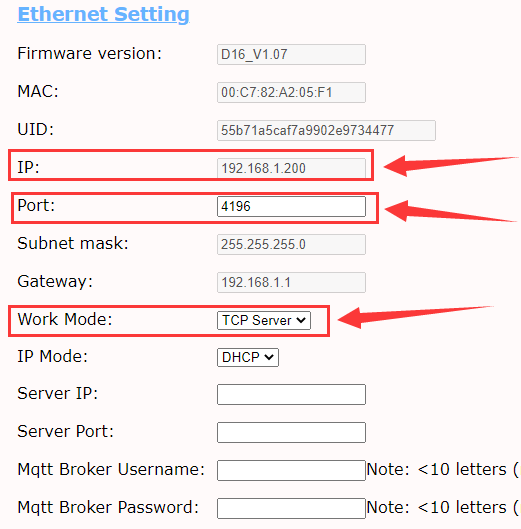
Login KC868-D16 ethernet setting, set work mode=”TCP Server”
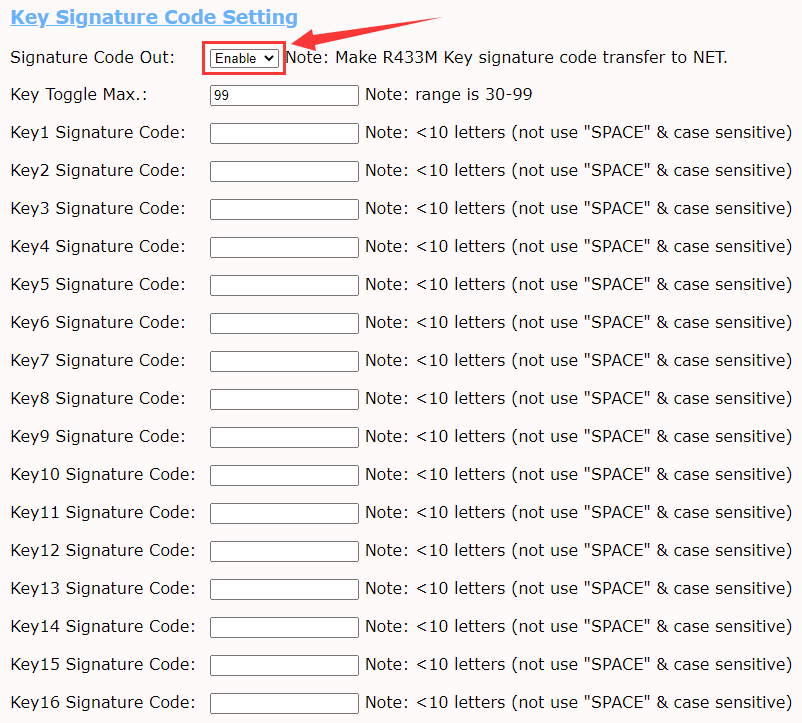
Make sure enable “Signature Code Out” option.
Open KC868-D16 dubug tool:
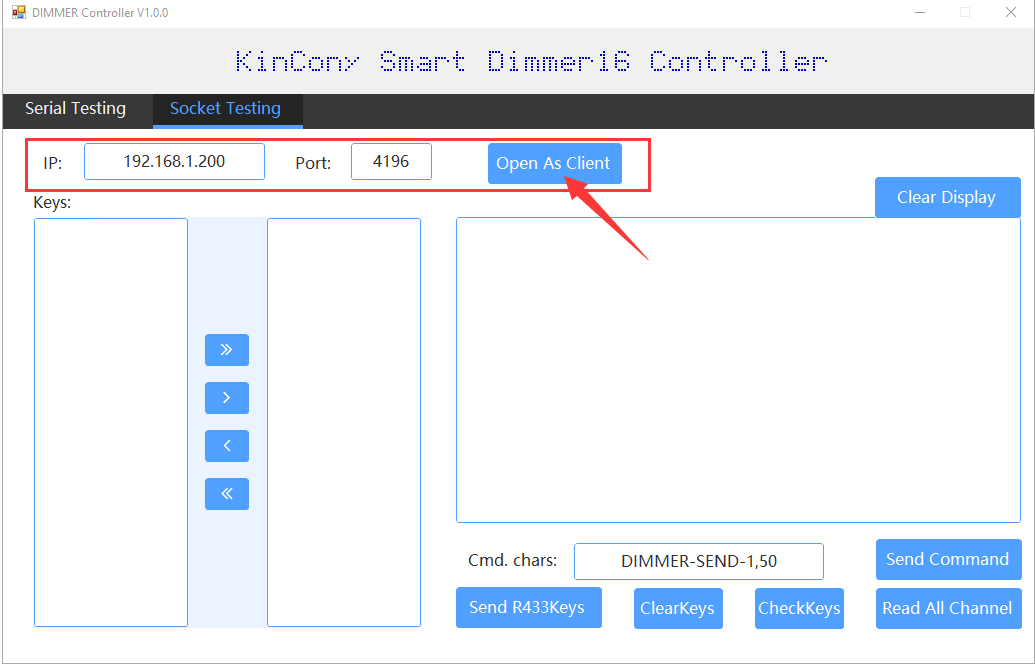
Fill IP and Port, click “Open As Client” button
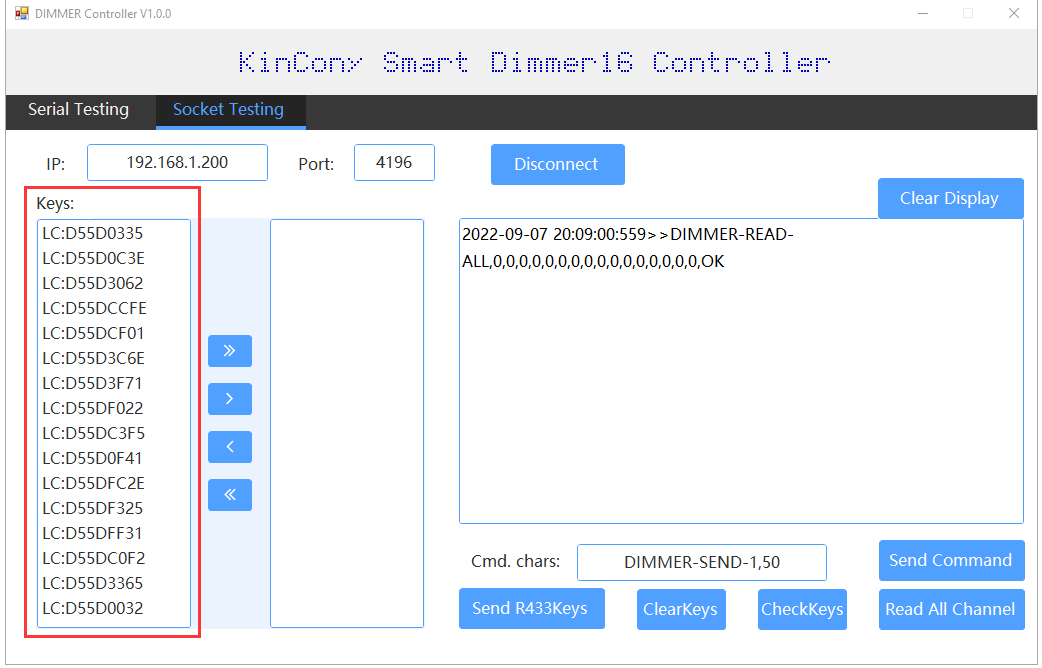
Press your remote’s button, total can learn 16 channel buttons. After every time you pressed remote’s button, the Keys will list on the window.
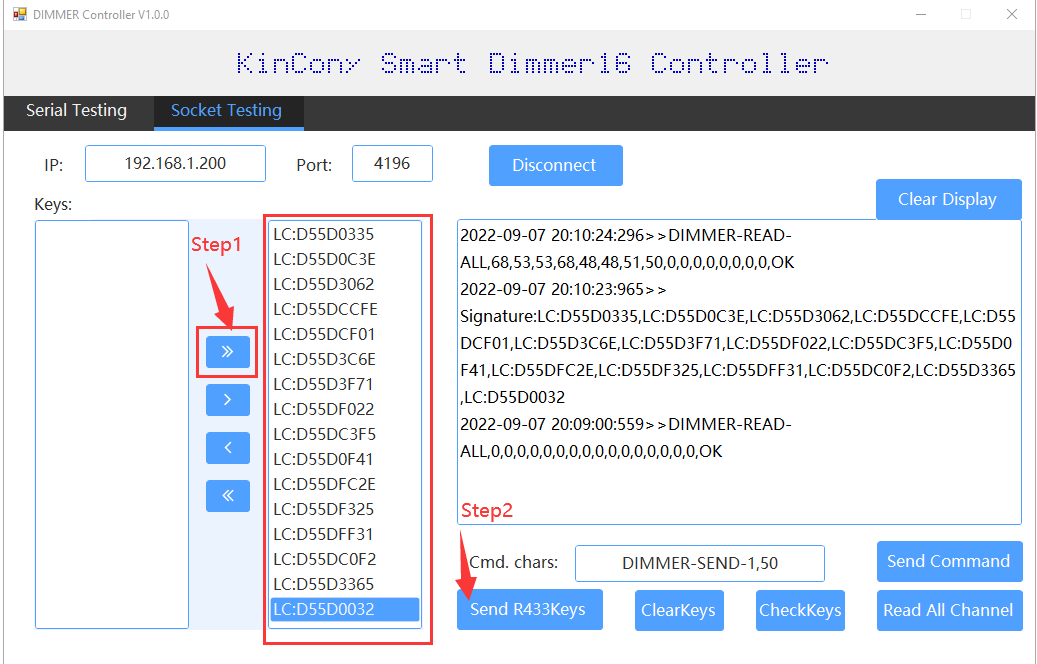
Click “Select All” button, select all Keys, then click “Send R433Keys” save all buttons’ key to KC868-D16.
After saved, you can “refresh” your webpage, then you will see all 16 keys have been saved to KC868-D16
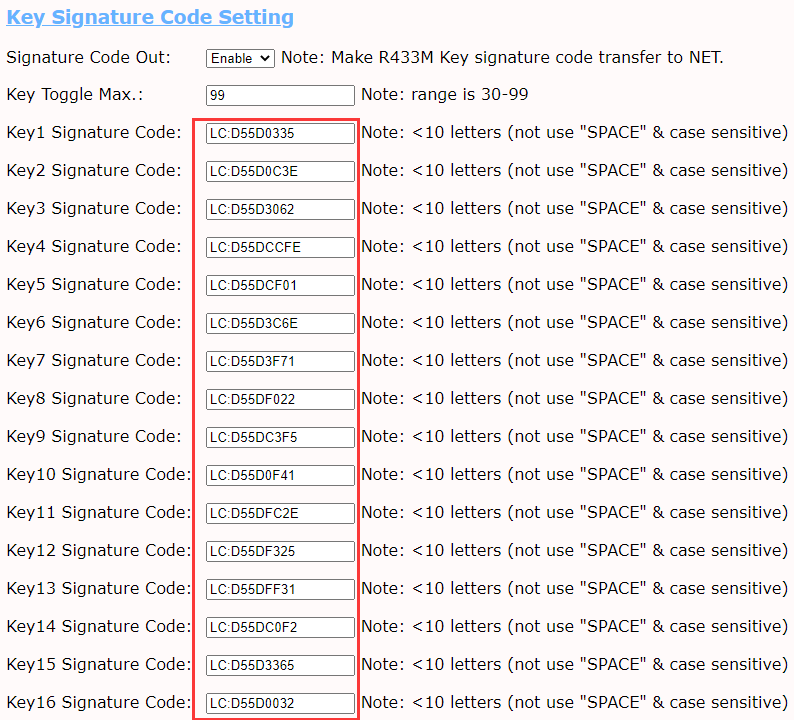
Now you can use your remote to control all lamps ON/OFF.
6. How to use TUYA phone app
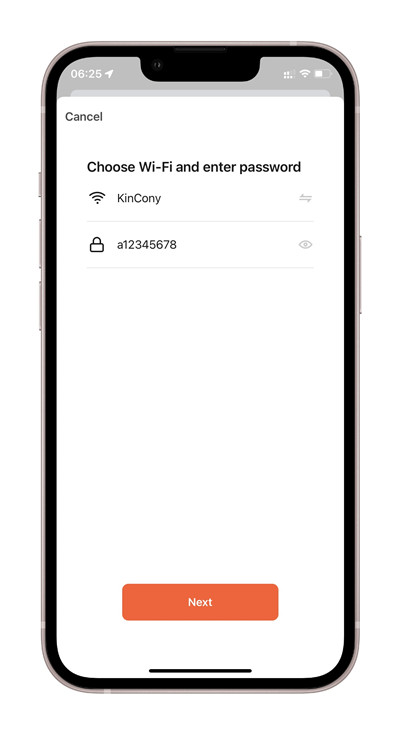
Your smart phone or tablet has connected to a 2.4G WiFi with internet.
You need to enable Bluetooth of the phone.
You have the correct router’s WiFi password.
You smart phone or tablet must have access to APP store or Goolge play store.
You router is MAC-open.
You can download the App by searching “Tuya Smart” in mobile phone app stores or scanning the following QR code.
Register an Tuya Smart account. if you already have Tuya Smart account, just login with your username and password.
Reset KC868-D16 firstly:
power on of KC868-D16
hold on “RESET” button until blue LED-“D6” fast blinking.
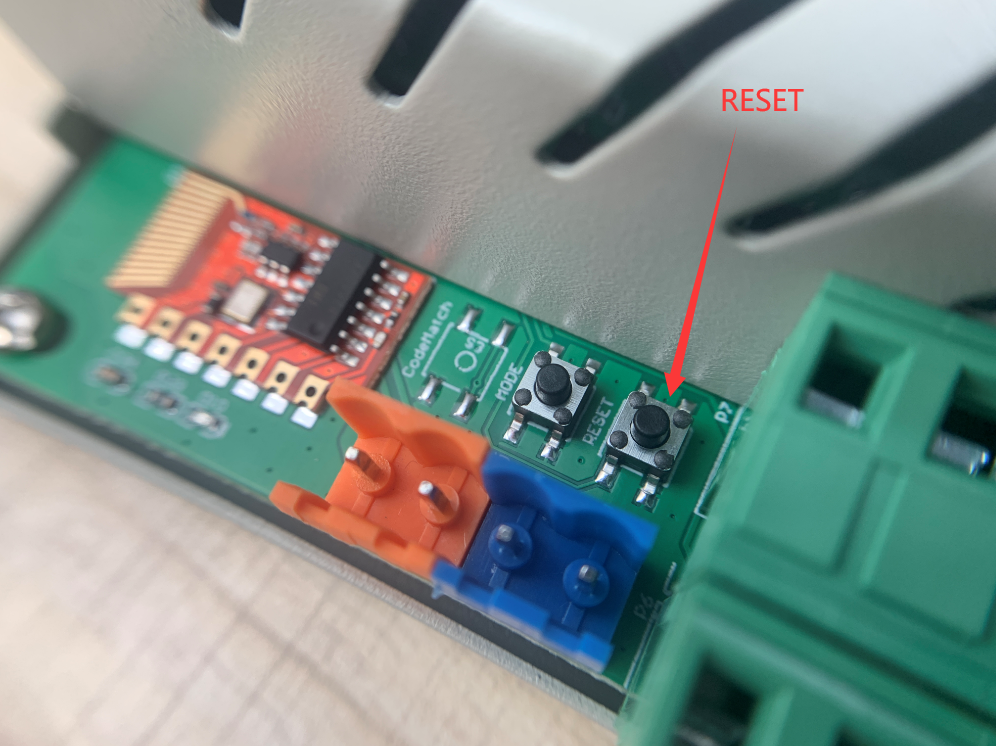
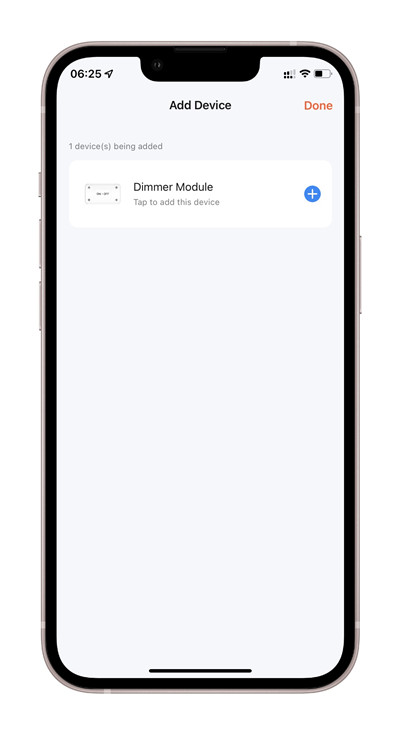
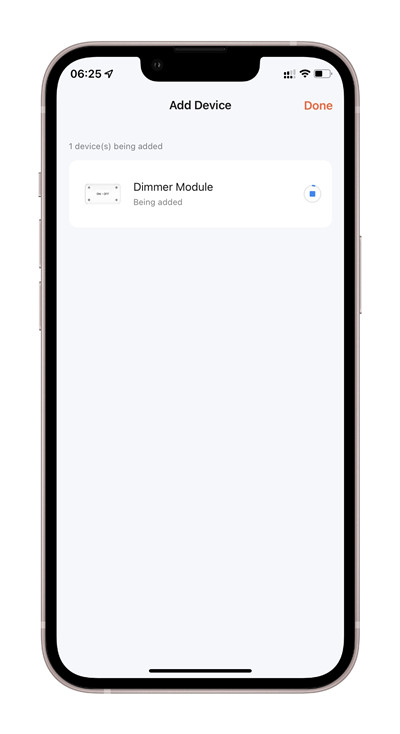
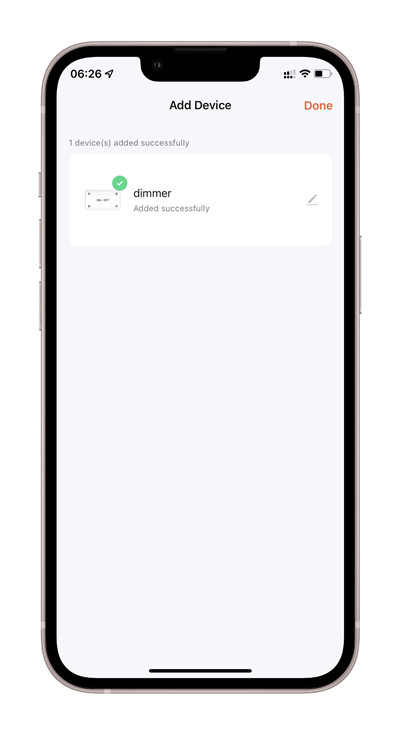
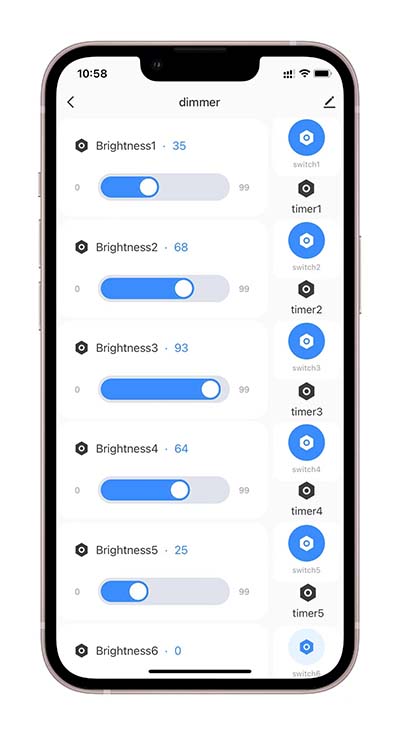
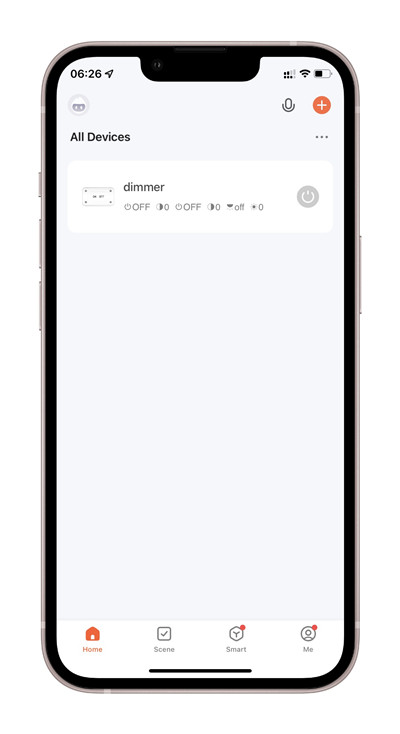
open Tuya App, you will see found “Dimmer Module”, or click “Add device” to scan device.

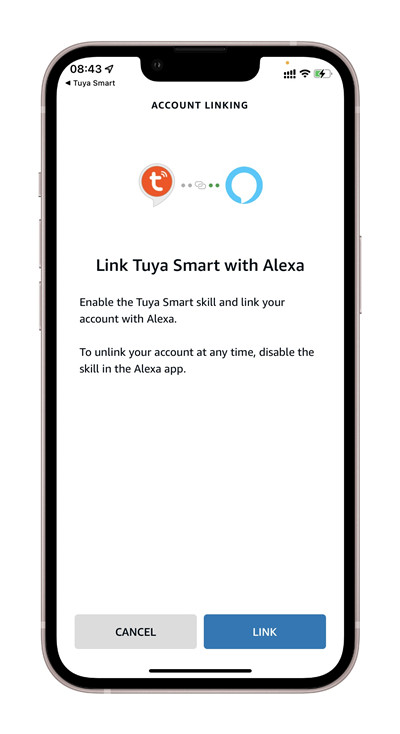
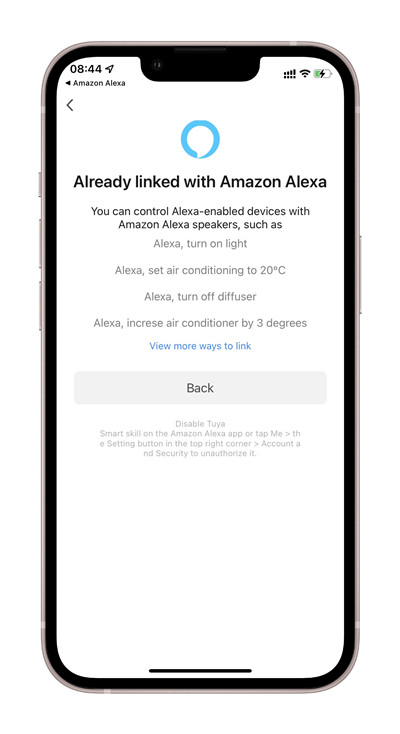
7. How to voice control by Amazon Alexa speaker
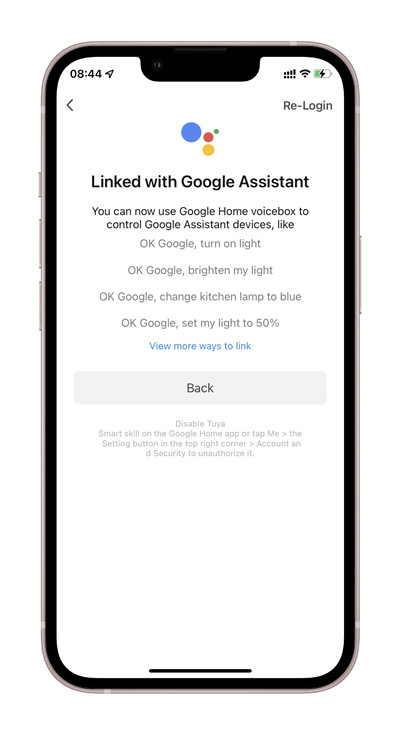
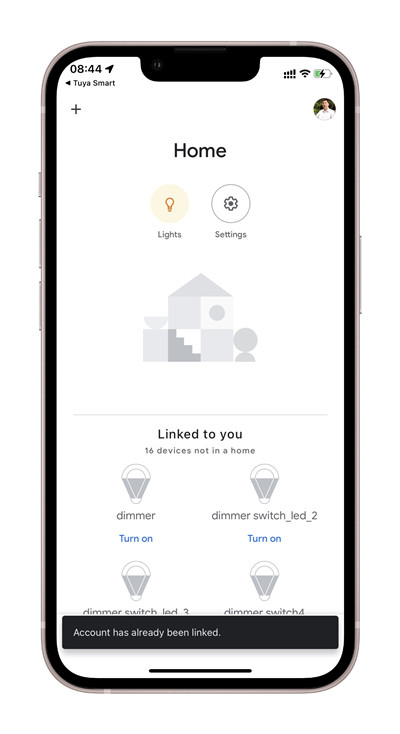
8. How to voice control by Google home speaker
9. Protocol document for integration
KC868-D16 support integrate to your own software by HTTP, MQTT, TCP, RS485

