1. Hardware interface
2. How to wire
3. Ethernet setting webpage
4. How to use TUYA phone app
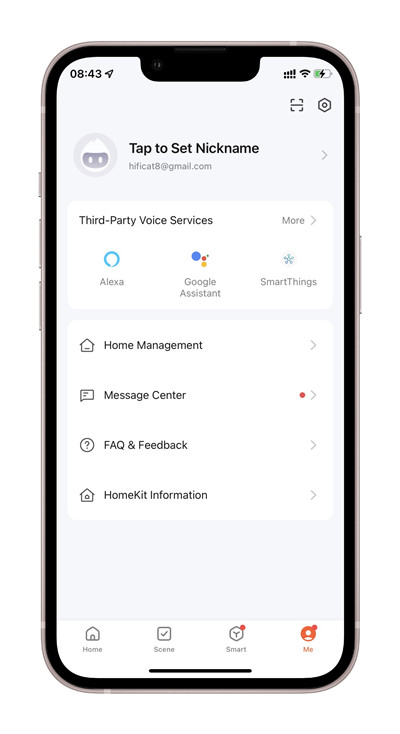
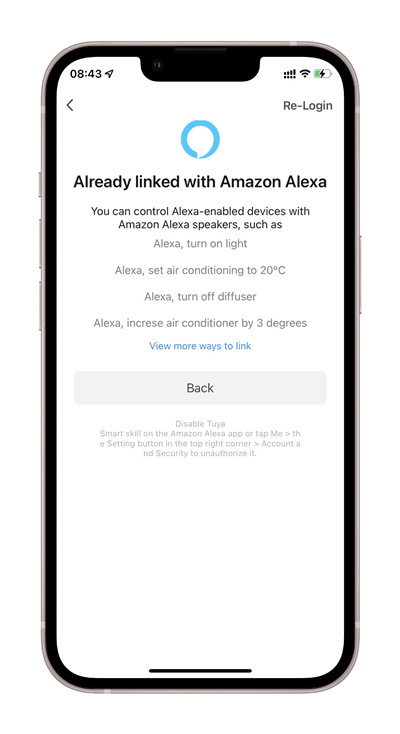
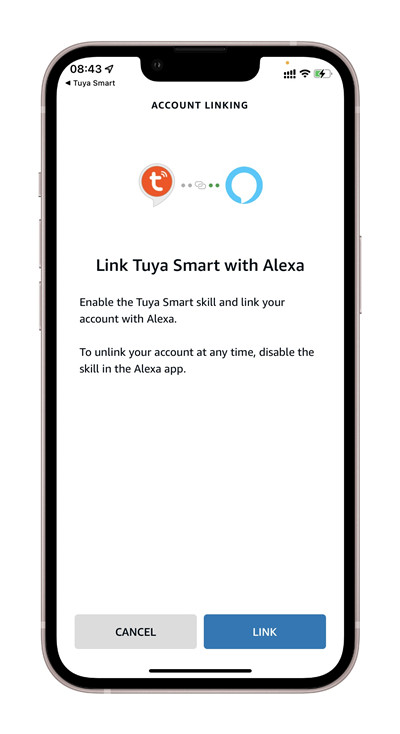
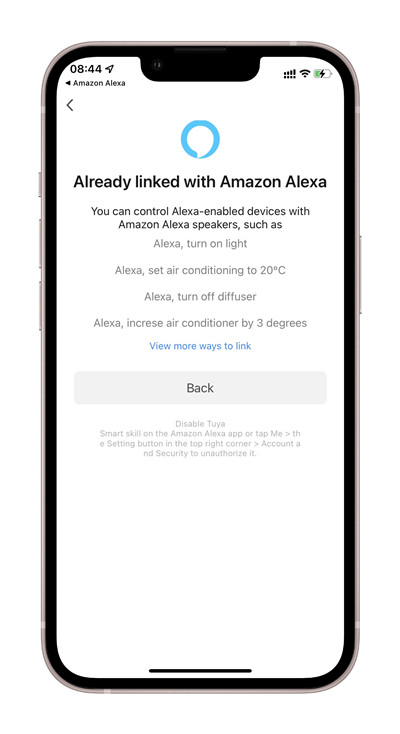
5. How to voice control by Amazon Alexa speaker
6. How to voice control by Google home speaker
7. How to use Apple Homekit or enable development mode of ESP32
8. Protocol document for integration
9. How to use “arduino library” for KC868-H32B Pro
1. Hardware interface
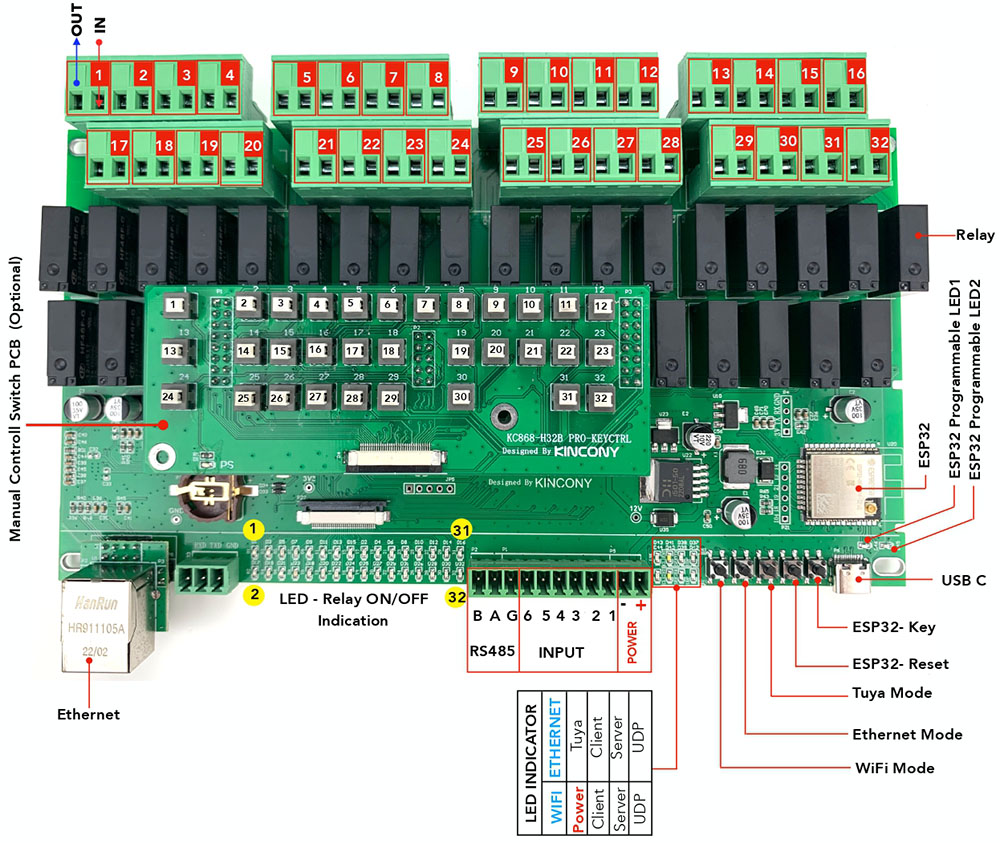
Power supply: use DC 12V
“Tuya”: green color
TUYA network: fast blink means ready to pair with phone app. always on means connected to tuya cloud server
Ethernet – “Client”: white color
when ethernet using “TCP Client” mode
Ethernet – “Server”: yellow color
when ethernet using “TCP Server” mode
Ethernet – “UDP”: blue color
when ethernet using “UDP” mode
Power – red color
WiFi – “Client” white color
when WiFi using “TCP Client” mode
WiFi – “Server”: yellow color
When WiFi using “TCP Server” mode
WiFi – “UDP”: blue color
when WiFi using “UDP” mode
ESP32 programmable LED1: green color (ESP32 GPIO22)
ESP32 programmable LED2: red color (ESP32 GPIO23)
what’s UDP , TCP Server, TCP Client means:
When set to “UDP” and set the cloud server IP and port, controller will auto connect to KinCony’s Cloud server. Then you can use “KinCony Smart Home” phone app for remote control relay.
When set to “TCP Server”, controller own is a server work in local network ,you can use “KBOX” phone app without internet and our cloud server to control relay in local network.just your mobile phone or PC and controller connect with same router.
………………..
When set to “TCP Client” and set the server IP and port, controller will auto connect to your own server (not KinCony’s cloud server), you can write program for server and make your own phone app to use, this for developer to use.
what’s buttons function:
Button1 “WiFi Mode” : change WiFi work mode for UDP->TCP Server->TCP Client.
Button2 “Ethernet Mode” : change ethernet work mode for UDP->TCP Server->TCP Client.
Button3 “Tuya Mode”: reset TUYA WiFi module.
Button4: “ESP32 Reset”: reset ESP32 module, when using “ESP32 developemnt mode”
Button5: “ESP32-key”: button for ESP32 GPIO0, when using “ESP32 developemnt mode”
How to use buttons:
Button1 “WiFi Mode” :
Hold on the button until LED color changed. There are 3 status:
a.) Hold on button, when the [yellow LED] is ON, release it, then work mode in “TCP server” mode;
b.) Hold on button, when the [white LED] is ON, release it, then work mode in “TCP Client” mode;
c.) Hold on button, when the [blue LED] is ON, release it, then work mode in “UDP” mode;
Note: after changed mode, the controller will restart automatically.
The controller default work mode is DHCP and UDP mode.
Button2 “Ethernet Mode” :
Hold on the button until LED color changed. There are 5 status:
a.) Hold on button, when the [yellow LED] is ON, release it, then work mode in “TCP server” mode;
b.) Hold on button, when the [white LED] is ON, release it, then work mode in “TCP Client” mode;
c.) Hold on button, when the [blue LED] is ON, release it, then work mode in “UDP” mode;
d.) Hold on button, when the [yellow and white LED] all is ON, release it, then work mode in “UDP” and IP by DHCP mode;
e.) Hold on button, when the [yellow and white and blue LED] all is ON, release it, then work mode in “TCP Server” and IP (192.168.1.200) by static mode;
Note: after changed mode, the controller will restart automatically.
The controller default work mode is DHCP and UDP mode.
2. How to wire
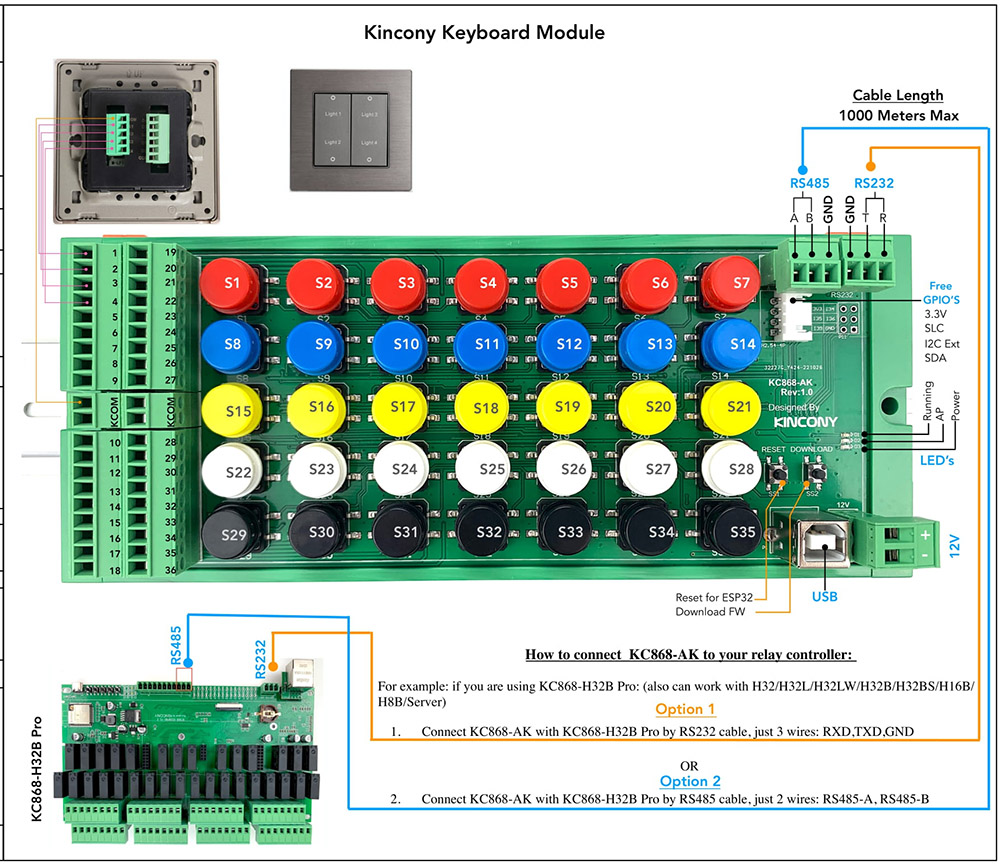
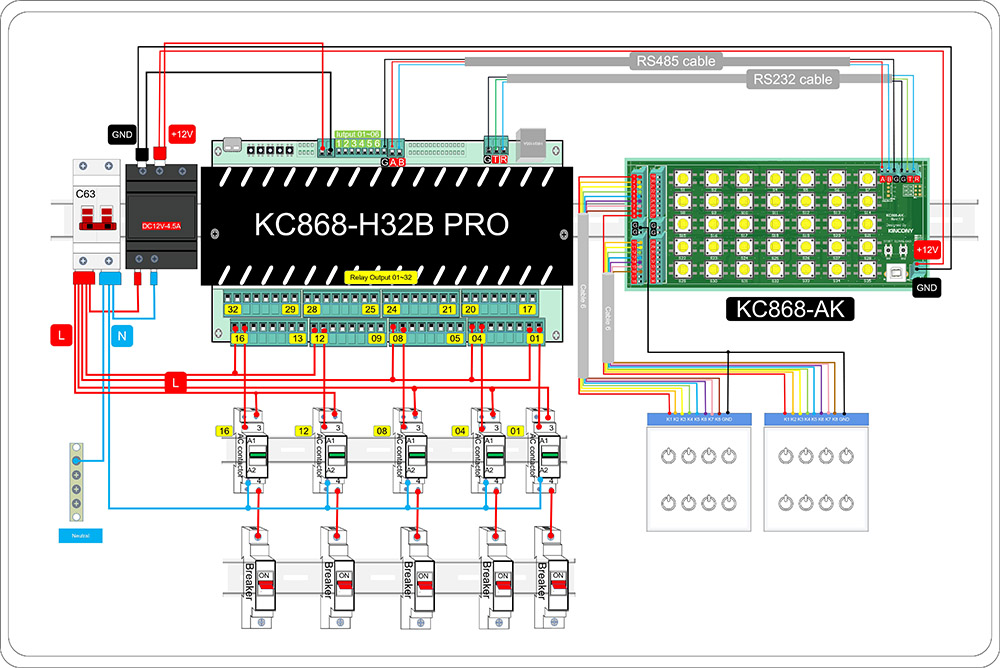
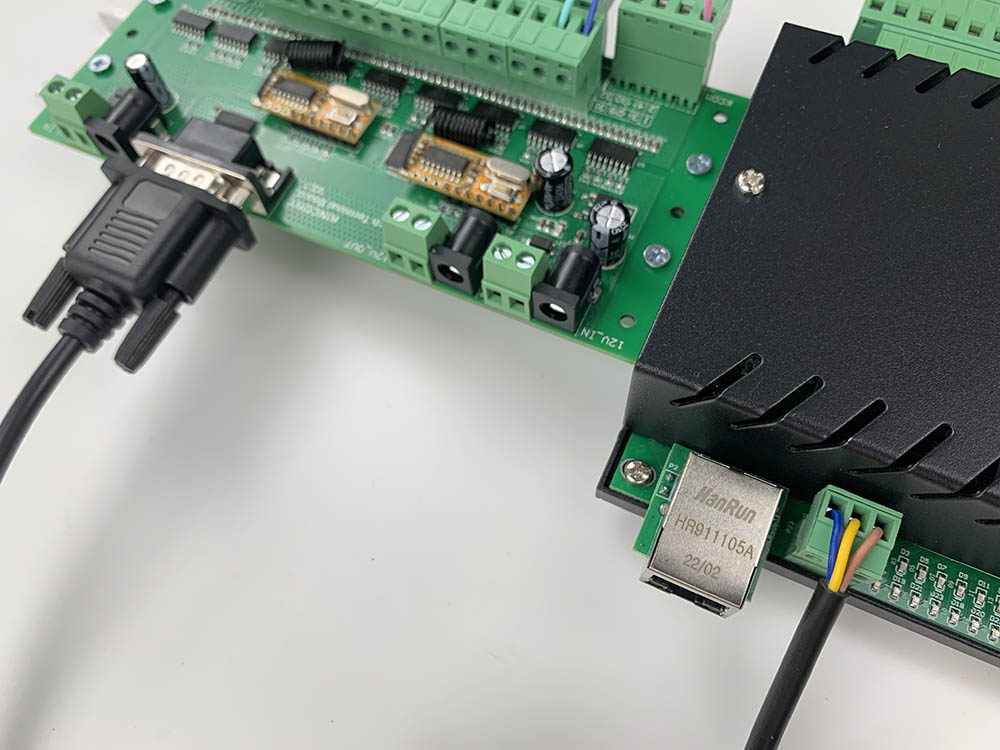
a. KC868-H32B Pro work with KC868-AK (keyboard module)
You can use 1-35 buttons for defined actions (ON/OFF/TOGGLE).
You can use 1-36 terminal ports with extend momentary wall switch, extend cable MAX 1000 meter.
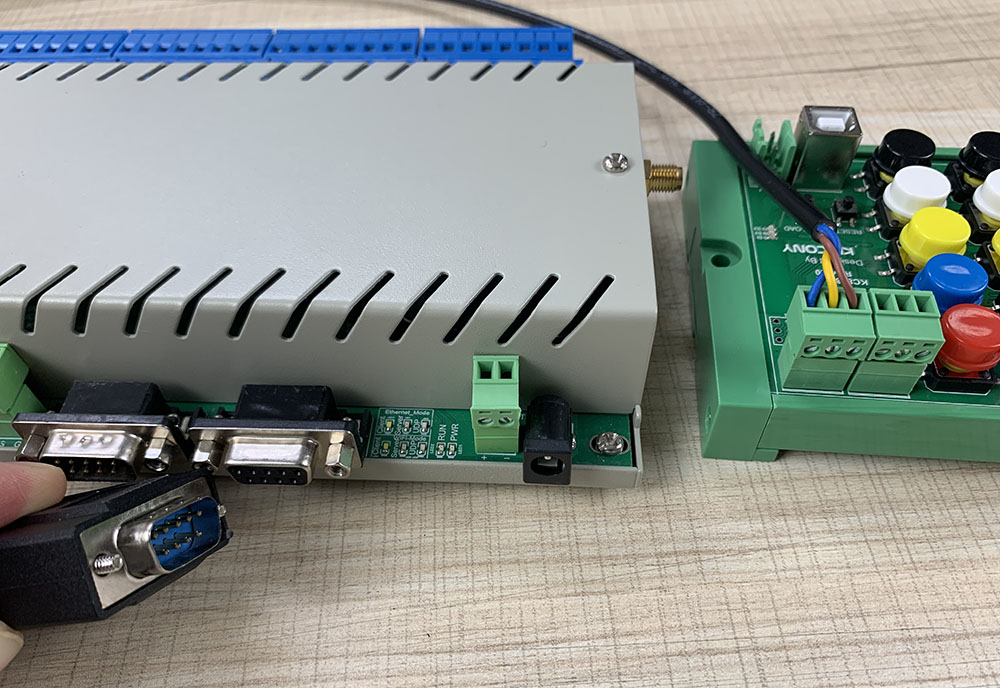
Connect with relay controller by RS232 or RS485 cable.
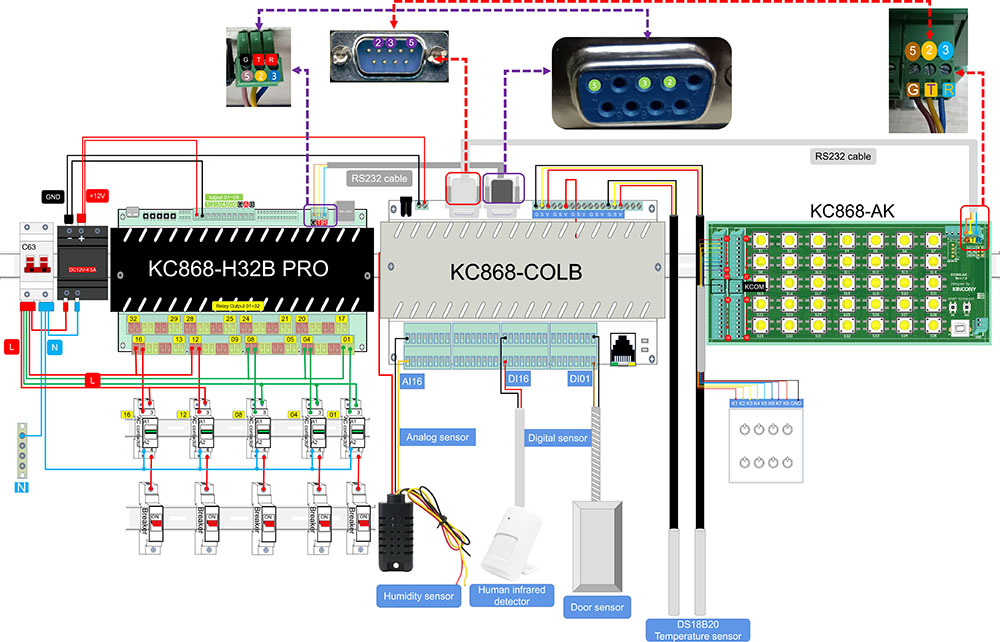
here is typical case KC868-AK work with KC868-H32B Pro smart relay controller and contact diagram:
how to use KC868-AK programmable keyboard see details
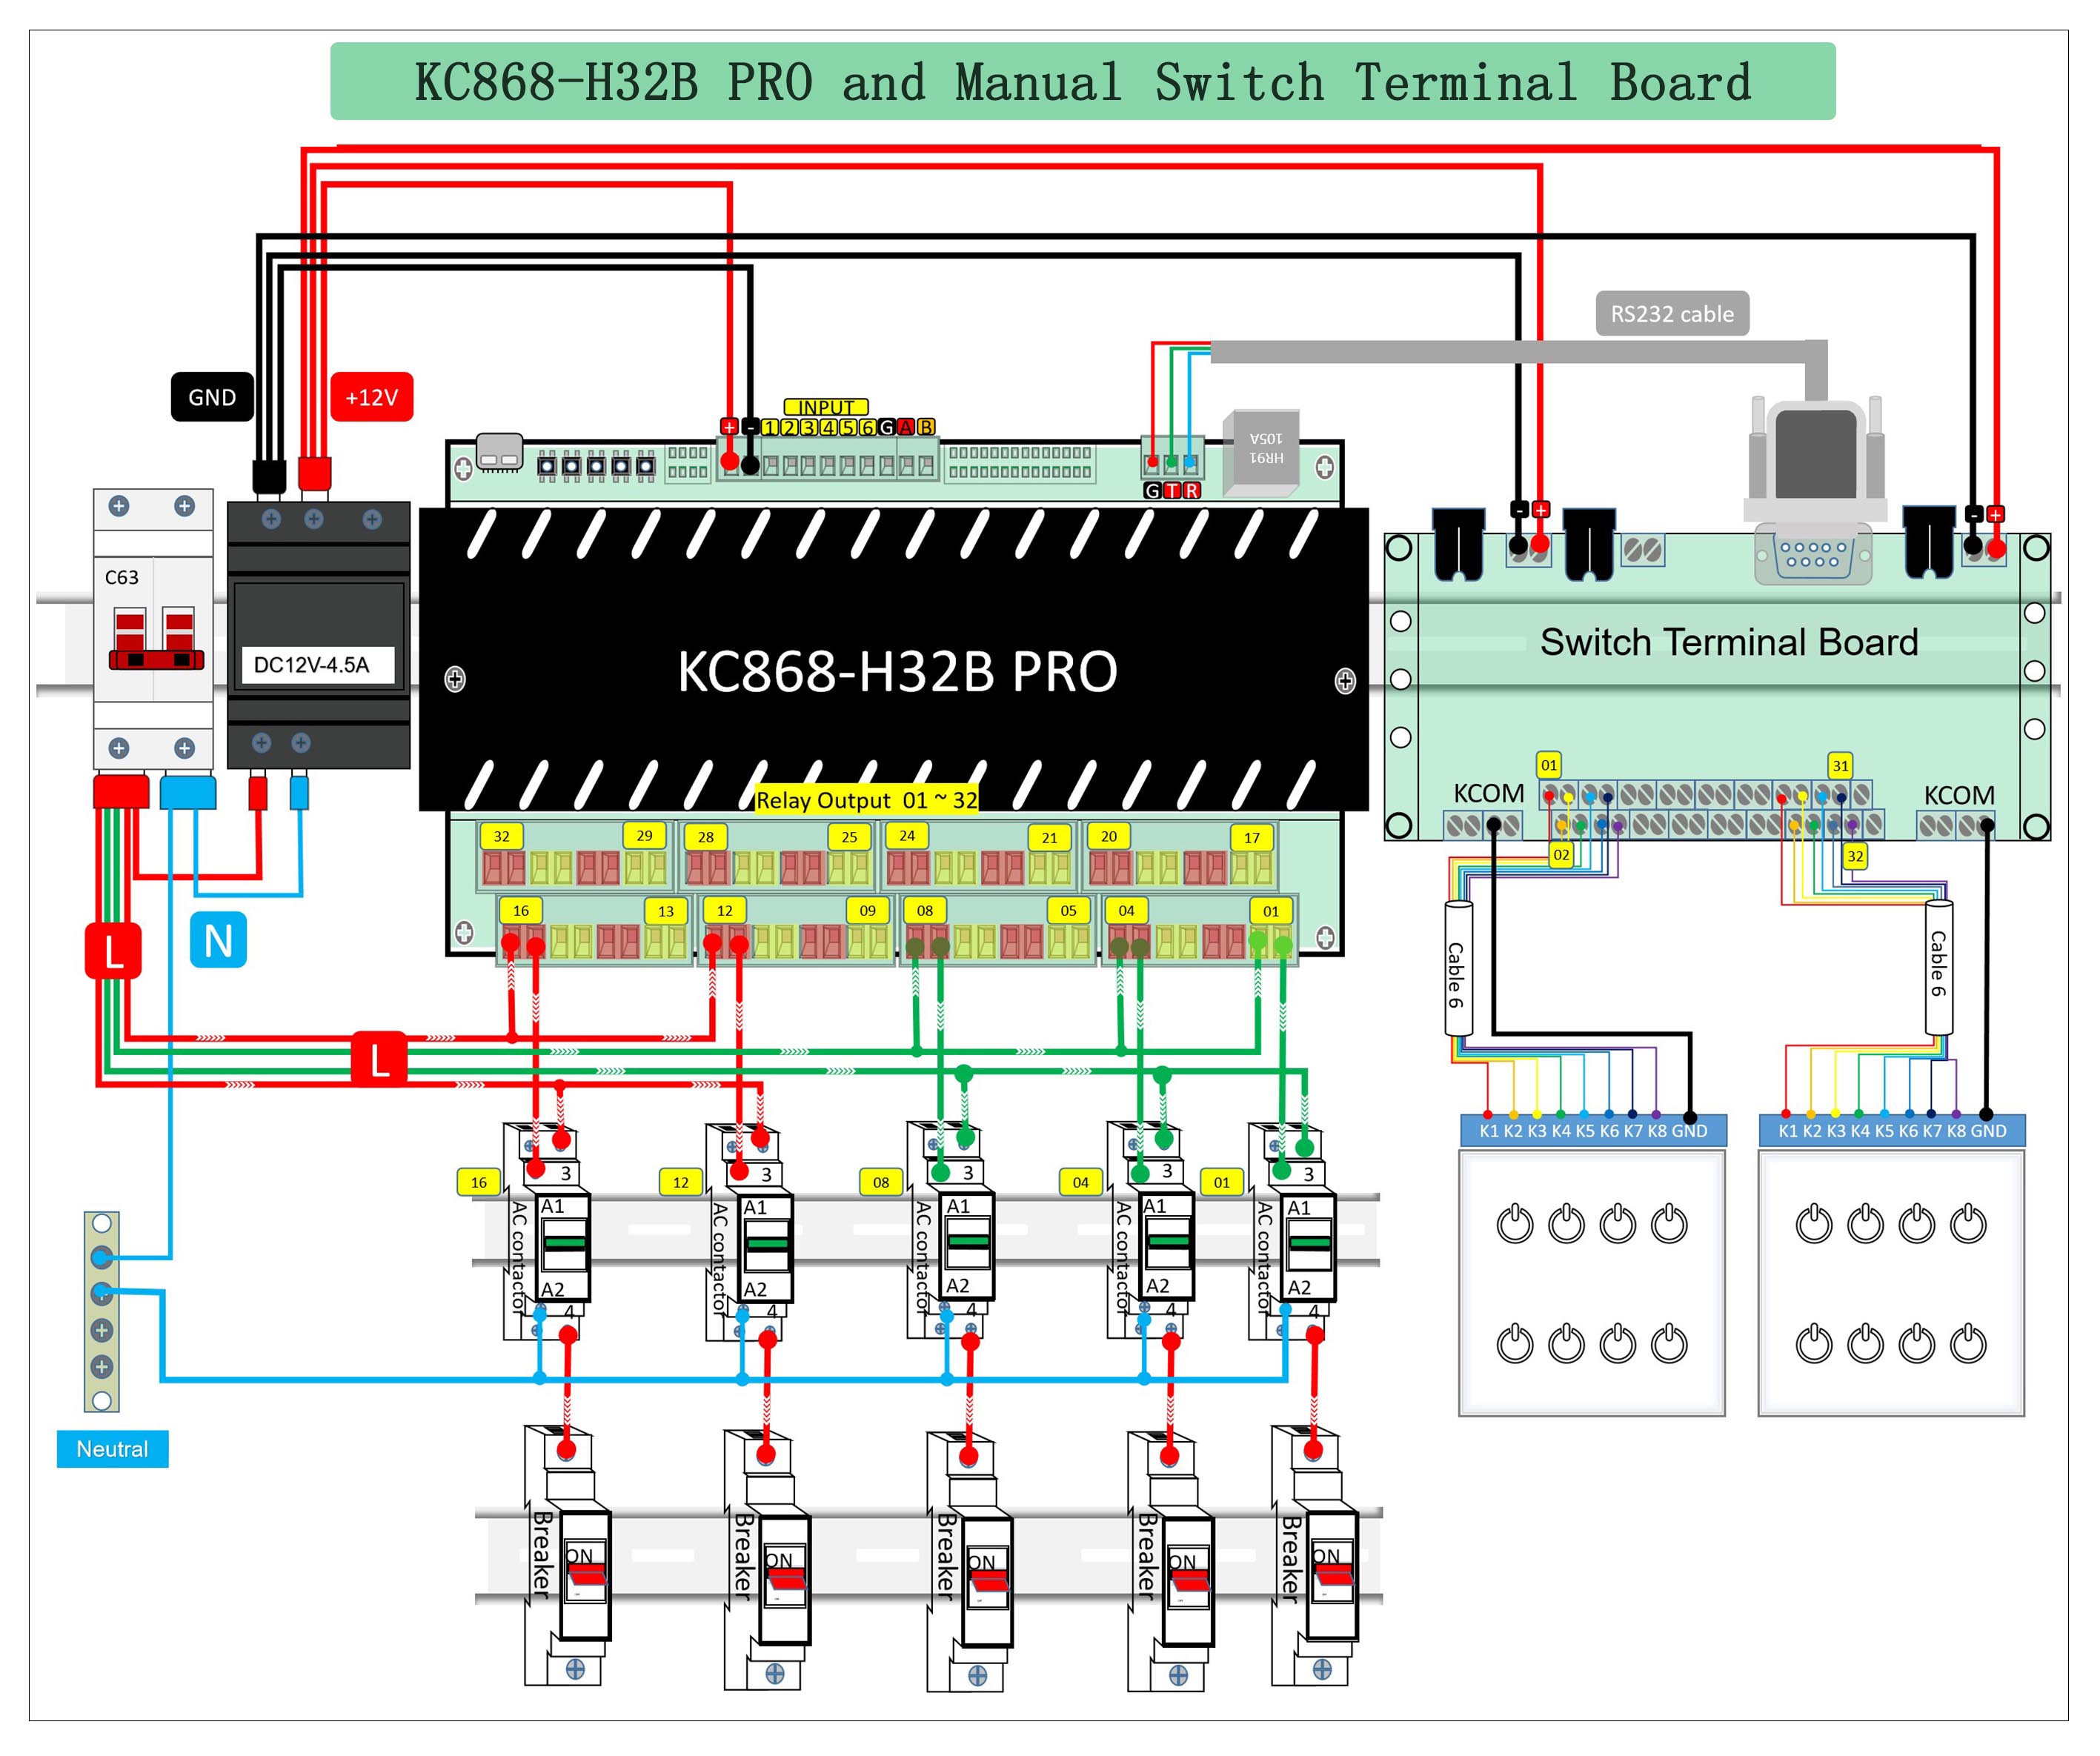
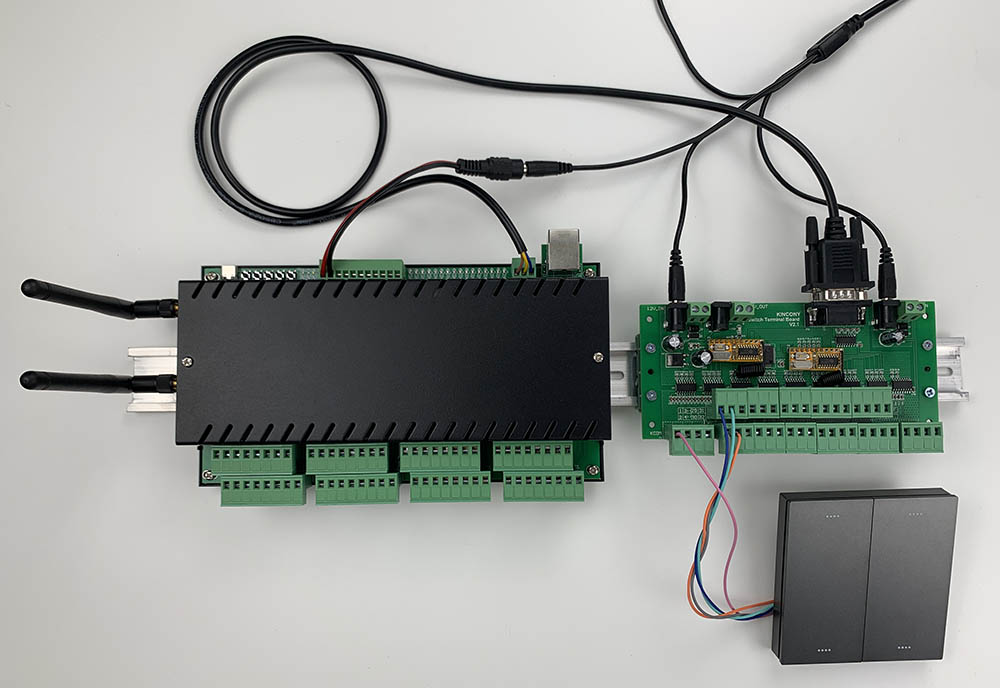
b. KC868-H32B Pro work with switch terminal board
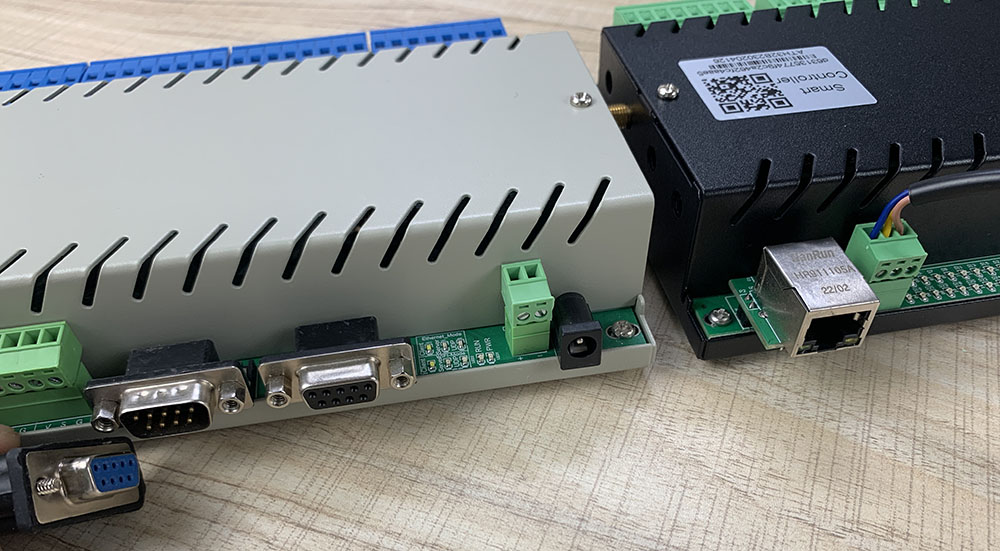
how to wire with RS232 cable, just use RXD,TXD,GND of RS232.
c. KC868-H32B Pro work with switch terminal board and KC868-COLB logical controller
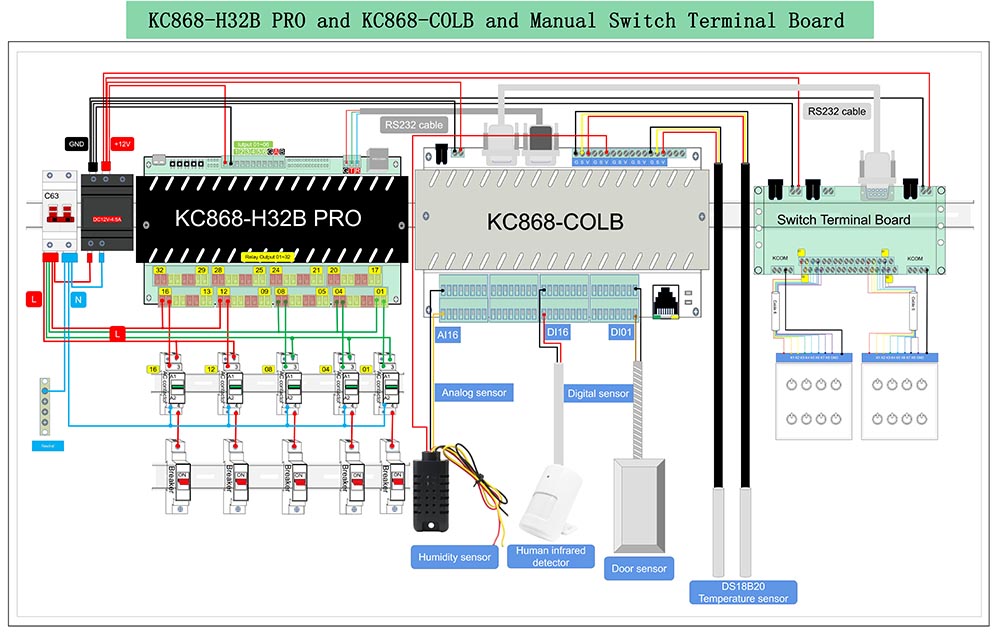
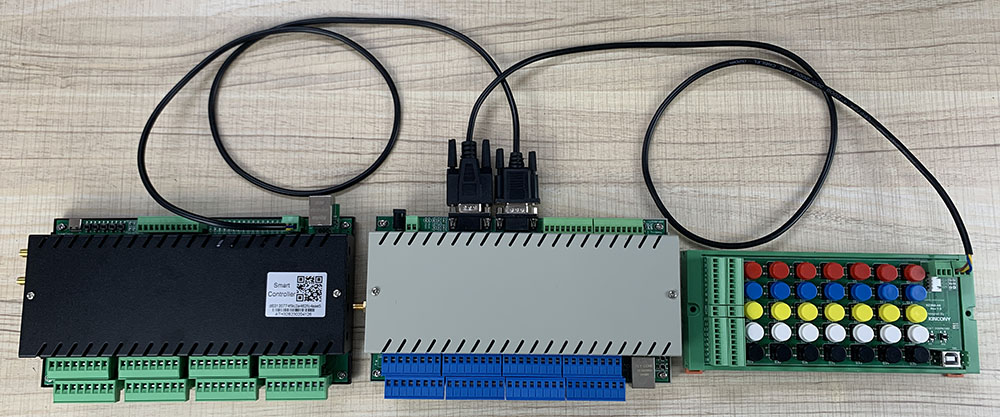
d. KC868-H32B Pro work with KC868-AK and KC868-COLB logical controller
3. Ethernet setting webpage
use Ethernet port to config IP and different work mode by “KinCony-SCAN_Device Tool” for KC868-xB/xBS/Dx” series controller.
Let your KinCony smart controller connect to your router by ethernet cable (CAT5) and your computer also connect with your same router, download “KinCony-SCAN_Device Tool” and unzip file, open “KinCony-SCAN_Device.exe”
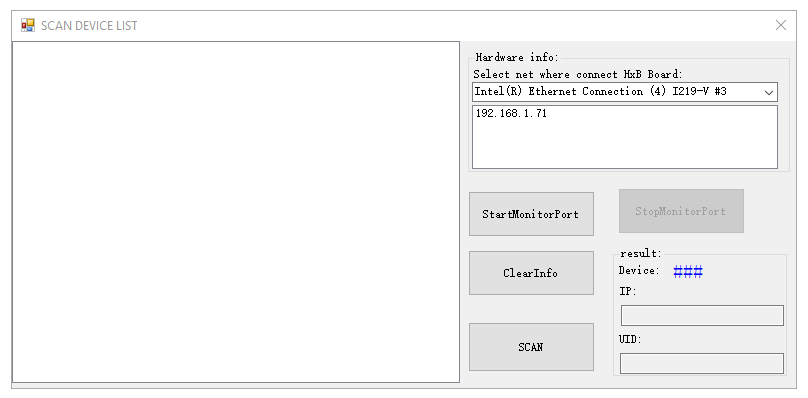
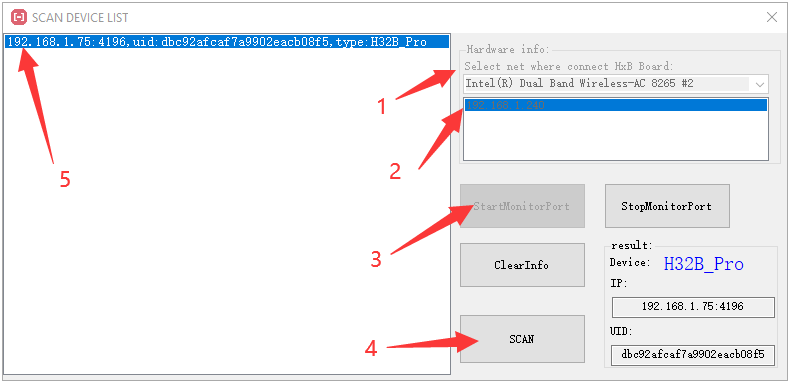
Step1: chose your network device of your computer.
Step2: click your computer IP address.
Step3: click “StartMonitorPort” button.
Step4: click “SCAN” button.
Step5: listed KinCony device’s IP,Port,UID,product type.
Setting details on webpage:
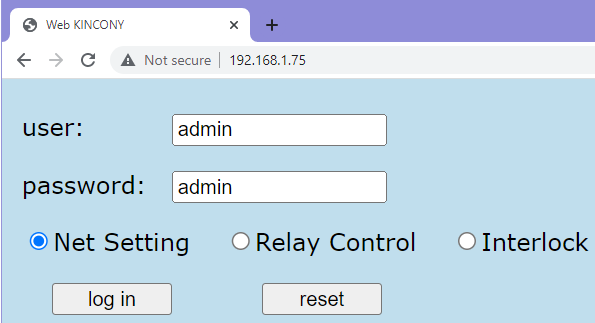
Use your ethernet IP address login by web browser. Default user and password are “admin” “admin”
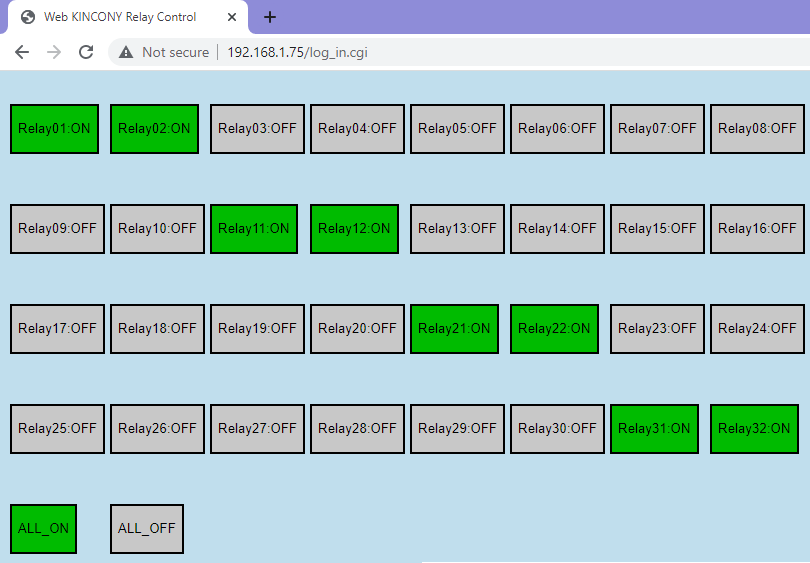
if chose “Relay control” option in login webpage. Then you can control 32 channel relays by webpage.

if chose “Net Setting” option in login webpage. Then you can config setting by webpage.
Work Mode:
1- TCP Server: Work in local network without internet.
2- TCP Client: This mode for programmer or developer, controller can connect to your own cloud server by TCP socket connection.
3- MQTT: integrate with third party software by MQTT protocol, such as home assistant or Node-Red or Domoticz.
4- UDP: connect to KinCony’s cloud server by internet, use “kincony smart home ” mobile phone application.
ESP32 development mode:
Disable: use ESP32 wifi module as AT command for controller, use for TCP/UDP/MQTT work mode.
Enable: DIYer can write any arduino code download to ESP32, find example code when install kincony arduino library.
Post password:
When use HTTP command have a password in the command string.
RS485 Type:
Modbus RTU: Controller work as “SLAVE” by modbus protocol.
Special Slave: Work with KinCony “RS485 Switch Panel Adapter”.
Relay Setting:
Reverse:
“checked” —- when turn ON relay1 by application, relay1 will OFF.
—- when turn OFF relay1 by application, relay1 will ON.
“unchecked” —- when turn ON relay1 by application, relay1 will ON.
—- when turn OFF relay1 by application, relay1 will OFF.
Momentary:
“checked” when turn ON relay, relay will auto OFF after some seconds (have preset).
“unchecked” when turn ON relay, relay will always ON until you turn OFF relay.
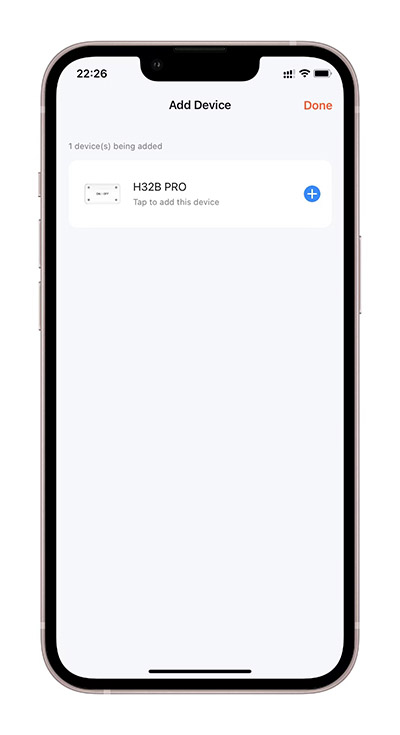
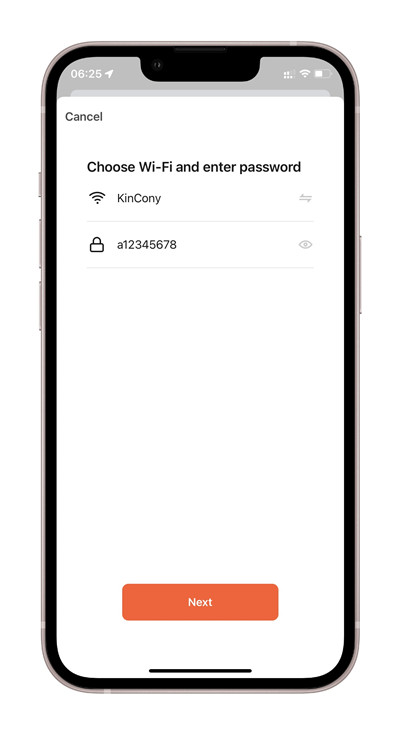
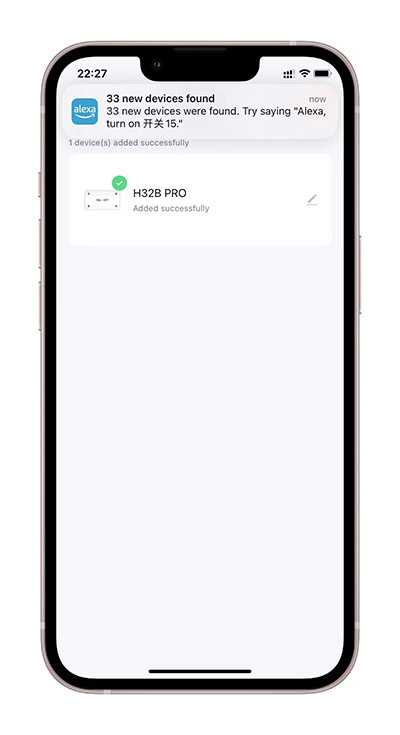
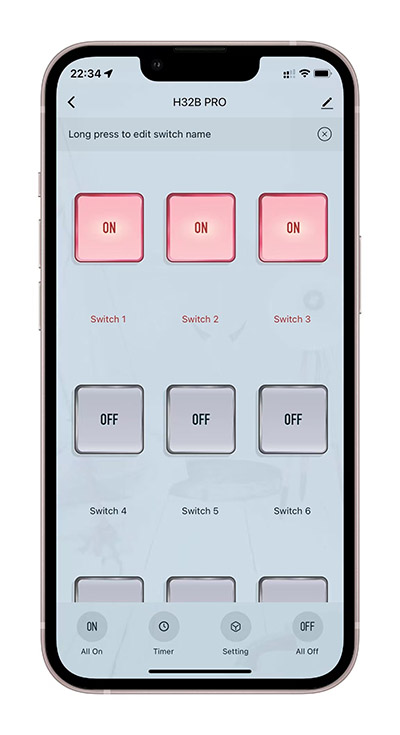
4.How to use TUYA phone app
Your smart phone or tablet has connected to a 2.4G WiFi with internet.
You need to enable Bluetooth of the phone.
You have the correct router’s WiFi password.
You smart phone or tablet must have access to APP store or Goolge play store.
You router is MAC-open.

You can download the App by searching “Tuya Smart” in mobile phone app stores or scanning the following QR code.
Register an Tuya Smart account. if you already have Tuya Smart account, just login with your username and password.
Reset KC868-H32B Pro :
power on of KC868-H32B Pro
hold on “Tuya Mode” button until Green LED fast blinking.
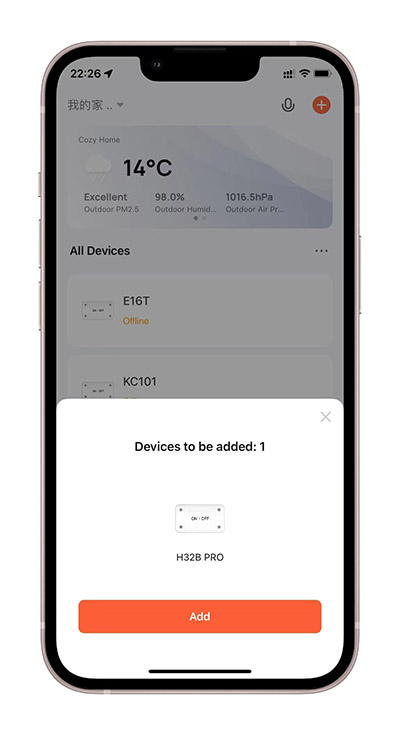
open Tuya App, you will see found “H32B PRO”, or click “Add device” to scan device.
5. How to voice control by Amazon Alexa speaker
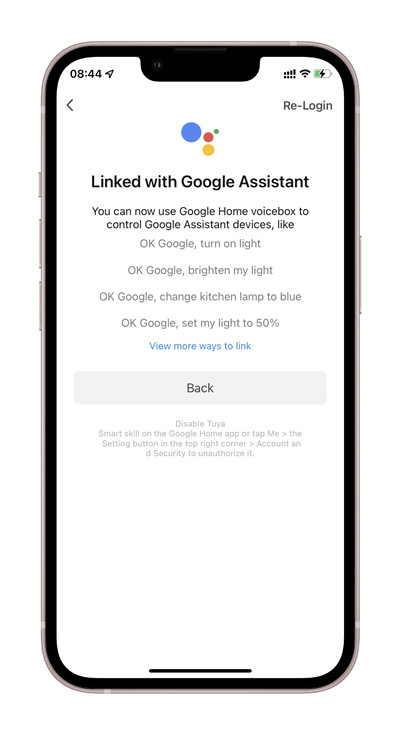
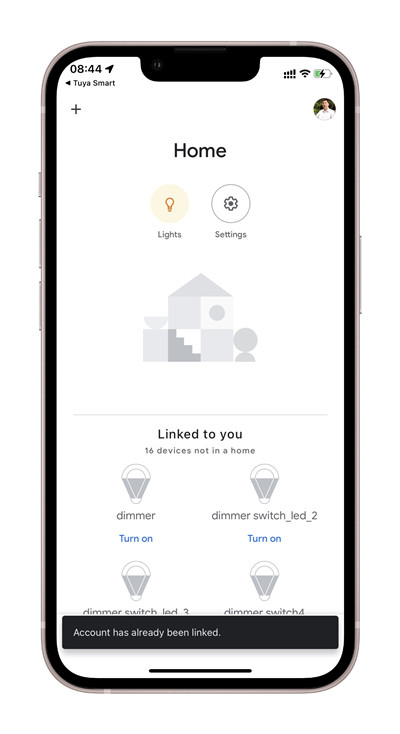
6. How to voice control by Google home speaker
7. How to use Apple Homekit or enable development mode of ESP32
a. Enable “ESP32 development mode”
b. download Apple Homekit for KC868-H32B Pro firmware to ESP32 module by USB cable. find firmware from KinCony’s forum
c. use serial tool (such as arduino IDE or any serial port tool) send command “W” to config WiFi SSID and password for router.
d. pair homekit device by qrcode number: 44637726 on Apple homekit mobile phone app.
here is details “How to use Apple HomeKit firmware for KC868-H32B Pro”
8. Protocol document for integration
protocol as same as KC868-H32B’s
download document PDF file at here: https://www.kincony.com/document
9. How to use “arduino library” for KC868-H32B Pro
how to do step by step at here: https://www.kincony.com/how-to-use-arduino-library-for-kc868-h32b-pro.html

