Please kindly note there are two controlling mode: Local Controlling and Remote Controlling.
When the device and your computer are connecting to the Ethernet, (same local internet), following the manual of Local controlling.
When the device and your computer are connecting to different internets, please follow the remote controlling.
LOCAL CONTROLLING.
First Step: Please power the device KC868-H8 and connect it into the Ethernet.
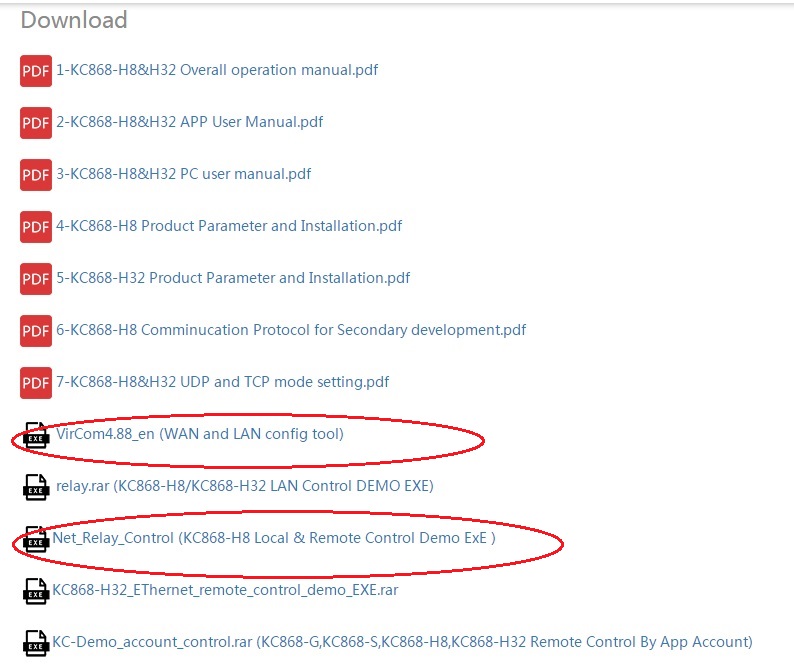
Second Step: Download the program and the vircom program (config tool) from: http://www.kincony.com/download-readme
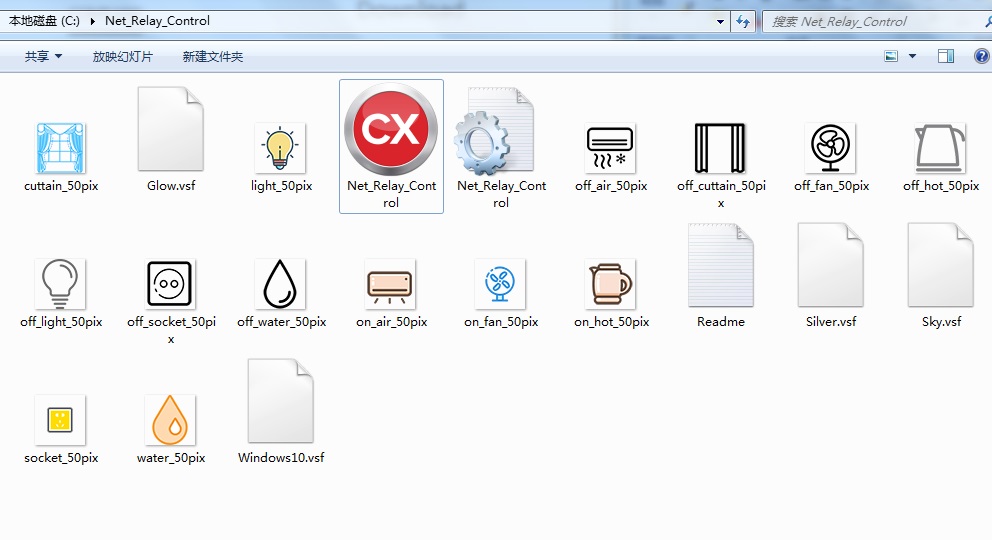
Please release the control program on the root directory of Disk C, because it’s one demo program, we make the icons in Disk C as default. For the config tool program, it can be put anywhere you want.
After you release the file into Disk C, open the file and find the icon of “CX”, double click it to open it.
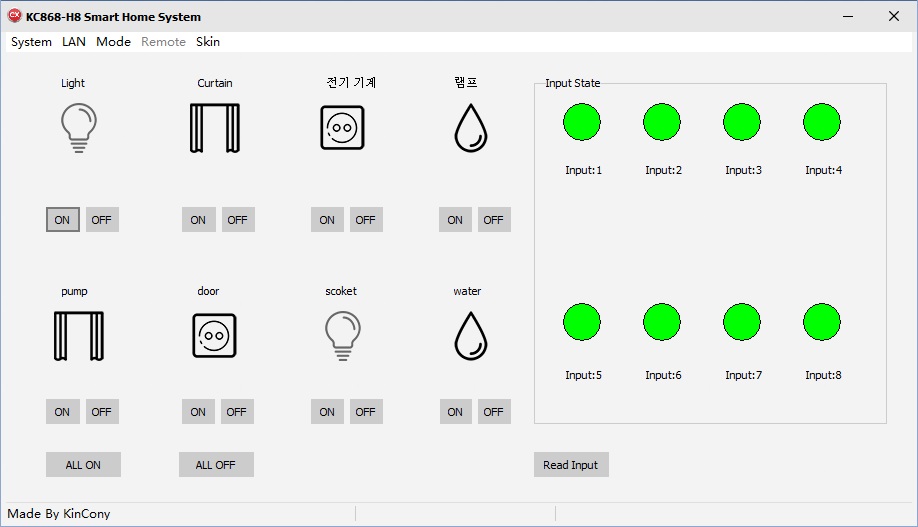
Third Step: Open the controlling window as below, click the system button and choose config to open the “config” window
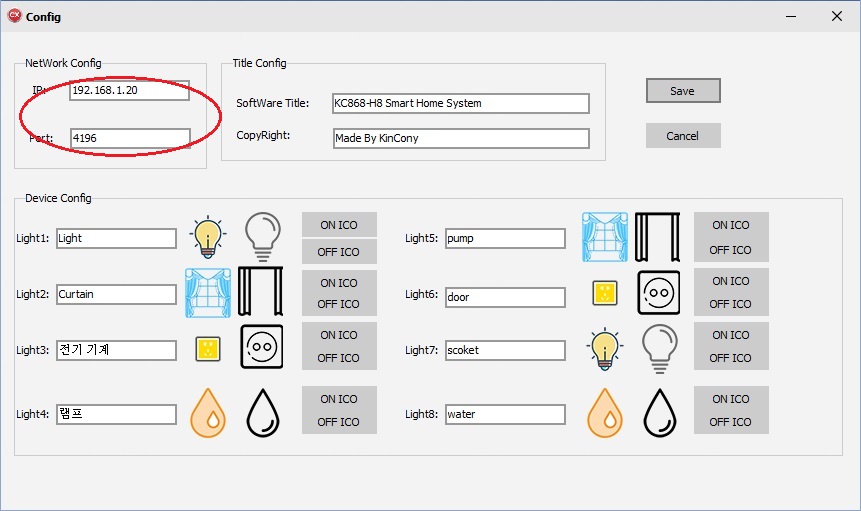
It is the “Config” window as below:
Then, we open the Virm program to check the IP address and port of the device as below:
(the detail of how to use the virm program, pls download the user manual “7-KC868-H8&H32 UDP and TCP mode setting”)
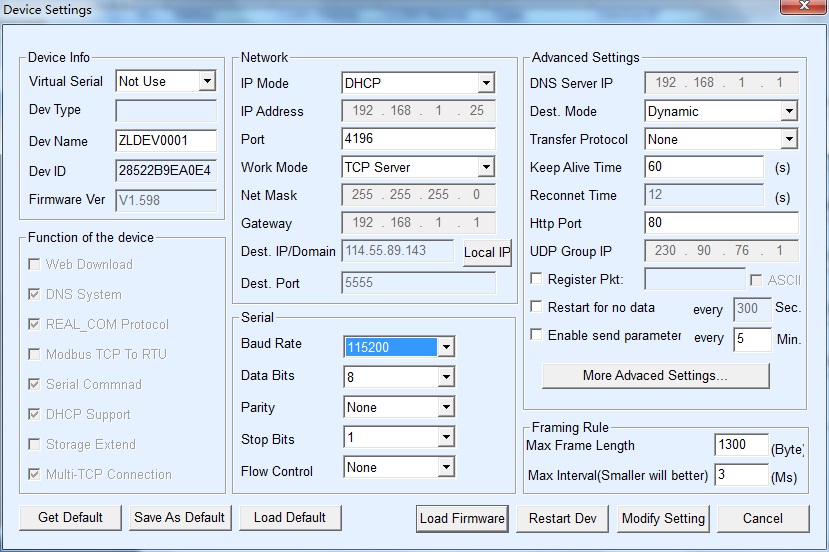
We see the IP Address is 192.168.1.25 and Port is 4196, then we input them into the IP address and Port on the Config window.
Here in the config window, you can also rename the applications and change the icons into the one you like.
After completed, click “Save” button to back the controlling window.
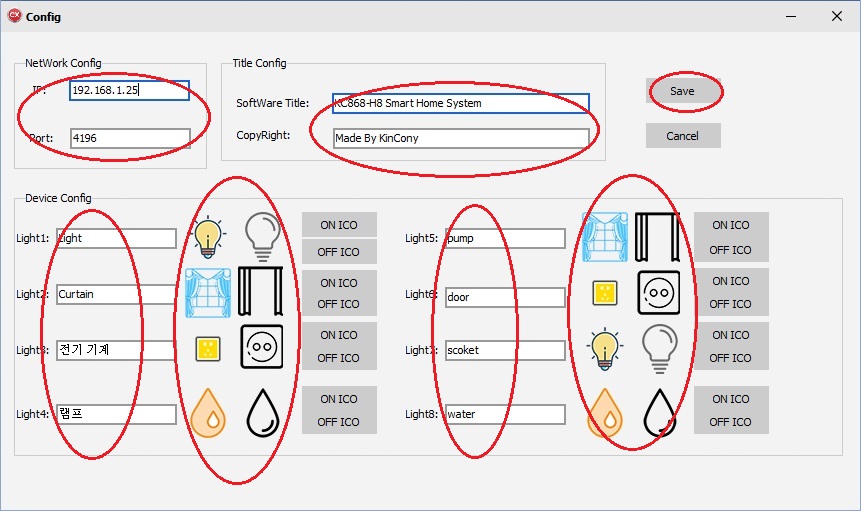
Next, we dropdown “LAN” button to click the “connect”, it will show “Device Connected” and “Connect OK!” at the bottom.
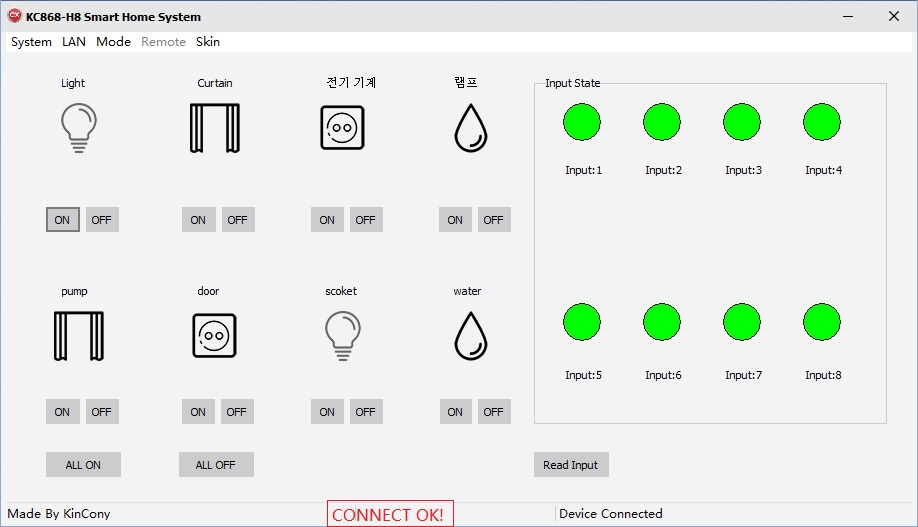
Then, dropdown “LAN” button again to click “Initialization”, it will show “Initialization completion”.
This setting is very important, please make sure to do this setting right.
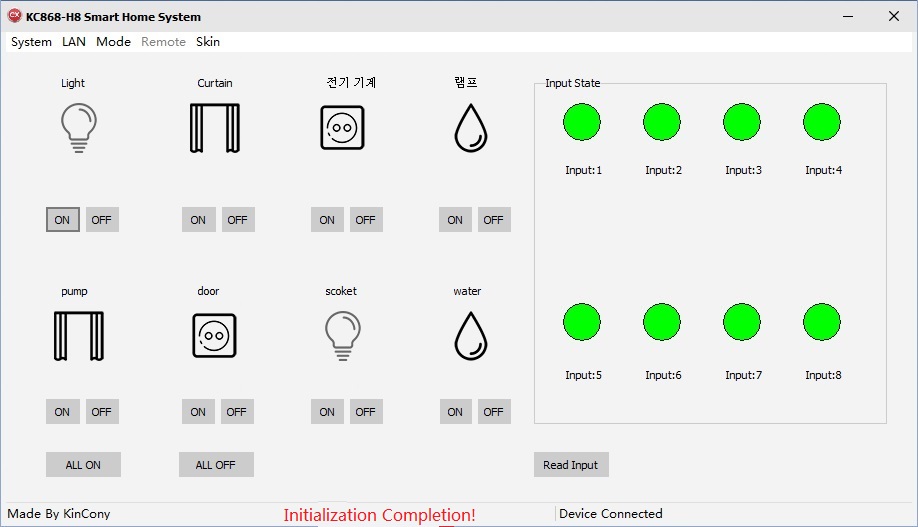
Now, you can control the “on” and “off” button to open and close the applications as below.
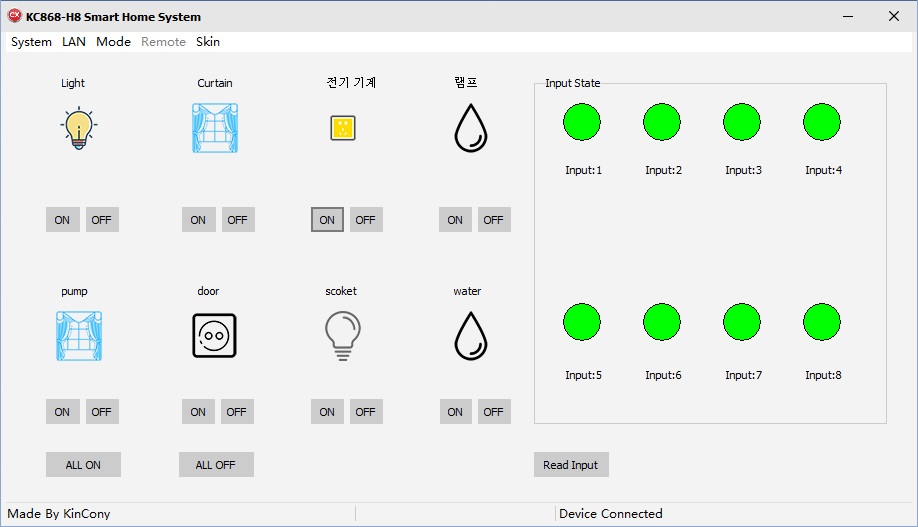
At the right part, there are eight inputting ports, when you connect the inputs and open or close them, they will show you the status of the inputting.
REMOTE CONTROLLING
When the device and your computer are not in the local internet, you still need to control it. Please change the mode from LAN into WAN.
Hereby, we introduce the operation.
Do the First step and Second step same as the “LOCAL CONTROLLING”
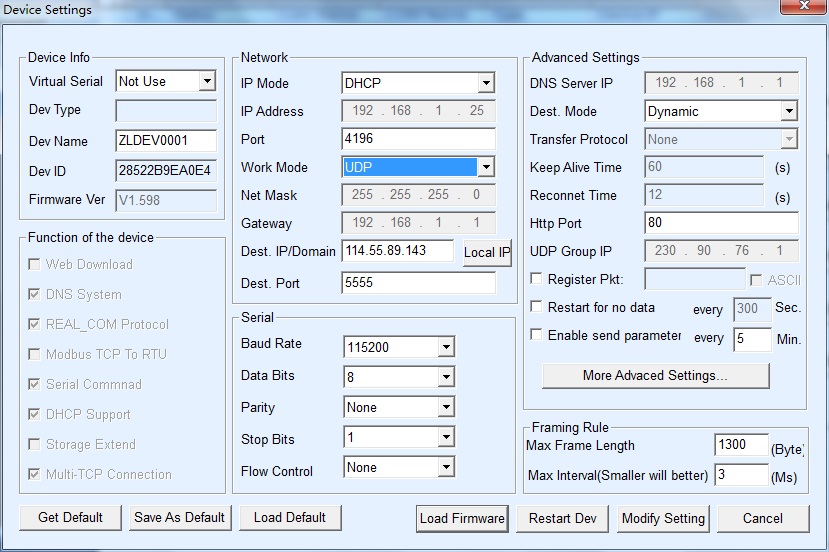
From the third step, please open the Vircom program to change the work mode into UDP mode as below.
(the detail of how to use the virm program, pls download the user manual “7-KC868-H8&H32 UDP and TCP mode setting”)
Change the “Work Mode” into “UDP” , then click the “Modify Setting” to save it.
Next, click the “CX” icon to open the program and then click the “Mode” to choose the “WAN” button as below:
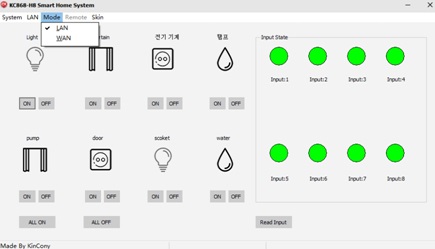
(It’s the local controlling with “LAN” mode as default)
After choose the “WAN” mode, the “Remote” button will be active as below, while the “LAN” button is not available.
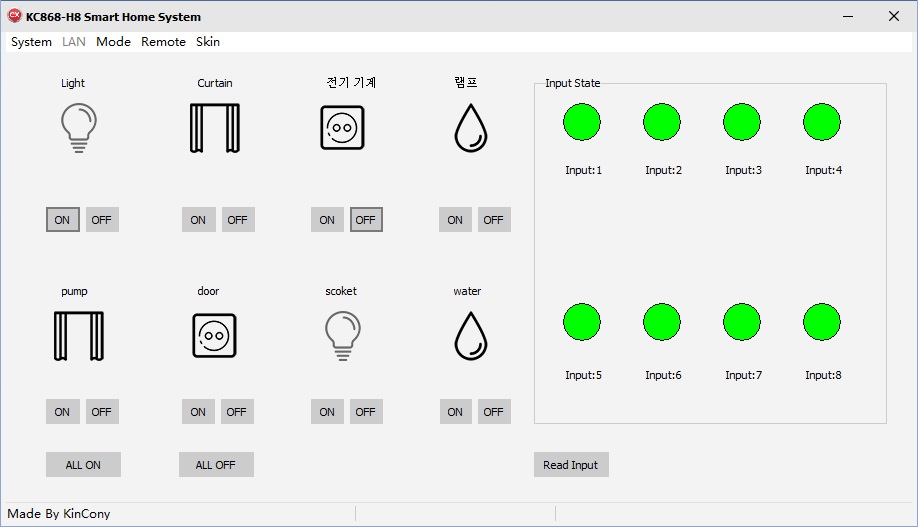
Then dropdown the “Remote” button to choose the “Config” and open the config window as below:
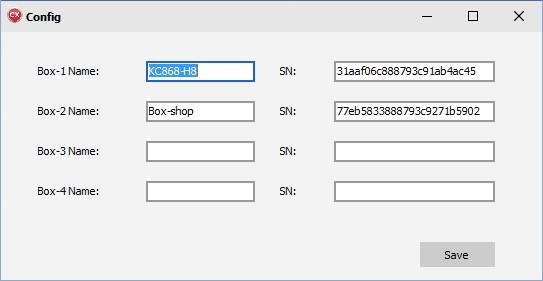
Following, you can give a name for your device and then input the Series Number, which is showing on the QR code label; Click “Save” button to back the controlling window.
(There are total 24 numbers, please make sure it right inputting)
Under this mode, you can control 4pcs devices; Connecting the others into internet, and name them, input their series number here, then click the Save button.
After that, please close the program and restart it to get the settings active.
Now, you are back the controlling window, and you can open and close the applications as below:
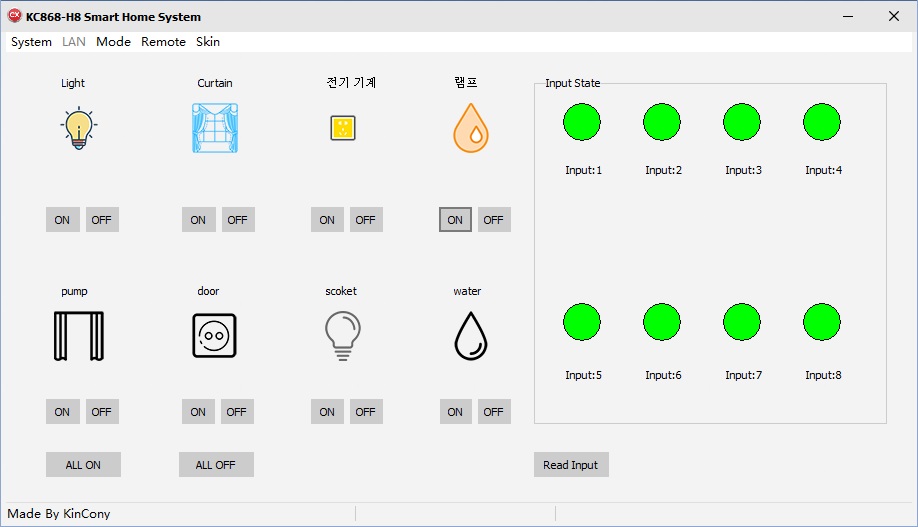
At the right part, there are eight inputting ports, when you connect the inputs and open or close them, they will show you the status of the inputting.


