There two steps for using the device of KC868-H8 or KC868-H32:
Firstly: to configure Wi-Fi and get the device into the internet via Wi-Fi
Secondly: Scan the QR code; add the device into the Kincony mobile APP for controlling
Or open the programs in the computer for controlling.
Hereby, we only introduce the first step to configure the Wi-Fi and get the device into the internet; For the second step of controlling the device, please read the user manuals for APP and PC program. More detail information on our website with below link: www.kincony.com/document
How to configure the Wi-Fi and get the device into the internet, let’s start the below steps:
Firstly: the hardware and the software tools required
- one computer with the function of the wireless; when your computer is without the wireless, you can use the wireless modem showed as below picture, it’s drive-free, plug and play.
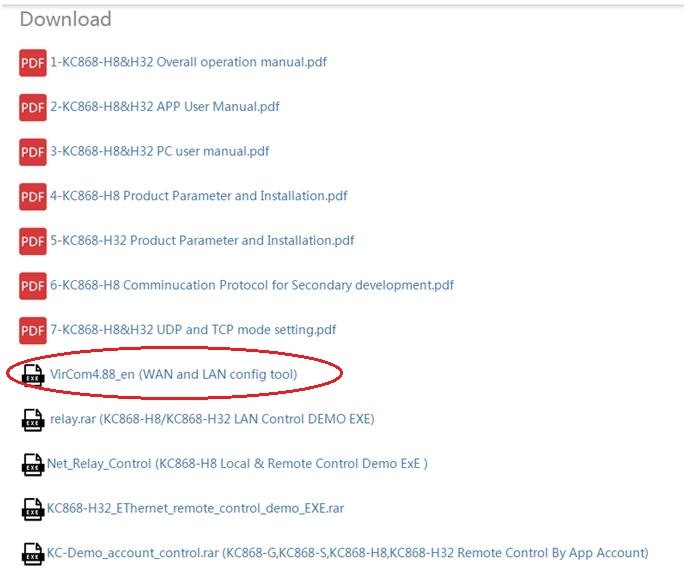
- Network configuration software tool, please visit our website to download the tool, link as www.kincony.com/document
Secondly: Configure the Wi-Fi, and get the device into internet
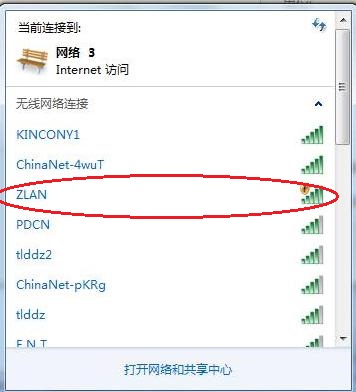
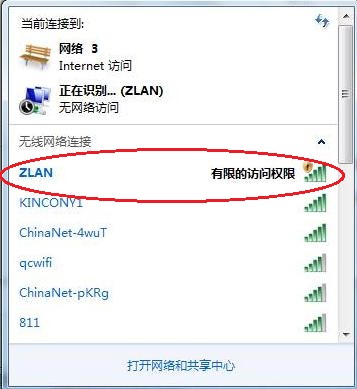
- the device is with AP mode and “ZLAN” for SSID as default, so just search the wireless signal from your computer to find the “ZLAN” and click to connect. See below pictures
2. After connecting, open the network configuration tool, see below picture and click the “Device” button
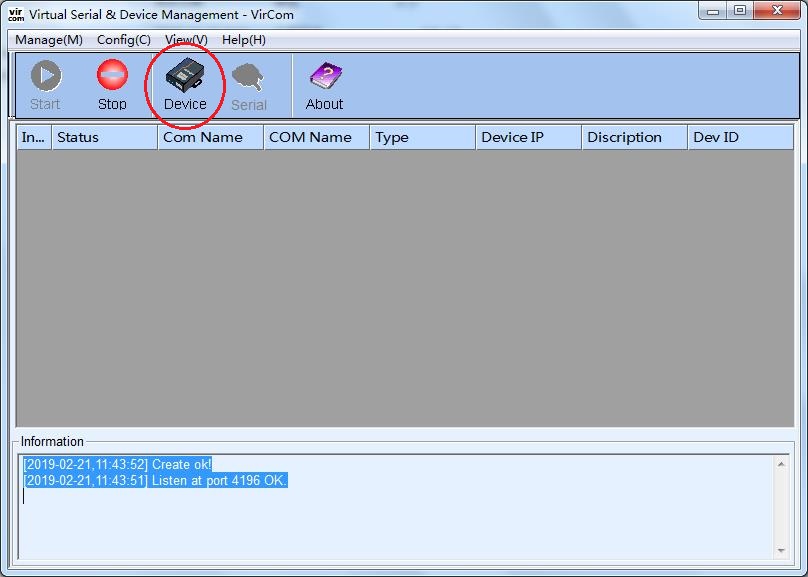
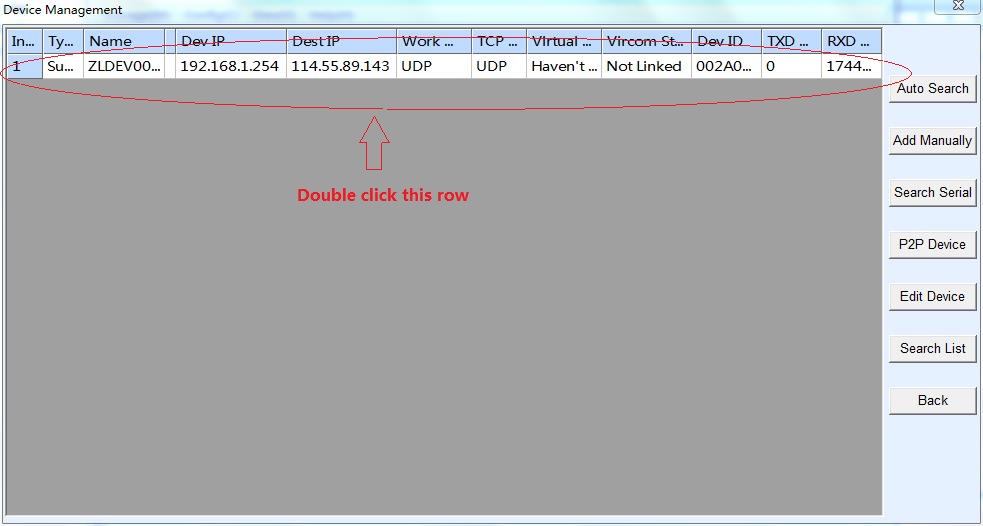
Then open the “Device management” window as below, see the information row of the device;
Double click the row
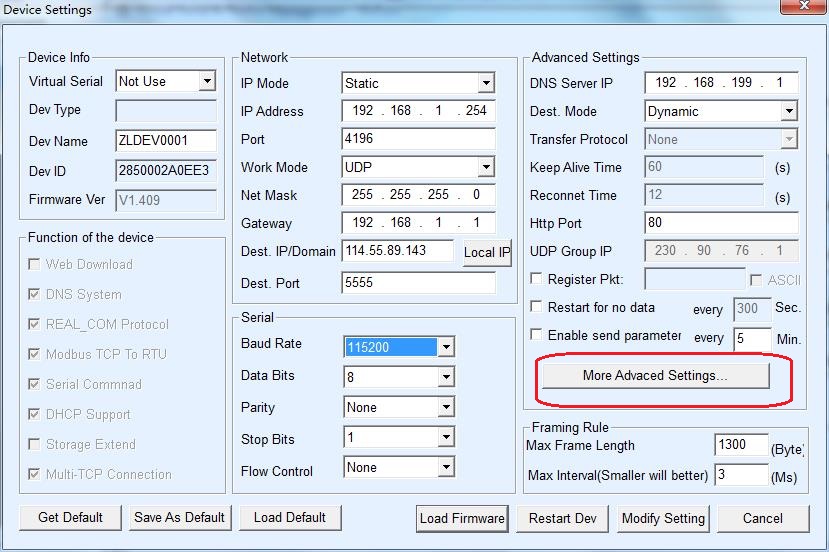
Then open the “Device Settings” window as below, click the “More Advanced Settings” button
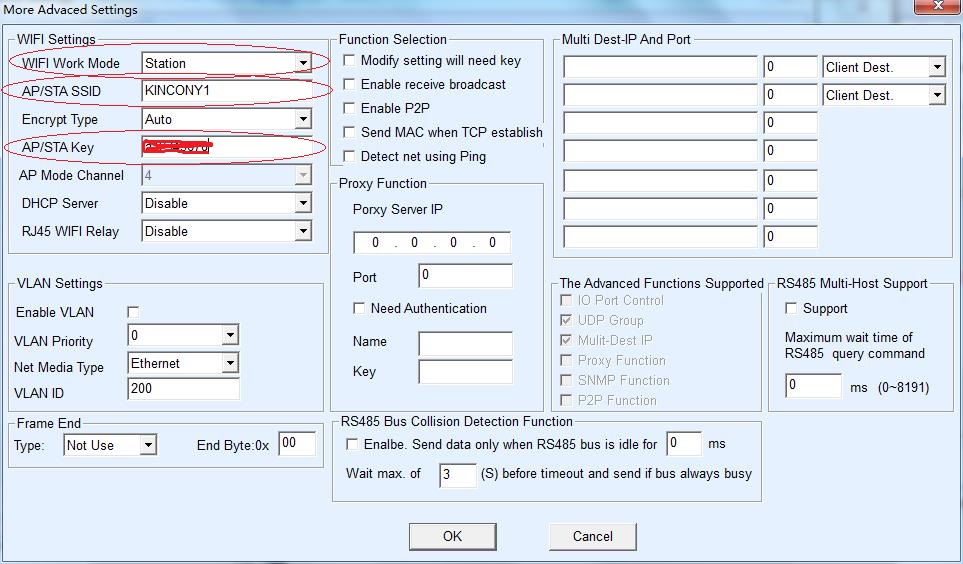
Then open the “More Advanced Settings” window as below, see the settings in the red ellipses;
For the WIFI Work Mode, please choose “Station”; for the AP/STA SSID, please input the wireless you are using.
Please note that it’s not the “ZLAN” wireless, configured on the first step, it is the wireless you use for the internet.
For the AP/STA Key, please input the password of the internet wireless.
After that, click the “OK” button to save and return back
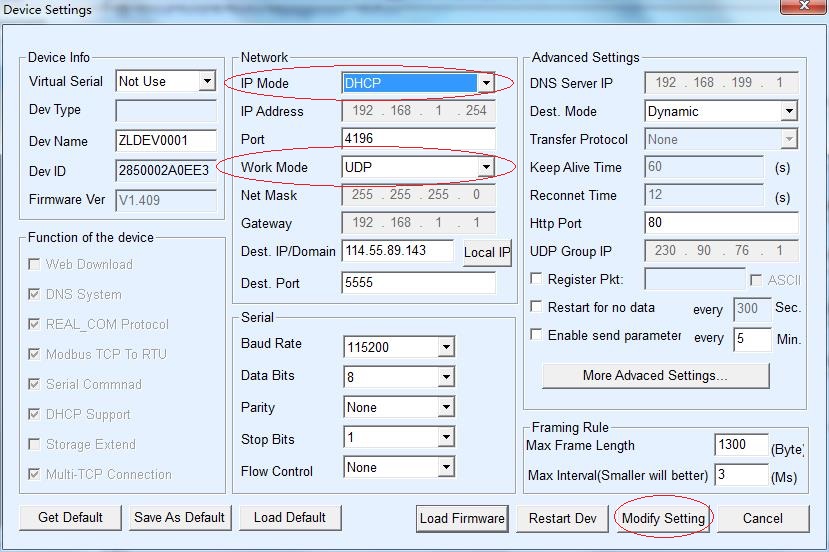
After returning the “Device Settings” window, please check IP Mode and Work Mode, make sure IP Mode is DHCP, and the Work Mode is UDP. See below picture. Then click the Modify Setting button to save it.
Now, the network configure software tool can be closed.
- Get the device power off for about 5 seconds and then power on. Wait for about 10 seconds, the device is on line now. You can add the device into the Kincony mobile APP to control or you can open the PC program to control the device.
Notes:
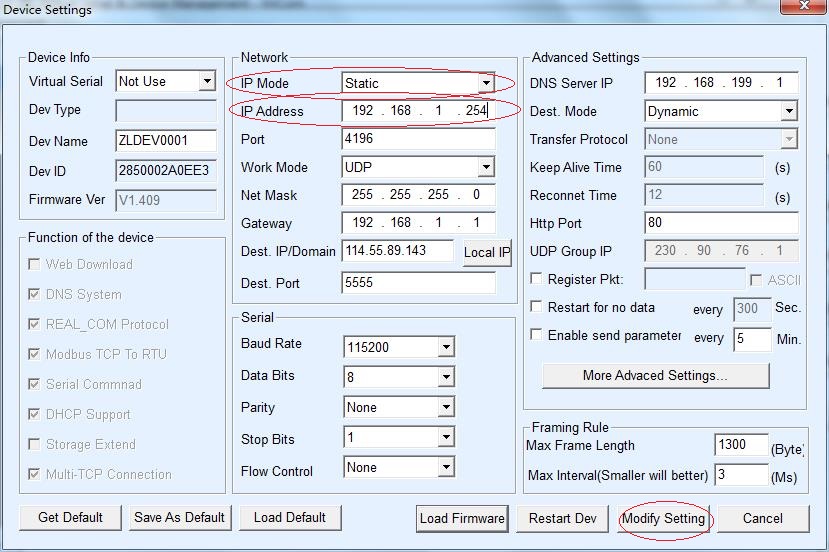
- If your wireless router doesn’t have the DHCP function, then in the “Device Settings” window, please select IP Mode with Static, and re-give a static IP address in the IP Address. Finally click the “Modify Setting” button to save it. See below picture:
- When the wireless router is changed, or the network can not available, the wireless module needs to be reset.
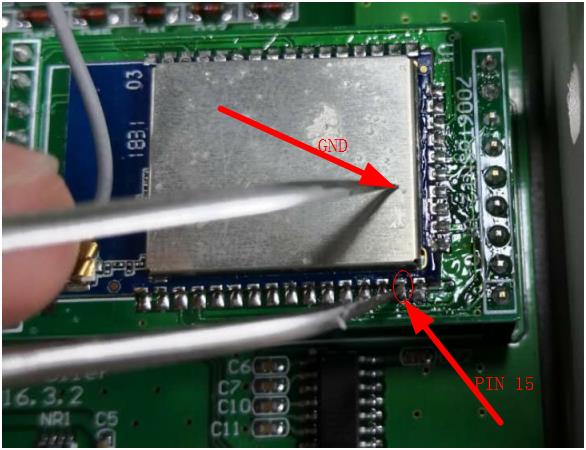
Open the cover of the device, and then get it power on, next, use the metal forceps or one electrical wire to connect the 15th pin of the wireless module (total 16 pins) and the ground for about 3 seconds, and then re-power on, see the below picture.
After that, according to the above configuration Wi-Fi steps, configure the Wi-Fi again and get the device into internet.


