We have written a new development and debug software tool for KC868-Hx smart relay controller. There are two test versions available:
1.TCP Server Version tool:
Debugger download:
KC868Hx-Debug-Server (use in Local LAN)
Source code download:
KC868-Hx Debug-Server local LAN control demo source code.rar (C++Builder 10.2.3)
2.TCP Client Version tool:
Debugger download:
KC868Hx-Debug-Client (use in Local LAN)
Source code download:
KC868-Hx Debug-Client local LAN control demo source code.rar (C++Builder 10.2.3)
KinCony GitHub for sample demo source code download
VirCom Controller Network Setting tool:
VirCom5.28_en (WAN and LAN config tool)
KC868-Hx Communication protocol:
KC868-H2/4/8/16/32 Comminucation Protocol for development.pdf
KC868-Hx Communication protocol Course:
Anlysis KC868-Hx Controller Communication Protocol
How to choose debugging tools and their differences?
A.TCP Server Version tool:


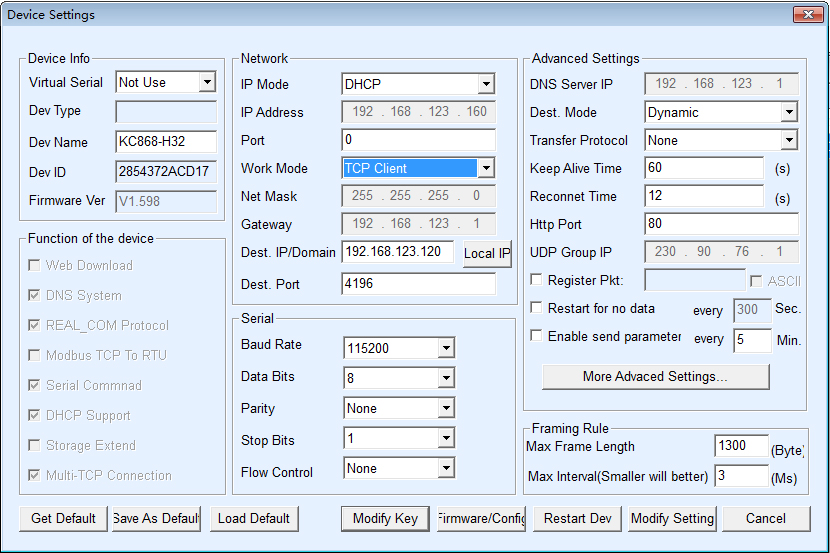
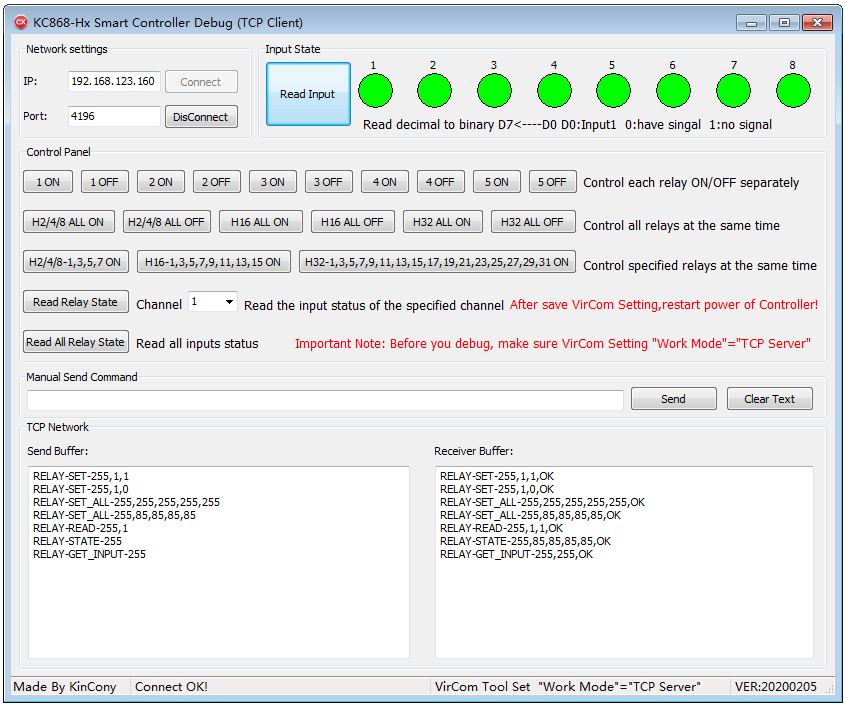
In the VirCom network configuration tool, set the KC868-Hx controller “Work Mode” to “TCP Client”. At this time, the PC debugger is the server, and the KC868-Hx controller is the client. The server is in “Listening” state. After the controller is powered on, it will actively establish a socket communication connection with the server to realize data interaction. In the debugger, we demonstrate how to control the single relay switch, how to control “ALL ON”, “ALL OFF” with one button, how to control the specified relay switch, how to read the current state of one relay switch, how to read the current state of all relay switches at one time, and how to read the dry node sensor state connected at the input port of controller. The bottom left of the window is the content of “send buffer”; the bottom right of the window is the content of “receive buffer”. Before use, set the “port” value, then click the “Listen” button to listen and wait for the client controller to connection. After the connection is successful, the IP address and port number of the connected client device will be displayed in the software status bar.
B.TCP Client Version tool:


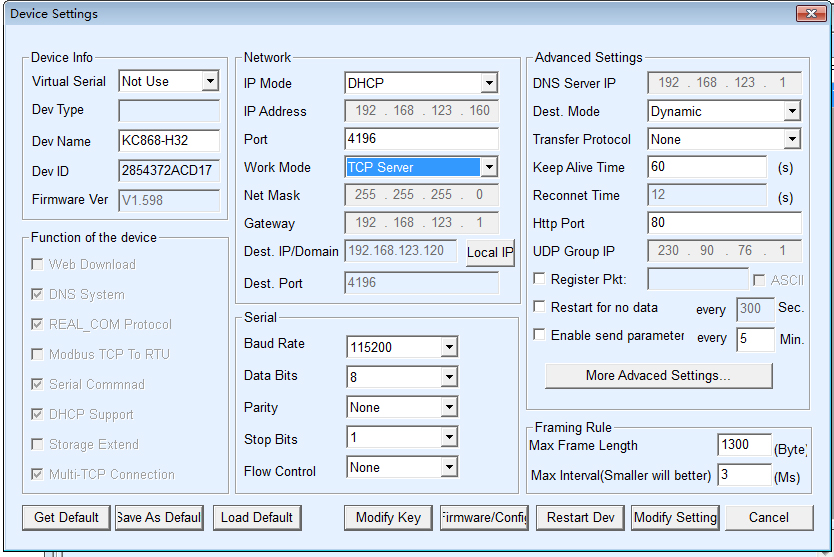
In the VirCom network configuration tool, set the KC868-Hx controller “Work Mode” to “TCP Server”. At this time, the KC868-Hx controller is the server, and the PC debugger is the client. The controller is in “Listening” state. After click “Connect” button on PC debugger, it will establish a socket communication connection with the controller to realize data interaction. In the debugger, we demonstrate how to control the single relay switch, how to control “ALL ON”, “ALL OFF” with one button, how to control the specified relay switch, how to read the current state of one relay switch, how to read the current state of all relay switches at one time, and how to read the dry node sensor state connected at the input port of controller. The bottom left of the window is the content of “send buffer”; the bottom right of the window is the content of “receive buffer”. Before use, set the server’s “ip” and “port” , then click the “Connect” button to connection with controller.
If you need to build a web server to control the devices with web pages, you can do it in the following ways:
Build a web server. Server establishes a communication connection with the controller through the socket to realize the control of the relay switch. For user through PHP, Java, HTML and other web pages to log in, so as to realize the online control of the relay switch by the website.


